
Back neck piercings sit in that soft spot just below the hairline, and they come in two professional styles: a horizontal surface bar or a single-point dermal anchor. Both demand a specialist piercer and proper aftercare to settle well.
Understanding How Back Neck Piercings Work
The nape moves differently than your earlobe. Skin tension shifts every time you turn your head, which is why placement here requires a different approach. Surface piercings use a shallow curved or straight bar that runs parallel to the skin, while dermal anchors are single-point implants with a decorative top that sits flush.
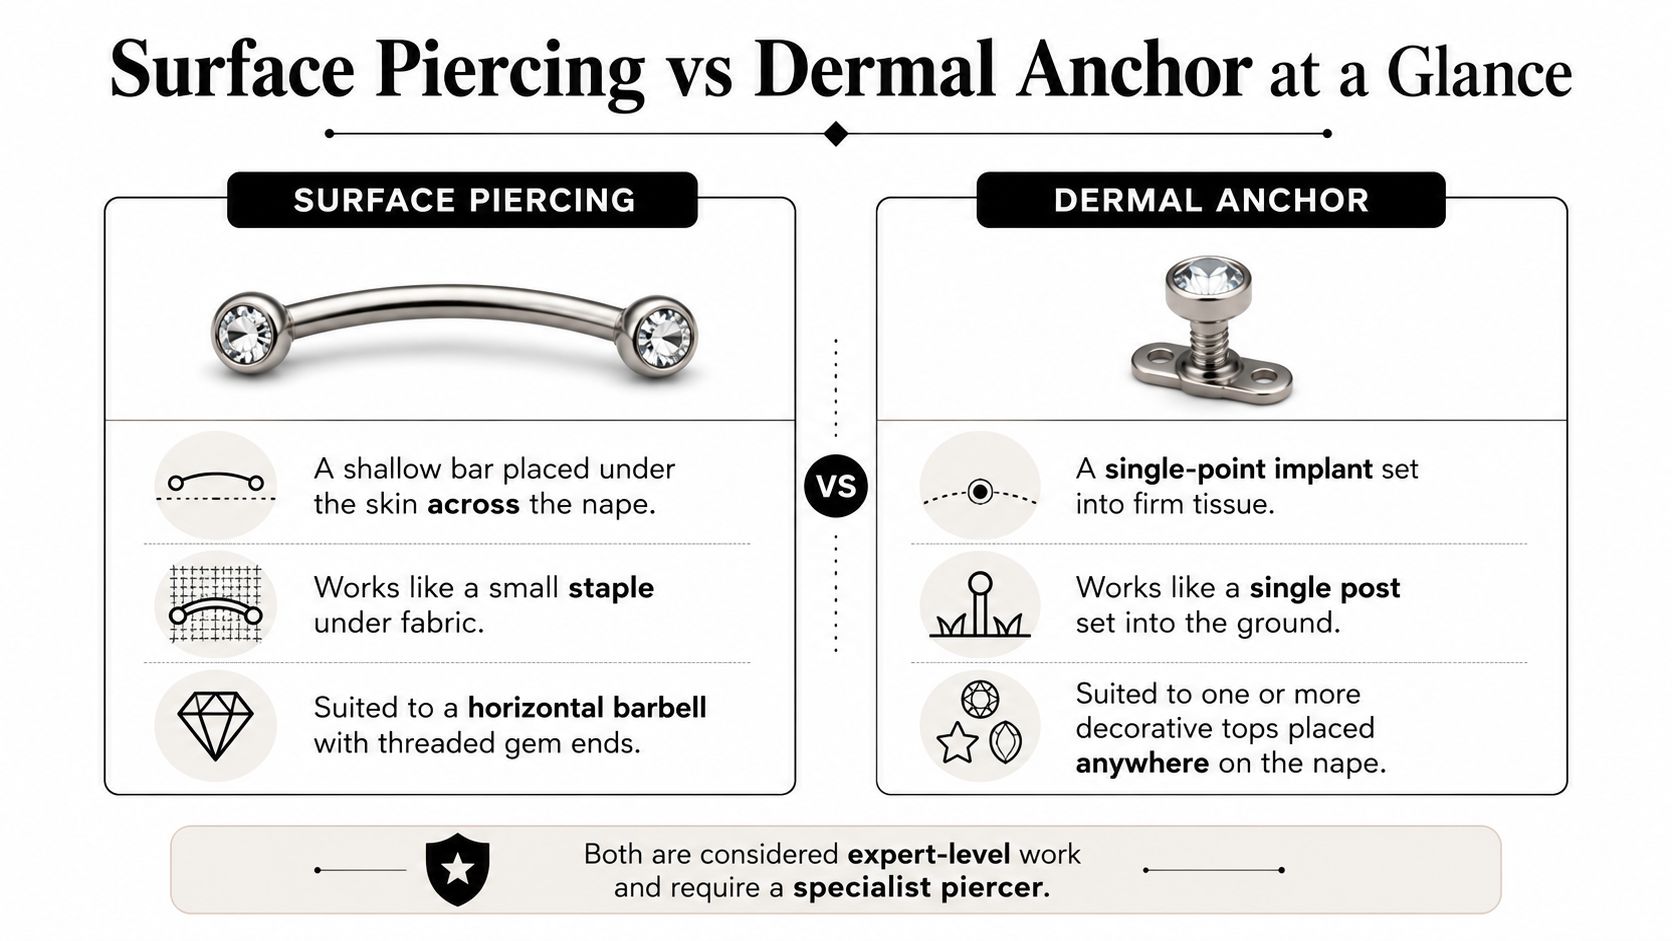
Think of a surface piercing like a small staple under fabric. It distributes pressure along a short bar, making it ideal for horizontal decorative pieces. A dermal anchor works more like a single post set into firmer ground, perfect for isolated gems or scattered clusters. This difference explains why each reacts differently to movement and snagging.
Surface Piercing vs Dermal Anchor at a Glance
Before diving deeper, here's a side-by-side look at how these two methods compare across the features that matter most.
| Feature | Surface Piercing | Dermal Anchor |
|---|---|---|
| Technique | Shallow bar placed beneath the skin across the nape | Single-point anchor implanted into firm tissue |
| Jewellery | Curved or straight surface bar with threaded ends | Decorative top screwed into a flat-base anchor |
| Look | Horizontal aesthetic, works well in pairs | Minimalist single gem or scattered clusters |
| Complexity | Higher migration risk if placed under constant pressure | Easier to hide but needs monitoring for rotation |
| Best for | Symmetrical horizontal statements | Low-profile sparkle away from the hairline |
Both options are specialist-level work. The nape carries a higher migration risk than simple ear piercings, so choosing an experienced piercer makes a real difference.
Anatomy and Suitability Considerations
Not every nape is suited for every piercing. A few practical factors shape what works for you.
- Skin thickness and firmness matter because the nape moves constantly when you turn your head.
- Hairline proximity increases the chance of tangles with collars, scarves, and shampoos.
- Implant-grade metals reduce allergic reactions and healing problems significantly.
Expert insight: Both options are specialist-level and have higher migration risk on the nape than simple ear piercings.
Practical Examples to Guide Your Choice
Consider your daily routine before committing. Someone who wears high-collared coats and frequently ties their hair up might prefer a low-profile dermal top positioned away from the hairline. The minimalist look stays out of the way.
On the other hand, if you want a symmetrical horizontal statement, a surface bar delivers that aesthetic. Just be prepared for a longer healing watch and a higher chance of migration if the area faces constant pressure.
Next Steps and Booking
If you like a visible horizontal accent, ask a piercer about curved surface bars with threaded gem ends. For minimalist sparkle, discuss dermal top options and anchor depth with a specialist.
For bookings or quick studio questions, contact Timebomb Tattoo & Piercing at 01202 900050 (Bournemouth) / 020 8686 7730 (Croydon) or WhatsApp 07752 913846 (Bournemouth) / 07902 490584 (Croydon) to check consultation availability and placement suitability.
Choosing the Right Jewellery And Placement For Your Nape
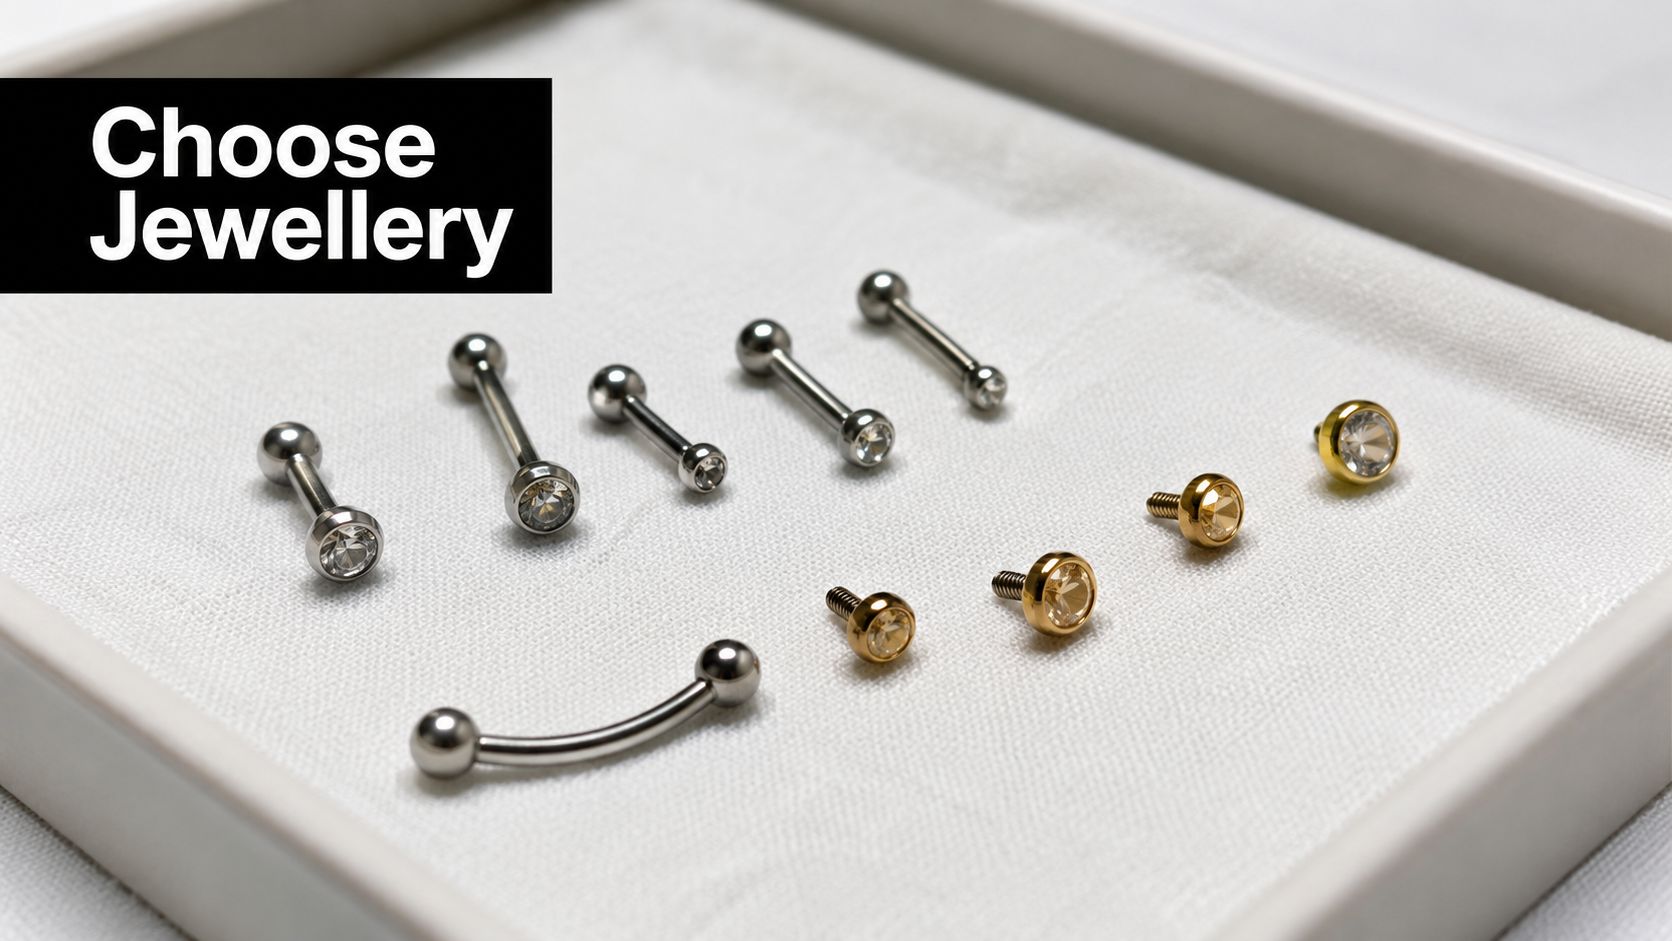
The jewellery you pick matters more than most people realise when it comes to how a back neck piercing actually feels day-to-day. Implant-grade titanium and solid 14k or 18k gold tend to cause the fewest problems—less itching, less redness, and generally a calmer healing process. That means fewer emergency visits to the studio because something isn't sitting right.
Placement is where things get interesting because it changes both the look and how practical the piercing will be. Higher up near the hairline catches on everything from brush bristles to scarves. Lower placements stay hidden under collars but might rub against coat seams or bag straps. Think of it like hanging a picture frame—where you put it determines how much it'll bother you over time.
Most studios work with curved or flat surface bars for these piercings, usually somewhere between 12g and 14g. Dermal anchors typically start at a 14g or 16g anchor post with a low-profile top to reduce snagging. Threadless ends sit noticeably flatter against hair and clothing, while threaded pieces feel sturdier but can catch more easily on fine strands.
Jewellery Styles And When To Choose Them
- Single dermal top: Subtle sparkle that works well for professional settings or if you just want something minimal
- Paired symmetrical studs: Creates a balanced look that really shines with updos or shorter styles
- Curved surface bars with gem ends: Bold horizontal pieces that look great if your wardrobe stays relatively consistent
- Chain attachments linking two anchors: Dramatic effect, though placement needs to be spot-on to avoid pulling
Practical Placement Considerations
Key insight Getting pierced close to the hairline means dealing with tangles and product transfer regularly, so expect to pay a bit more attention to your haircare routine
Before your consultation, it helps to have a few things sorted:
- Bring reference photos along with pictures of how you usually wear your hair—piercers can gauge visibility and snag risk much better that way
- Wear something with a low neckline on appointment day so they have clear access
- Make a quick note of anything that regularly touches your neck: headphones, bike helmets, rucksack straps
When it comes to actually deciding where things go:
- Stand relaxed while the piercer marks out potential spots
- Check the mirror with your hair both up and down to see how visible it'll be
- Turn your head and simulate how your usual clothing moves around that area
Here's how threaded and threadless finishes compare in practice:
| Feature | Threaded Ends | Threadless Ends |
|---|---|---|
| Security | Very secure once tightened | Very low profile, quick to swap out |
| Catch risk | Slightly higher near hair | Lower, tends to work better with collars |
| Comfort | Can feel a bit bulkier | Sits noticeably flatter against skin |
Worth asking at your consultation:
- What metal and gauge would work best for my anatomy specifically?
- How will this placement affect my daily haircare and clothing routine?
- What should I actually look out for regarding migration?
You might be interested in learning more about microdermal anchor options in our guide on Microdermal Anchor Piercing.
For local bookings or quick placement questions, reach out to Timebomb Tattoo & Piercing on 01202 900050 (Bournemouth) / 020 8686 7730 (Croydon) or WhatsApp 07752 913846 (Bournemouth) / 07902 490584 (Croydon) to check consultation availability and current jewellery stock.
Who Is a Good Candidate for a Back Neck Piercing
Not every neck is built for a back neck piercing, and knowing that upfront saves you a wasted trip to the studio. The first thing any good piercer checks is whether there's enough firm tissue on the nape to hold a surface bar or dermal anchor without putting it under constant strain. You're looking for skin that sits reasonably flat, without deep creases where jewellery would be pulled or pushed around all day.
The condition of the skin matters just as much. Responsible studios won't pierce through active acne, fresh scars, raised moles, or sunburnt tissue. It's not being fussy, it's about lowering infection risk and making sure the finished result actually looks good.
Age and consent rules are stricter than you might expect in the UK. Most reputable studios set the minimum at 16 for anything beyond earlobes, and anyone younger will typically need a parent or guardian there in person with ID. That usually means signing a consent form and bringing proof of the relationship.
There are some medical and lifestyle factors that can rule out a nape piercing altogether. Recent neck surgery, radiotherapy, or skin conditions like uncontrolled eczema are obvious no-gos. If you have a history of keloid scarring, a piercer will probably turn you down too, and for good reason.
Then there's what you do day to day. Full-contact sports, regular helmet use, or lugging around heavy rucksack straps that dig into the nape, all of these create repeated pressure. That pressure increases the odds of migration, irritation, or outright rejection. If any of that sounds like you, have a conversation with your piercer about alternatives.
If you're uncertain whether your anatomy is suitable, a consultation is worth its weight in gold. A piercer will mark out possible placement sites, feel for tissue firmness, and show you how different jewellery options will sit with your hair and clothing. It takes the guesswork out of the equation and helps narrow down the right jewellery choice.
Before you book, run through these quick checks:
- Do high collars, scarves, or tight backpacks regularly rub against the nape?
- Are there any raised or changing moles in the area you want pierced?
- Have you had any recent procedures or ongoing skin issues on your neck?
- Do you take blood thinners or have any clotting disorders?
Key takeaway An honest self-screen and a brief studio consultation save time and significantly cut the chance of being turned away on the day.
If you'd like to chat through placement options or suitability before booking, contact Timebomb Tattoo & Piercing on 01202 900050 (Bournemouth) / 020 8686 7730 (Croydon) or WhatsApp 07752 913846 (Bournemouth) / 07902 490584 (Croydon) to arrange a consultation in Croydon or Bournemouth.
What to Expect at a Professional Piercing Studio
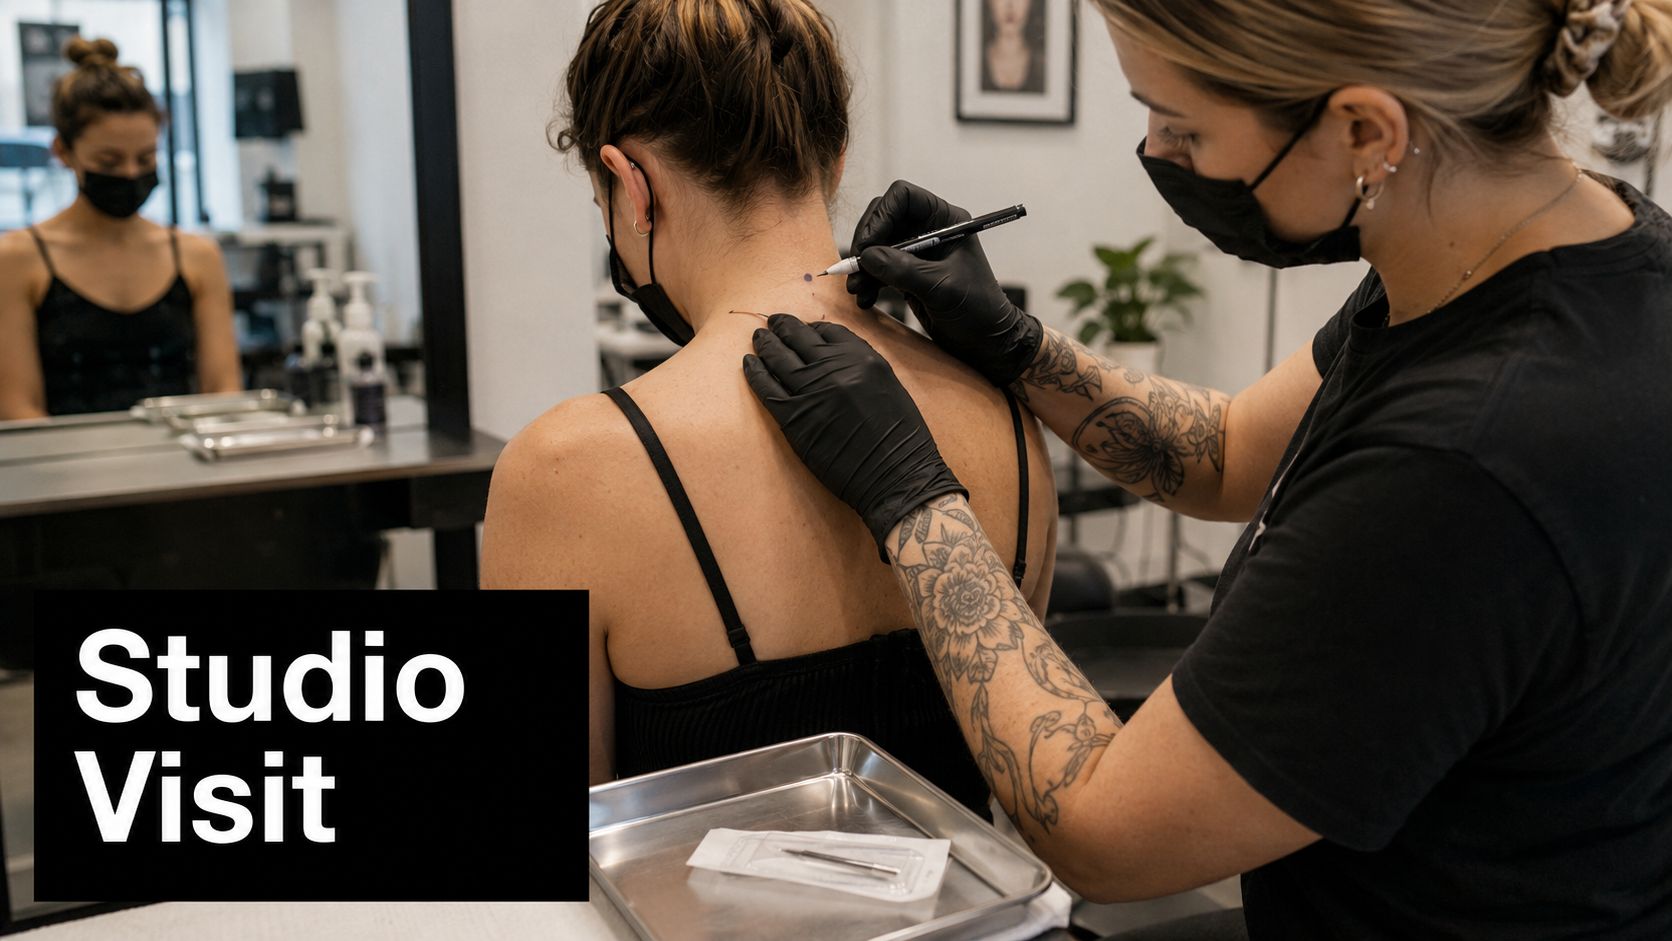
Walking into a studio for the first time can feel a bit daunting, but knowing what happens at each stage takes a lot of the anxiety out of it. A decent piercer will always start with a proper chat — they want to understand your anatomy, your daily routine, and the look you're actually going for.
Before they do anything else, they'll mark the placement while you're sitting and then again while you're standing. This matters more than people think. The back of the neck moves constantly, and a dot that looks perfect when you're still might sit awkwardly once you turn your head or change your hairstyle. A good piercer accounts for this so the result looks natural however you wear your hair.
Jewellery comes next. You'll usually be offered implant-grade titanium or solid 14k/18k gold — both are well-tolerated and safe for fresh piercings. They'll show you threaded and threadless fittings side by side so you can handle them yourself and get a feel for how each one works before committing.
Sterility isn't something you should have to ask about. The piercer should walk you through the single-use needle setup and let you see the sealed packaging before anything is opened. Any tools that are reusable will have been autoclaved, and the jewellery itself should arrive in clean trays, not loose in someone's pocket.
What you wear on the day makes more difference than you'd think. Skip the high collars, chunky hoods, and tight scarves. A top with a low neckline or something you can easily lift out of the way gives the piercer proper access without them having to tug at your hair or clothing.
Nape piercings don't tend to drag on. Most appointments run 30 to 60 minutes from start to finish, including the consultation and marking. The actual piercing is often just a few minutes of that — it's the prep and aftercare chat that takes the time.
Before they touch your skin, a professional should talk you through aftercare clearly enough that you leave knowing exactly what to do. Saline soaks, what to avoid, when to come back for a check — all of it should be covered before you walk out the door.
Studio Standard Sterile single-use needles, implant-grade jewellery, and autoclaved equipment aren't optional extras for back neck piercings. They're the baseline.
A few things to bring or expect:
- Reference photos help the piercer understand exactly where you want things and how big.
- Wear something clean and easy to pull aside — it keeps the area clear and reduces contamination risk.
- Bring questions. About healing timelines, snag risks, jewellery swaps — whatever's on your mind.
How the appointment typically runs:
- Consultation and anatomy check to make sure the piercing suits you.
- Placement marking while sitting and standing to check how it sits with movement.
- Consent paperwork, photos, and laying out sterile tools.
- Piercing with a single-use needle and immediate jewellery placement.
- Aftercare briefing and booking any follow-up you might need.
Booking tips that actually help:
- Check walk-in availability and consultation slots before you travel so you're not left hanging around.
- If you need a quick answer, call 01202 900050 (Bournemouth) / 020 8686 7730 (Croydon) or message on WhatsApp at 07752 913846 (Bournemouth) / 07902 490584 (Croydon).
- Read also: our guide on why single-use needles matter for piercing safety goes into more detail on studio standards.
Small extras that separate a good studio from an average one:
- A mirror check so you can see the placement from angles the piercer sees — it's your neck, after all.
- Hair clips to keep everything out of the way during the procedure.
- Written aftercare instructions and a record of the exact jewellery used, so you have it for later.
When everything is laid out clearly like this, there are no nasty surprises. And if anything feels rushed or something doesn't sit right with you, don't be afraid to ask questions or reschedule. Comfort and safety should never be afterthoughts.
Healing Timelines And Risks You Should Know About
Surface back neck piercings commonly take 6 to 12 months to settle, while single-point dermal anchors usually stabilise in 3 to 6 months. That's a proper stretch of time, so it's worth planning your wardrobe, hairstyle, and daily routine around that window before you commit.
The nape is a tricky spot because it moves constantly. Jewellery there is far more likely to migrate or reject than something in an earlobe. Think of it like a tent peg on shifting ground—repeated pressure slowly works it loose unless the ground stays firm and undisturbed.
Common Risks And Everyday Triggers
- Snagging on hair and clothing irritates the piercing and can shift the jewellery out of place.
- Collars, seat belts, and backpack straps create repetitive friction that speeds up migration.
- Sleeping on your back puts direct pressure on a fresh piercing, which can flatten and inflame it.
- Sun exposure on the back of the neck dries out and discolours healing tissue.
Key takeaway: Protecting the area from repeated rubbing is the single most effective way to reduce complications.
Short, practical precautions make a real difference:
- Stick to loose collars and softer fabrics while healing.
- Skip tight backpacks or reposition straps away from the nape.
- Sleep on your side or stomach for the first few weeks.
- Keep your hair tied loosely and avoid heavy conditioners near the piercing.
Warning Signs That Need Professional Attention
Mild redness, clear lymphatic discharge, and tenderness are all normal for the first few weeks. But if you notice spreading redness, green or foul-smelling discharge, severe pain, a rapidly growing lump, or the jewellery visibly shifting outward, get it checked by a piercer or clinician straight away.
Follow-Up And When To See A Piercer
- Book a check-in at 2–4 weeks and again at 3 months for surface bars.
- If a dermal top feels loose after three weeks, contact your piercer—early tightening or replacement can prevent losing it entirely.
- For persistent swelling or a suspected infection, call for advice rather than guessing.
If you need quick studio guidance, call 01202 900050 (Bournemouth) / 020 8686 7730 (Croydon) or message WhatsApp 07752 913846 (Bournemouth) / 07902 490584 (Croydon) for a prompt response.
Practical Healing Timeline Examples
- Dermal anchor, day 0 to 2 weeks
- Expect local swelling and crusting. Keep up with saline soaks twice daily.
- Derminal anchor, 3 to 6 months
- Most movement settles down. Reduce soaks to once daily and keep an eye out for rotation.
- Surface piercing, 0 to 3 months
- Stay vigilant about snagging. Avoid collars and active sports.
- Surface piercing, 6 to 12 months
- Long-term tissue adaptation continues. Migration risk drops significantly if the area hasn't suffered repeated trauma.
Short, consistent aftercare beats sporadic over-cleaning every time. Keep your hands clean, use sterile saline, and steer clear of alcohol or peroxide—they delay healing rather than helping it. When in doubt, contact your studio early. Catching problems promptly means simpler fixes and far better long-term results.
Aftercare That Actually Works for Back Neck Piercings
Good aftercare is what separates a nape piercing you love from one that becomes a constant headache. Wash your hands before you touch the area, and treat the site gently — you're working with fresh tissue that's trying to heal, not a scab you can pick at.
Sterile saline soaks twice daily are your best friend for the first few weeks. Grab a ready-made saline spray or mix up a sterile solution, soak some gauze, and hold it against the piercing for 5–10 minutes. Then pat it dry with a single-use tissue. No rubbing, no scrubbing — just a gentle press.
Skip the oils, alcohol, hydrogen peroxide, and anything perfumed. These products strip away healing tissue and set you back. That means no aftershave, heavy hair serums, or oil-based conditioners anywhere near the piercing during the initial healing phase.
Hair care takes on a whole new level of importance when the piercing sits right at the hairline. Tie your hair back loosely and keep it away from the jewellery while you shampoo. Stick to lightweight, water-based products and rinse thoroughly so nothing transfers to the wound.
Expert tip Patting beats rubbing every time. Think of the piercing like a scabbed paper cut — it needs protection, not an aggressive scrub-down.
Practical steps to reduce snagging and pressure:
- Loose hairstyles like low ponytails or buns stop strands from catching on the jewellery
- Soft, low-collar tops are your go-to; avoid tight scarves, backpacks, or helmets pressing on the nape
- Sleep on your side or stomach for the first few weeks to keep direct pressure off the site
When to think about jewellery changes and follow-ups:
- Downsizing is usually recommended once the initial swelling goes down — it reduces leverage on the tissue
- Book a check-in around 2–4 weeks to make sure everything's settling properly
- For dermal anchors, keep an eye out for rotation; for surface bars, watch for any signs of migration
Normal healing versus infection — here's what to look for:
- Normal: mild redness, clear lymphatic discharge, small crusts that flake off on their own
- Concerning: spreading redness, increasing pain, green or foul-smelling discharge, or the jewellery starting to push through
If something doesn't look right, get professional advice sooner rather than later. Early intervention is usually a straightforward adjustment, not a complicated fix.
Saline sprays make the whole aftercare routine easier and more consistent. For choosing a product that works well with nape placements, learn more about saline spray for piercing.
Routine checklist for the first 8 weeks:
- Clean hands before touching the area
- Saline soaks twice daily for 2–4 weeks, then once daily as advised
- Pat dry with single-use tissue
- Keep hair and products away from the site
- Don't twist or turn the jewellery
Got follow-up questions or need urgent aftercare advice? Give the studio a ring on 01202 900050 (Bournemouth) / 020 8686 7730 (Croydon) or drop a WhatsApp to 07752 913846 (Bournemouth) / 07902 490584 (Croydon) for quick guidance.
Booking Your Back Neck Piercing and Common Questions Answered
Getting a back neck piercing starts with a proper consultation — not just turning up and hoping for the best. A decent piercer will check whether your tissue can hold the jewellery, mark the placement in both sitting and standing positions, and walk you through whether a surface bar or dermal anchor makes more sense for your anatomy.
Call 01202 900050 (Bournemouth) / 020 8686 7730 (Croydon) or WhatsApp 07752 913846 (Bournemouth) / 07902 490584 (Croydon) to check consultation availability at Timebomb Tattoo & Piercing in Croydon or Bournemouth. Bring along a few reference photos and a short list of questions so nothing gets forgotten during the appointment.
What to Expect in a Consultation
- A quick anatomy check to confirm you're a suitable candidate, with practical examples of where the jewellery would sit.
- Jewellery options in implant-grade titanium or solid 14k/18k gold, including threaded and threadless pieces you can actually handle.
- Marking done while you're seated and then standing, followed by consent paperwork and a clear aftercare plan.
"A consultation-first approach saves time and reduces surprises later"
That means you walk out knowing what the healing timeline really looks like and what snag risks to watch for — before the needle even comes out.
Quick FAQ About Pain, Hair, and Healing
1. How painful is a back neck piercing?
You'll feel a sharp pinch and then some pressure. Most clients say it's over quickly and far more manageable than they expected. Dermal anchors tend to be over in a flash, while surface bars can feel slightly longer because there's more tissue involved.
2. Can I wear my hair up while it heals?
Yes, but keep things loose. Avoid tight buns or ponytails that pull across the piercing site. Soft clips work well — anything that puts direct pressure on the jewellery is best avoided.
3. When can jewellery be changed?
Dermal tops often settle around 3–6 months, though surface bars typically need 6–12 months before it's safe to downsize. Always check with your piercer before swapping anything out — rushing this step is one of the most common mistakes people make.
4. What if jewellery feels loose or sits differently?
Get in touch with your studio straight away. Early tightening or replacement is usually straightforward, whereas waiting can turn a minor issue into a bigger problem. For urgent queries, call 01202 900050 (Bournemouth) / 020 8686 7730 (Croydon) or WhatsApp 07752 913846 (Bournemouth) / 07902 490584 (Croydon) for quick guidance.
Practical Booking Tips
- Wear something with a low neckline or a top that's easy to shift out of the way on the day.
- Let the studio know during booking if you regularly wear a helmet, carry a heavy backpack, or work in a role that involves neck contact.
- If it helps put your mind at ease, ask to see sealed single-use needles and autoclave records — any reputable piercer will be happy to show you.
Book through Piercing Near Me for trusted studio details and direct links to Timebomb Tattoo & Piercing.