
You're standing in a jewellery aisle, holding an earring that seems to point upwards rather than hang down. The product photo makes it look as though the piece has climbed from the lobe towards the outer ear, but the listing doesn't explain how it stays there, which piercing it needs, or whether it will pinch after a full day.
That uncertainty is understandable. Ear crawler earrings are a mechanical accessory as much as a fashion piece. Their comfort depends on the post, gauge, length, decorative weight, and the way the curve matches your ear. Once you understand those details, choosing a crawler becomes much easier, particularly if you're considering an upper-lobe or cartilage placement.
What Ear Crawler Earrings Actually Are
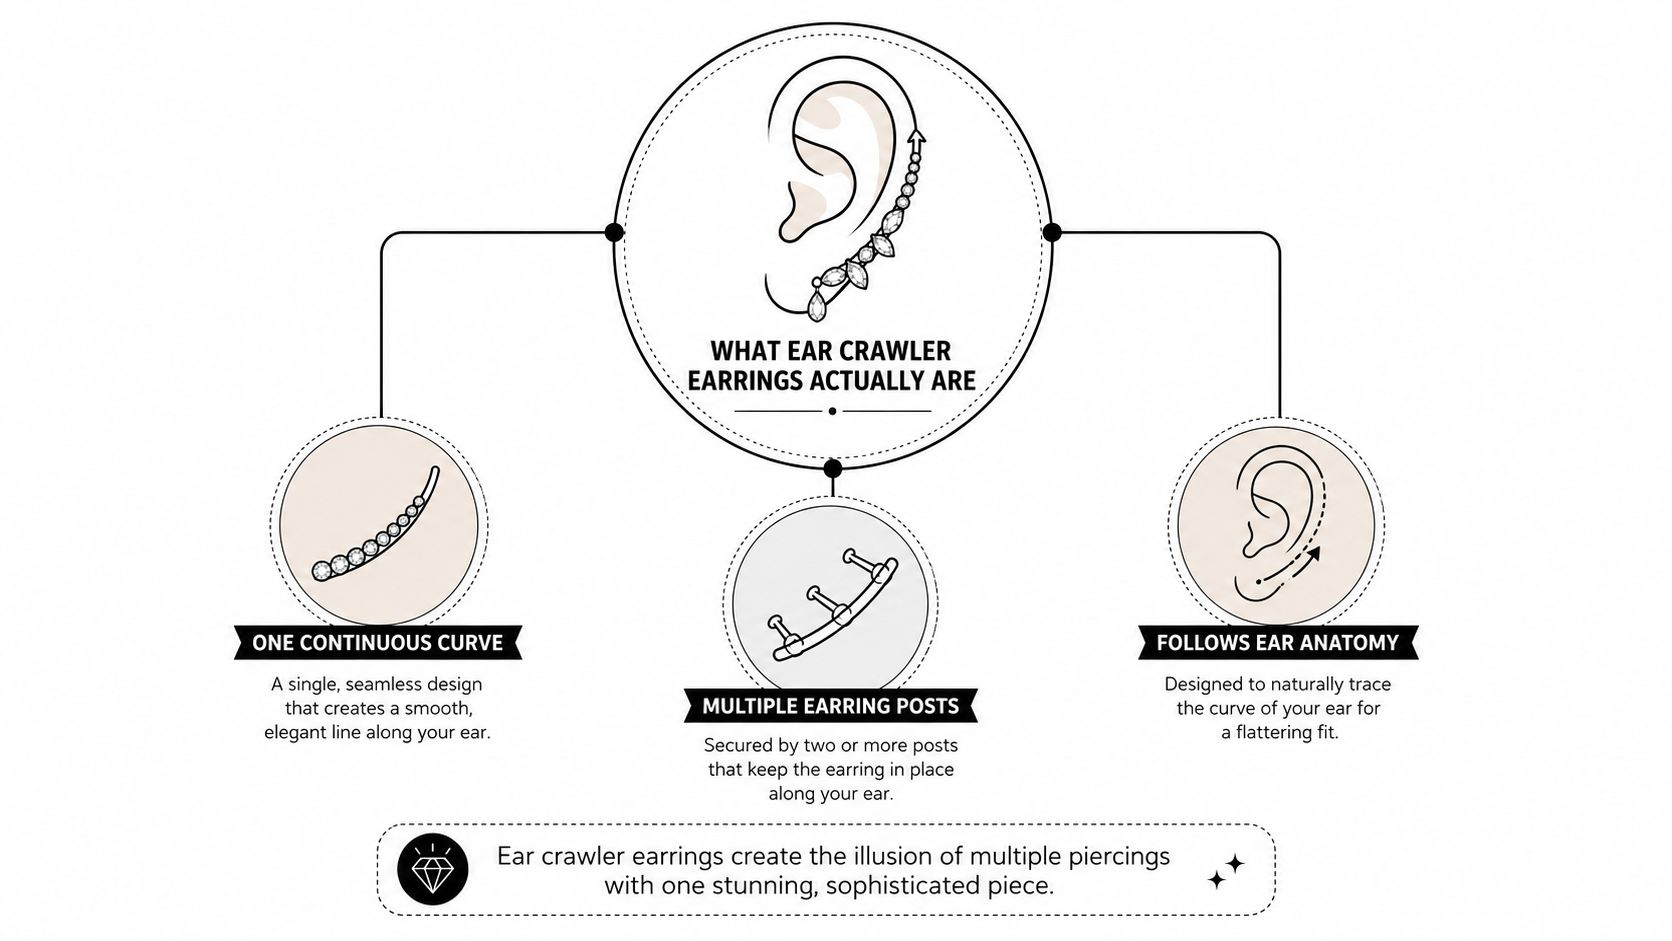
Ear crawler earrings are shaped pieces of jewellery worn through a piercing, usually at the lobe or upper lobe, with a decorative front that curves upwards along the ear. Instead of hanging below the piercing like a conventional drop, the piece creates a rising line that follows the outer ear or moves towards the cartilage.
Start by identifying three parts:
- The post, which passes through the piercing and carries the jewellery.
- The decorative front, the visible section that creates the design.
- The climb or trail, the curved section that rises from the piercing and sits against the ear.
The name describes the visual effect, not a separate piercing type. A half-hoop may form a smooth arch, a vine-style design may trail upwards with small details, and a sculptural S-curve may create a stronger architectural silhouette. Some pieces use a single post and a carefully balanced curve, while others are designed for more than one piercing.
How crawlers differ from similar styles
An ear cuff usually grips the edge of the ear without passing through a piercing. It can provide a similar upward sweep, but its security depends on pressure and the thickness of the ear at the point where it sits. A cuff is therefore a no-piercing option, while a crawler is generally piercing-dependent.
“Climber” and “crawler” are often used interchangeably. In practice, climbers frequently describe lobe-based earrings that tilt upwards, whereas crawler is a broader term for a piece that follows the ear's vertical line or outer contour.
Stacked studs create a related visual effect, but each stud needs its own piercing. A crawler can suggest a curated stack from one starting point, although the exact piercing requirement varies by design. Always check the product specification rather than relying on the photograph.
The Ancient Origins of the Ear Crawler Look
The upward sweep of modern ear crawler earrings has an unexpectedly old British ancestor. At a burial site in Cumbria, Great Britain, archaeologists found ancient ear cuffs known as kaffas, dated to around 4300 BC. These early brass pieces wrapped around the ear without requiring a piercing, creating decoration through pressure and shape rather than through a post.
That detail matters because the visual idea behind a crawler isn't entirely new. A kaffas could frame the ear and suggest movement around its edge, much like contemporary sculptural jewellery creates the impression of a line travelling upwards. Modern crawlers usually depend on a piercing, but they retain that same desire to decorate the ear's natural structure rather than suspend an ornament from the lobe. The style's ancestry is therefore rooted in Britain by more than 6,000 years, based on the Cumbria date and the modern era as documented in this history of ear cuffs and kaffa ear climbers.
Visible ear jewellery later became established in England as a recognised fashion for both gentlemen and ladies in the late 1500s, according to this history of earrings in England. That cultural continuity helps explain why an ear crawler can feel both unusual and familiar. It reworks an old ear-wrapping concept into a contemporary, piercing-based format.
Current UK fashion coverage has been turning towards sculptural silhouettes, ear cuffs, and curated stacks, with styling that can work with or without extra piercings as reported by Harper's Bazaar UK. The modern crawler fits naturally into that conversation, but its appeal isn't only about trend. It's a practical reinterpretation of a very old mechanical principle, shaped to work with a pierced ear.
Materials and Why Implant-Grade Titanium Matters
A crawler touches more of the ear than a small, flush stud often does. That larger contact area gives the curve more opportunity to rub, catch on hair, or press against cartilage, so material quality becomes part of the fit, not a minor buying detail.
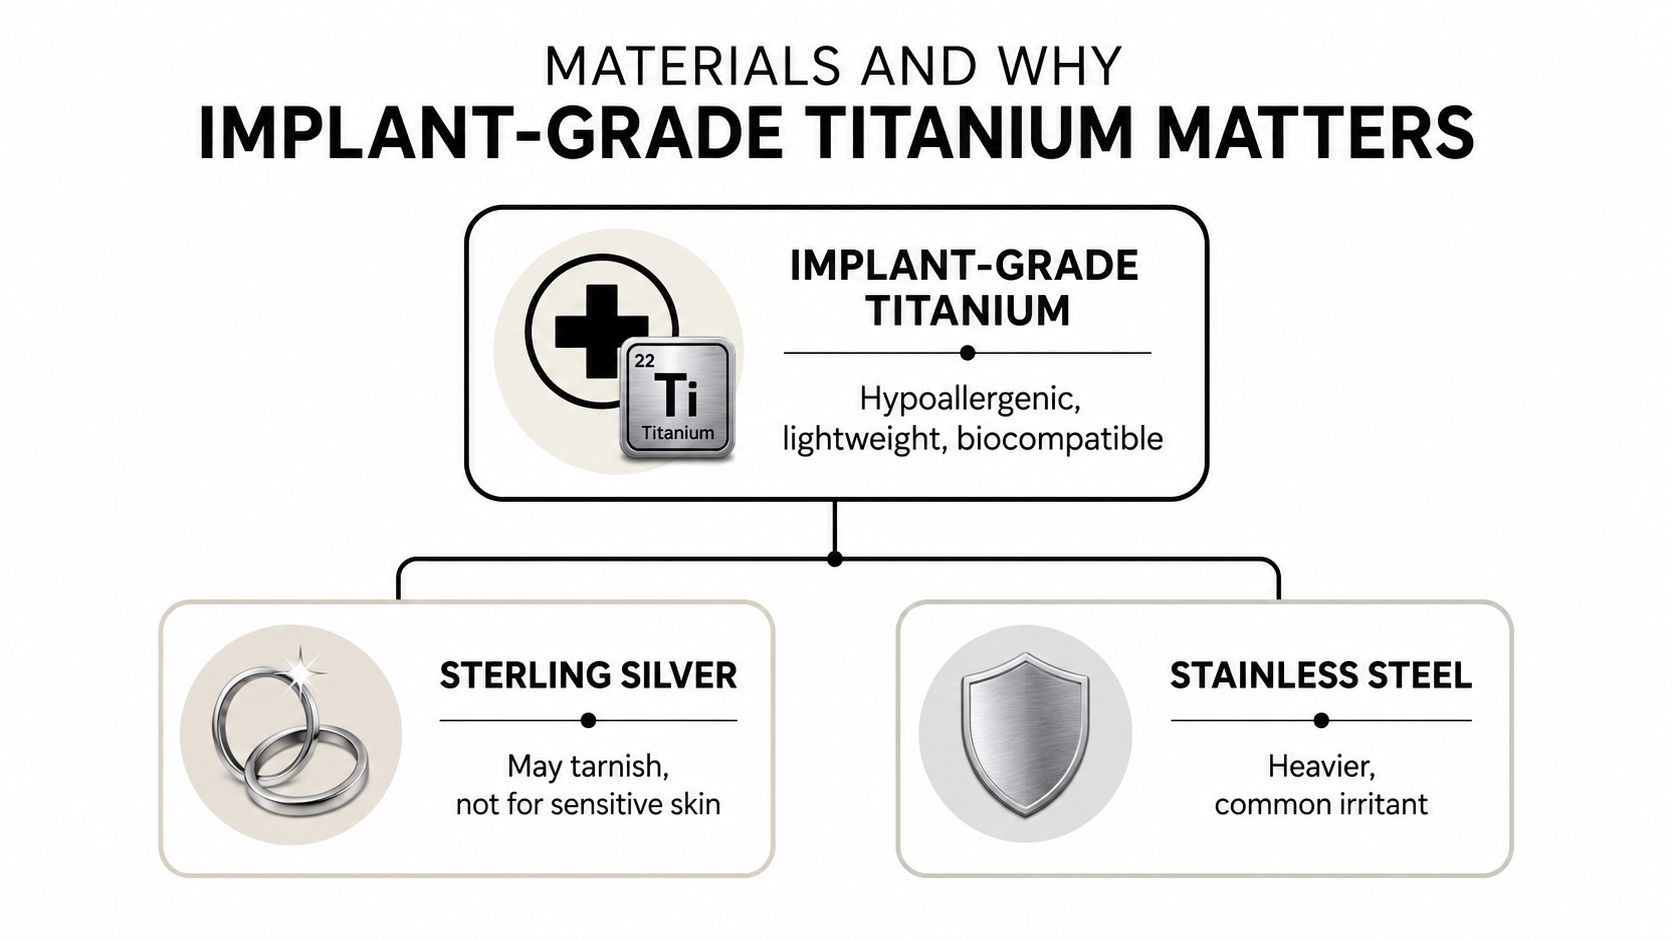
For an initial piercing or sensitive skin, look for implant-grade titanium marked with one of the recognised standards ASTM F136, ISO 5832-3, or ASTM F67. UK piercing guidance identifies these standards as suitable options for initial jewellery in this professional piercing metals guide. Higher-spec titanium is described as nickel-free, lightweight, and corrosion-resistant, properties that can reduce exposure to common irritants during contact with healing tissue.
Reading the material label
The useful information should appear in the product description or be confirmed by the studio. “Titanium colour” isn't the same as titanium, and “hypoallergenic” on its own doesn't tell you which alloy has been used. Ask for the specific standard and whether the jewellery is intended for a fresh piercing or only for healed wear.
Fashion alloys, plated brass, copper-based metals, and unspecified nickel-containing materials can create problems for sensitive ears. The issue isn't that every wearer will react, but that a healing cartilage piercing has less tolerance for repeated friction and irritation. A coating can also wear away where the jewellery rubs, exposing the underlying metal.
Material check: If a seller can't identify the alloy and relevant implant standard, treat the piece as healed-piercing fashion jewellery rather than suitable starter jewellery.
For a first-time client, an internally threaded or high-polish titanium design is usually the more considered choice. Internal threading keeps the rougher threaded section inside the jewellery rather than dragging it through the piercing, while a smooth, high-polish surface reduces abrasion during insertion and removal. The exact design still needs to match your placement and anatomy.
You can review the practical differences between suitable titanium jewellery options in this guide to implant-grade titanium earrings. A reputable piercer should also explain whether the crawler itself is appropriate as initial jewellery, since a decorative curve may create more movement than a simple flat-back labret.
Sizing, Gauge, and How Crawlers Actually Fit
A crawler stays comfortable when three measurements work together: gauge, post length, and curve. Gauge describes the thickness of the post. For cartilage placements in the UK, crawler-style jewellery is commonly engineered with 16g, or 1.2 mm, and 18g, or 1.0 mm, posts as shown in this UK cartilage jewellery listing.
The thicker 16g option can offer more stability, while 18g may suit a smaller, more delicate design or an existing piercing that has been fitted for that size. Don't force a thicker post into a narrower piercing, and don't assume a thinner post will automatically be more comfortable. The piercer should assess the existing channel and the intended jewellery.
What the post length changes
Post length controls the space between the front of the jewellery and the back of the ear. Too little room can create pressure, swelling, and a pinching sensation. Too much room allows the piece to move, catch, and place extra stress on the piercing.
Look for these practical warning signs:
- Pinching at rest: The backing or front presses into the ear before you've touched it.
- Pressure when smiling or sleeping: Movement around the ear makes the crawler feel tight.
- A heavy forward pull: The decorative section tilts away from the ear instead of resting close to it.
- Uneven contact: One point digs into the cartilage while another part floats away.
- A mismatched rise: The curve points sharply away from the helix rather than following it.
The curve matters because no two helixes have exactly the same shape. A crawler that rises neatly on a broad, gently rounded outer ear may sit at a steeper angle on a narrower ear. The same product photograph can therefore give a very different result on another person.
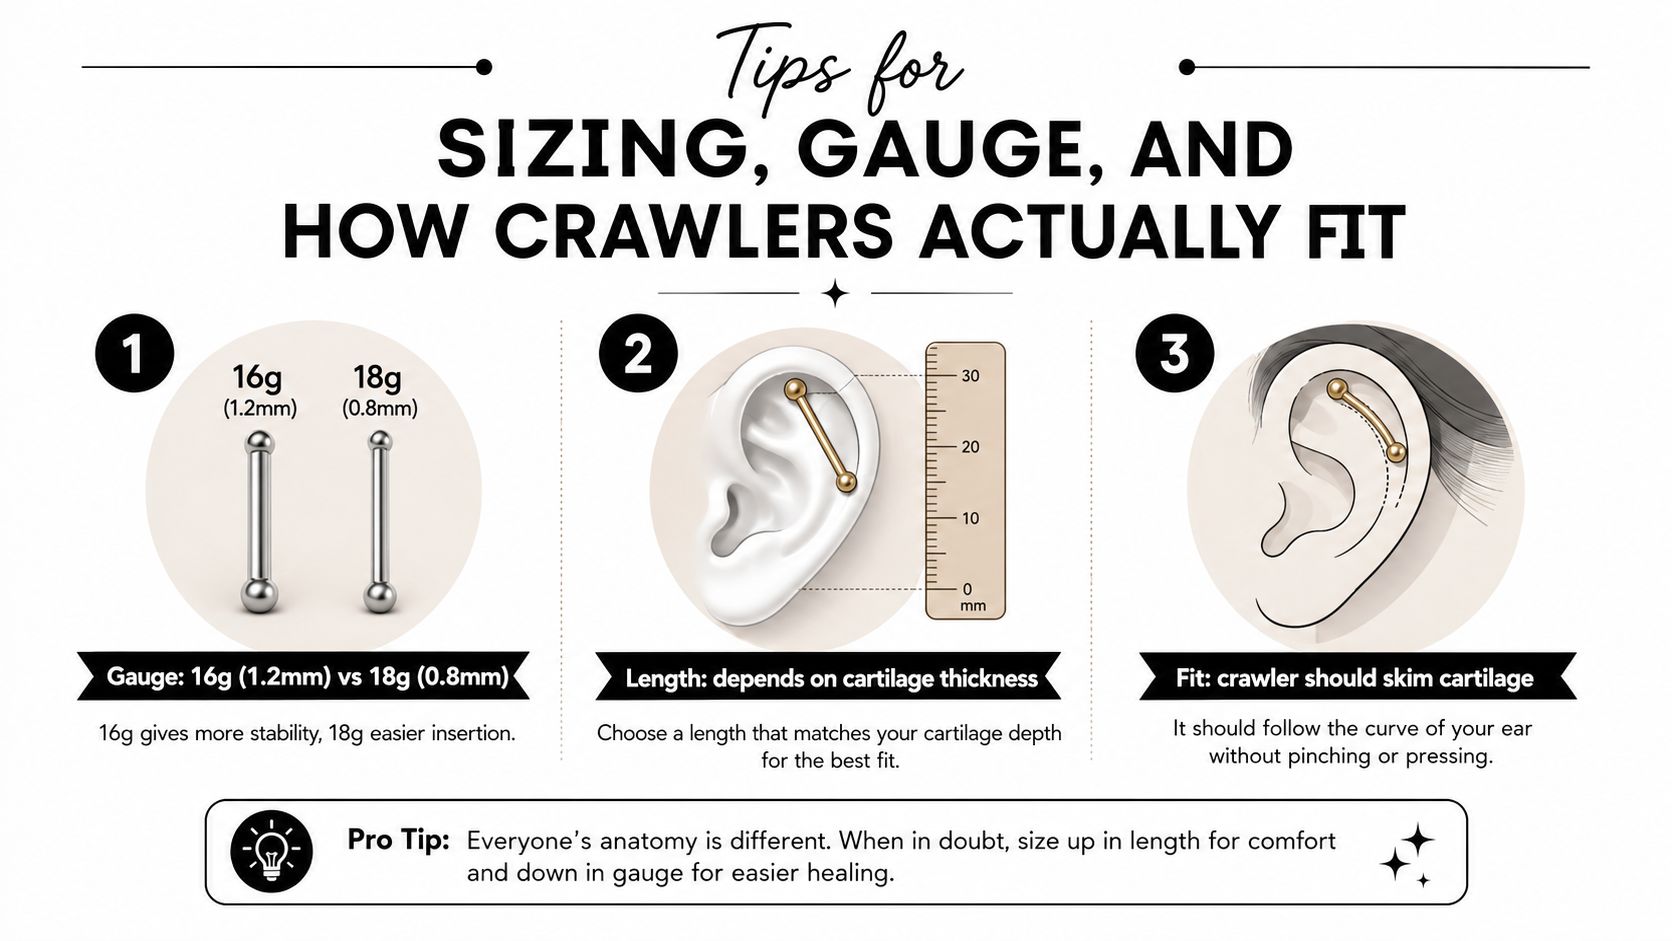
Before committing to all-day wear, check that the piece skims the ear without pinching, remains stable when you gently move your jaw and hair, and doesn't pull the piercing channel in one direction. A professional fitting is particularly useful if the design is intended to span lobe and cartilage, or if you're choosing jewellery for a fresh placement.
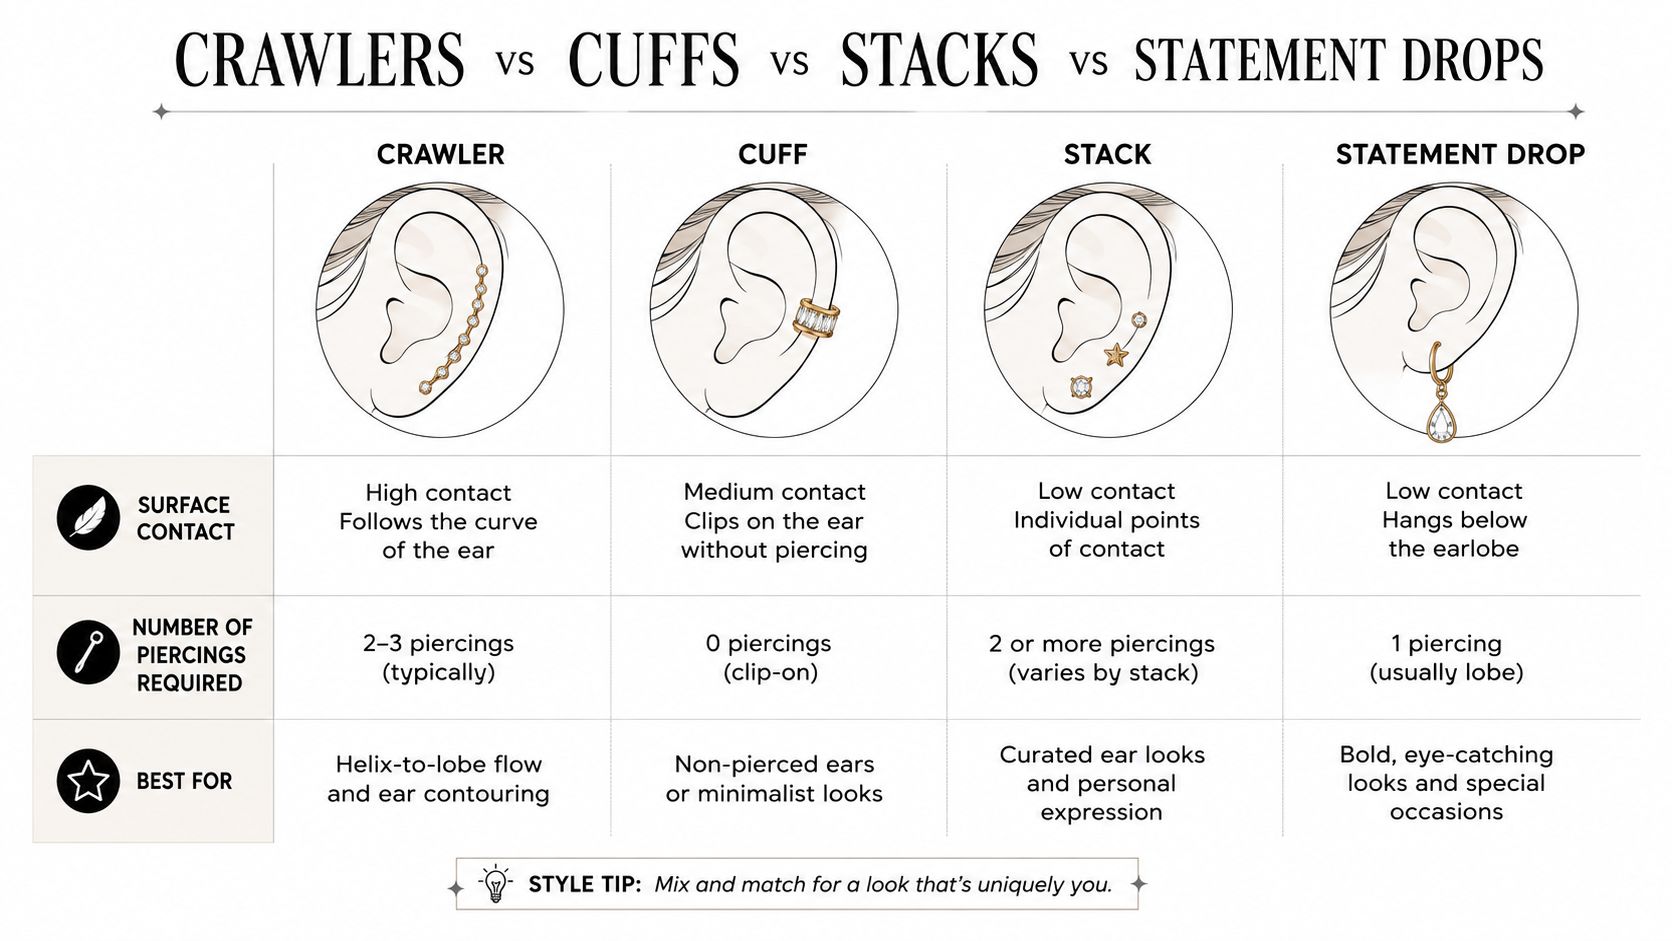
Crawlers Versus Cuffs Versus Stacks Versus Statement Drops
The best choice depends less on the photograph and more on what you want the jewellery to do. A crawler gives you an upward line from a piercing, a cuff grips the ear without a piercing, a stack builds detail from several piercings, and a statement drop creates movement below the lobe.
| Style | Piercings Needed | Best For | Care Level |
|---|---|---|---|
| Ear crawler earrings | Usually one, though some designs need more | An upward sweep from the lobe or cartilage | Moderate, because the curve can catch and rub |
| Ear cuff | None | Testing an ear-wrapping look without a new piercing | Moderate, because pressure affects security |
| Stacked studs | Several separate piercings | A customisable, layered ear arrangement | Higher, especially while multiple piercings heal |
| Statement drops | Usually one lobe piercing | Visible movement and impact below the ear | Low to moderate, depending on weight and movement |
A crawler suits someone who wants a statement look without building a full stack. It can also work well for a first-time client with a single healed lobe piercing, provided the post and curve are suitable. It isn't automatically the right choice for a new cartilage piercing, where decorative movement and contact may complicate healing.
Cuffs are useful for experimenting, but their pressure must be adjusted carefully. A cuff that's too loose may slip, while one that's too tight can become uncomfortable quickly. Stacked studs offer the most control over spacing and styling, but every additional piercing brings another healing site to manage.
A crawler reduces the number of visible jewellery pieces, not necessarily the importance of fit.
Statement drops are simpler mechanically. They hang from the lobe and don't need to follow the helix, making them a practical alternative if your ear shape doesn't suit a climbing curve. If you're considering a cuff-based look with a genuine piercing, review the options for ear cuff piercings before deciding.
Aftercare for Crawlers and Why Cartilage Needs Longer
A crawler through a fresh piercing behaves like a small lever on healing skin. The post and curved section can catch on hair, bedding, or headphones, so wash your hands before touching it and leave the jewellery stable. Do not rotate or repeatedly adjust it while the channel settles.
UK local authority guidance recommends soaking the piercing twice each day in warm salt water made with about 1/4 level teaspoon of preferably sea salt in an egg cup or shot glass of warm water according to Torbay Council's ear and face piercing aftercare guidance. Pat it dry with fresh disposable paper towel or kitchen roll. Shared hand and bath towels can leave residue and bacteria on the area.
Saline recipes vary. Another UK professional guide recommends 1 teaspoon of non-iodised salt in 500 ml of boiled then cooled water, with two short cleaning sessions each day for most lobe piercings in its ear piercing healing and aftercare guide. Use the recipe supplied by your piercer rather than combining methods. Avoid alcohol, hydrogen peroxide, and harsh antiseptics on fresh tissue.
Placement changes the care window
Submerging a new piercing exposes it to waterborne contaminants and irritation. UK guidance recommends avoiding pools, hot tubs, lakes, and the sea for at least 6 weeks for earlobes and 12 weeks for cartilage as stated in this region-specific piercing aftercare advice. For more detail on cartilage healing timelines, see our cartilage piercing aftercare guide.
| Placement | Minimum Submersion Wait | Aftercare Sessions | Key Caution |
|---|---|---|---|
| Earlobe | 6 weeks | Twice daily | Avoid snagging and unnecessary handling |
| Cartilage | 12 weeks | Twice daily | Reduce pressure, friction, and contact while healing |
Mild tenderness, local warmth, and a small amount of pale discharge may occur during normal healing. Increasing pain, spreading redness, marked swelling, or thick discharge needs assessment by a qualified piercer or healthcare professional. Do not remove jewellery from a concerning piercing before seeking advice.
Why a Professional Fitting Beats Buying Blind
A product photograph can't show how a crawler will behave on your ear. A trained piercer can assess the thickness and curve of your helix, the position of an existing lobe or upper-lobe piercing, the likely gauge, the post length, and the angle that will let the design sit without pulling.
That assessment is especially valuable when the jewellery is intended to create a continuous line from the lobe towards cartilage. The piercer can also discuss whether a simple flat-back labret would be more appropriate for initial healing, with a crawler introduced later once the placement is settled.
Hygiene should be visible
Good studio practice includes clear hand hygiene, clean preparation, sterile single-use needles, and jewellery suitable for the intended placement. A UK local authority cosmetics piercing code states that piercers should wash their hands before and after treatment even when disposable gloves are worn in its code of practice. Gloves add a barrier, but they don't replace handwashing.
At a consultation, ask:
- Which placement will create the rise I want?
- What gauge and post length suit my anatomy?
- Is this material appropriate for an initial piercing?
- How will the curve affect sleeping, hair, and headphones?
- What aftercare should I follow?
If you're in Bournemouth or Croydon, studios that offer consultations, walk-ins, and appointments can help you compare placement and jewellery before you commit. Bring the style you like, but let the anatomy decide the final position.
Making Your Final Choice With Confidence
Choose your crawler by working through four decisions. Start with material, prioritising implant-grade titanium when you're dealing with a fresh piercing or sensitive skin. Then choose placement, with the lobe offering versatility and upper-lobe or helix placements creating a more dramatic climb.
Next, match the gauge, post length, and curve to your ear rather than copying a photograph. Finally, be honest about aftercare, particularly if the jewellery will sit in cartilage and your routine includes swimming, contact sports, headphones, or frequent hair changes.
A first-time client with one healed lobe piercing may prefer a lightweight crawler for a controlled statement. An experienced collector with several healed cartilage placements may choose a more architectural design, but the same rules still apply. The safest decision is a conversation about anatomy and mechanics, not an impulse purchase based only on style.
Piercing Near Me connects clients with studios offering consultations, walk-ins, and appointments in Bournemouth and Croydon, with guidance on placement, implant-grade jewellery, piercing preparation, and personalised aftercare. Visit Piercing Near Me to explore your options, or call 01202 900050 (Bournemouth) / 020 8686 7730 (Croydon) or message WhatsApp on 07752 913846 (Bournemouth) / 07902 490584 (Croydon) to discuss a professional fitting.