
You've cleaned around your new navel piercing, dried it, and then noticed the bar looks slightly crusty again. Perhaps you're wondering whether to twist it, whether the redness is normal, or whether the saline spray you bought is helping. These are common concerns, but most healing problems come from too much handling, trapped moisture, and friction, not from a lack of harsh products.
The safest approach is calm and consistent. Clean the piercing gently, keep the area dry, leave the jewellery in place, and get professional advice if symptoms become more pronounced.
What to Expect in Your First 24 Hours
You leave the studio with a fresh navel piercing and immediately become aware of every movement. Sitting down pulls at the skin, a waistband brushes the jewellery, and a small amount of clear fluid appears around the entry points. That can feel alarming, but mild tenderness, slight swelling, and limited clear discharge can occur during the initial healing response.
The first day is mainly about protection rather than aggressive cleaning. UK aftercare guidance recommends keeping a new navel piercing covered with a breathable dressing during the first 24 hours, helping shield it from clothing friction and everyday contamination. The dressing shouldn't be airtight or pressed tightly against the jewellery.
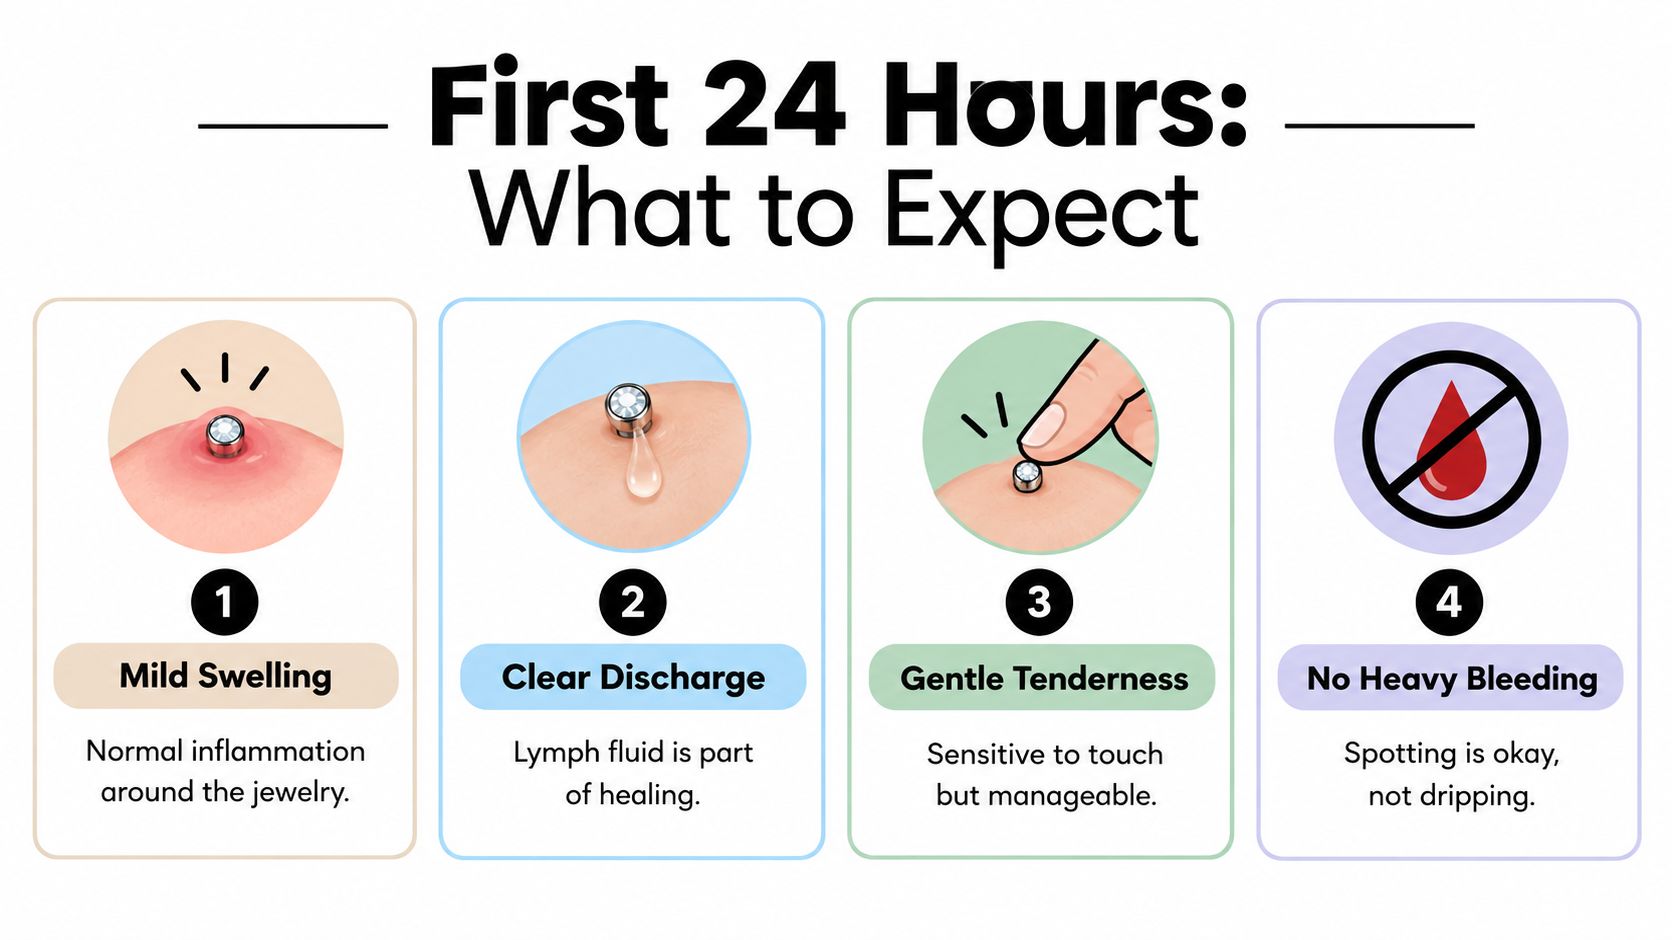
What usually looks manageable
A little sensitivity when clothing touches the area is different from pain that keeps intensifying. Clear or pale fluid that dries into a light crust is also different from thick, discoloured discharge. Your job is to avoid disturbing the tissue while it settles.
First-day rule: Protect the piercing from rubbing and moisture. Don't test it by turning the bar or repeatedly checking how it feels.
Choose loose clothing that doesn't press across the navel. If the area becomes wet, dry it carefully with fresh disposable paper towel or kitchen roll, rather than rubbing it with a bath towel that may catch on the jewellery.
UK guidance also advises showers over baths during the early healing period, with swimming and exercise avoided during the first two weeks. This UK piercing aftercare guidance explains the early protection approach, including the importance of avoiding trapped moisture and unnecessary irritation.
Your Daily Navel Piercing Cleaning Routine
A reliable routine doesn't need a bathroom shelf full of products. It needs clean hands, suitable saline, gentle contact, and thorough drying. UK council guidance advises washing your hands well with soap and water before cleansing the piercing, then drying them thoroughly with a clean personal towel or paper towel. UK body-art aftercare guidance also cautions against cleaning more than twice a day.
Follow these steps
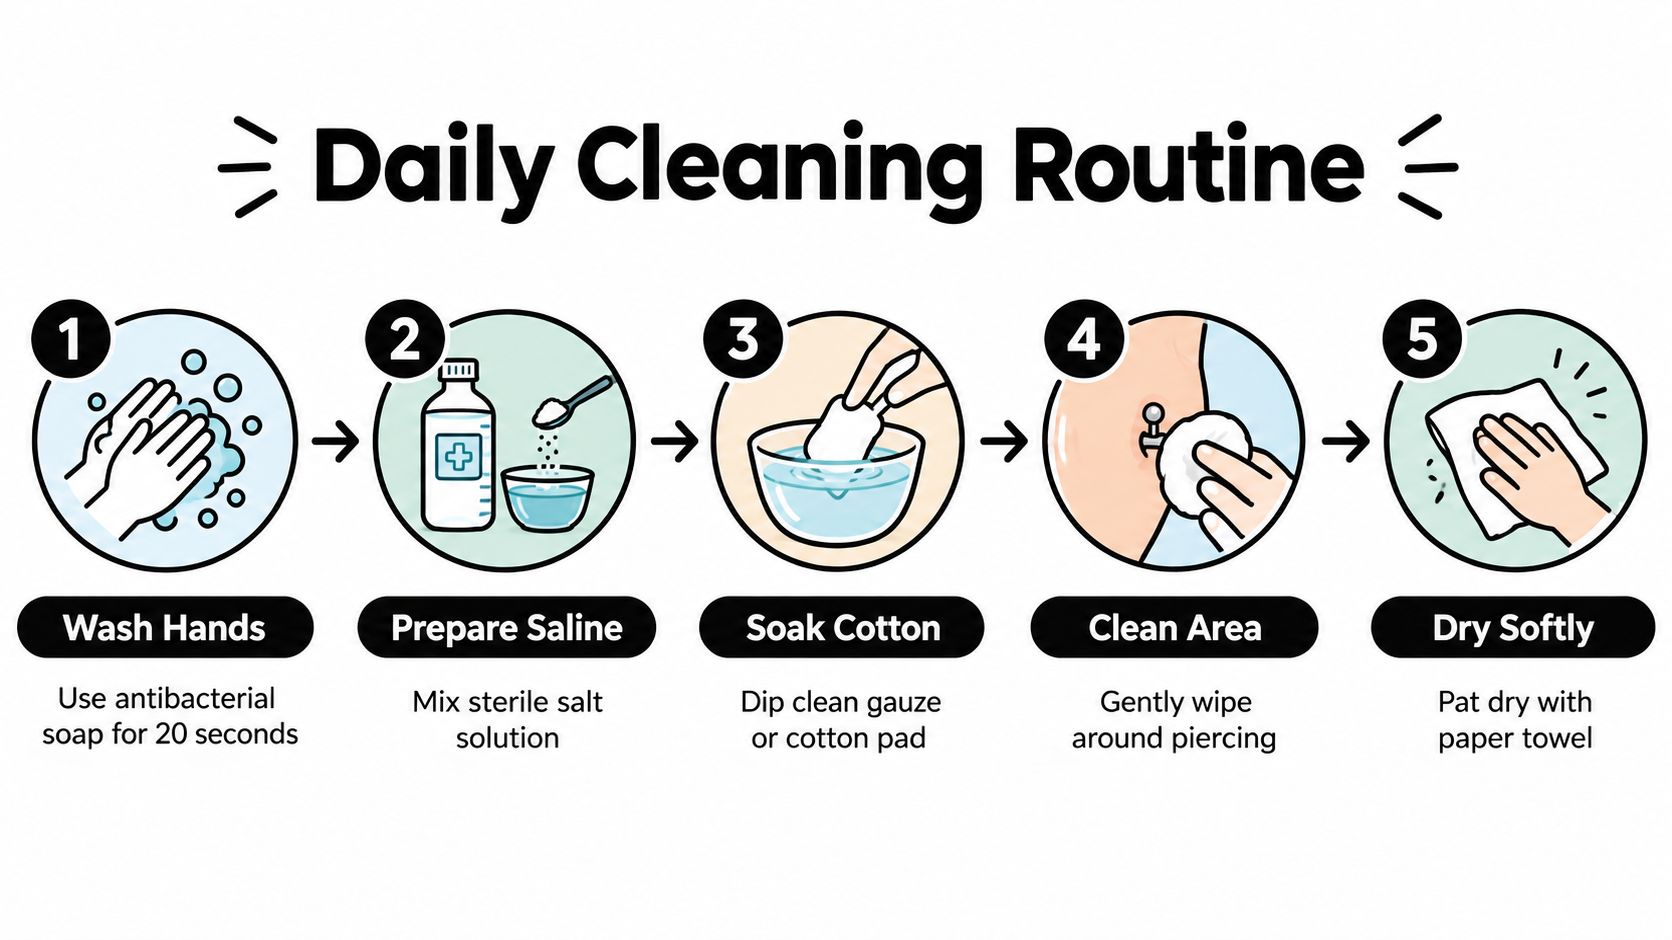
Wash your hands first. Use liquid soap and water, paying attention to your fingertips and under your nails. Dry with a clean paper towel before touching the piercing.
Use sterile saline where possible. Apply it to the front and back of the piercing, allowing the solution to contact the skin rather than blasting the area with pressure.
Leave the saline briefly in contact. One UK aftercare source recommends leaving saline on the skin for one minute before removing it. This gives softened discharge time to loosen without scraping.
Remove softened residue gently. Use clean medical gauze or another fresh disposable product. Don't pick at a firmly attached crust, and don't drag the jewellery through the tissue.
Dry both sides properly. Pat the area with fresh disposable paper towel or kitchen roll. Moisture trapped inside the navel can encourage bacterial growth, so drying is part of the cleaning routine, not an optional finishing touch.
Choosing practical timing
Cleaning after a shower can work well because warm water may soften dried discharge. Dry the piercing carefully afterwards, then complete the second cleaning later in the day, leaving enough time between routines to avoid irritating the skin.
Avoid rough towels, cotton clothing fibres that snag the bar, and repeated wiping to achieve a perfectly spotless appearance. The aim is to remove discharge and prevent moisture retention, not to sterilise living skin.
Consistency beats intensity. A measured twice-daily routine supports healing more effectively than repeated cleaning whenever you notice a tiny piece of crust.
Choosing the Right Cleaning Solution
Sterile saline is generally the simplest choice for a healing navel piercing because it offers a consistent salt concentration without the contamination risks that come with preparing and storing a mixture at home. Premade sterile saline sprays can also make application easier, particularly when the nozzle lets you reach both sides without touching the piercing.
This guide to saline spray for piercings can help you compare practical aftercare formats before buying a product.
Comparing the options
| Option | Where it fits | Main trade-off |
|---|---|---|
| Premade sterile saline | Preferred for routine care when available | You need to check that the product is intended for wound or piercing care |
| Homemade salt solution | A fallback when sterile saline isn't available | Measuring and water hygiene need careful attention |
| Harsh cleansers | Not suitable for routine navel-piercing care | They can irritate or excessively dry healing tissue |
A UK local-authority document recommends saline made with warm water and about 1/4 level teaspoon of preferably sea salt to an egg cup or shot glass of water. If you make a solution, measure the salt rather than estimating by eye, and use clean preparation methods. Another UK source gives a homemade alternative of 1/4 teaspoon natural rock salt in 8 oz of boiled water, showing why advice should be followed consistently rather than mixed between recipes. The local-authority aftercare document provides the first method and drying guidance.
Don't use alcohol, hydrogen peroxide, strong antibacterial products, fragranced body wash, or abrasive scrubs as everyday aftercare. These products may feel powerful, but irritation and dryness can make the piercing more uncomfortable and prolong recovery. A gentle saline routine is less dramatic and usually more appropriate.
Common Mistakes That Delay Healing
The most persistent question I hear is whether rotating the navel bar helps saline reach the channel. UK aftercare advice isn't perfectly consistent. Some guidance tells clients not to turn or move the jewellery, while other sources describe gentle cleaning around the front and back. Local-authority guidance advises against unnecessary rotation and says not to remove the piercing for cleaning.
The practical answer is straightforward: clean the skin around the jewellery, but don't force the bar to move. Cleaning should loosen discharge and keep the area dry. It shouldn't involve repeatedly sliding, twisting, or lifting the jewellery to inspect the channel.
Habits that create avoidable irritation
Rotating the bar as a routine: Movement creates friction through healing tissue. Leave the jewellery in its settled position unless a qualified piercer needs to assess or adjust it.
Wearing tight waistbands: Snug trousers, high-rise clothing, and belts can press directly on the navel bar. Choose clothing that allows the area to move without constant rubbing.
Cleaning whenever you see crust: Dried discharge can look untidy, but repeated cleansing can leave the skin sore. UK guidance commonly limits cleaning to twice daily, so don't turn every visual check into another treatment.
Drying with a shared towel: Bath towels can catch on the jewellery and may carry residue from previous use. Use fresh disposable paper towel or kitchen roll and pat rather than scrub.
Soaking in baths or swimming early on: Water exposure and prolonged dampness make it harder to keep the area settled. UK guidance recommends showers over baths in the early period and advises avoiding swimming and exercise during the first two weeks.
Responding to moisture and friction
If a waistband catches the bar, stop the friction rather than compensating with stronger antiseptic. If the navel stays damp after showering, focus on careful drying. The right correction addresses the trigger, not just the visible symptom.
Jewellery movement isn't a cleaning step. If the area worsens, more manipulation is not the answer.
Persistent redness, swelling, heat, or discharge deserves a professional assessment. Don't attempt to solve those signs by scrubbing harder or removing the jewellery yourself.
Signs Your Piercing Needs Professional Attention
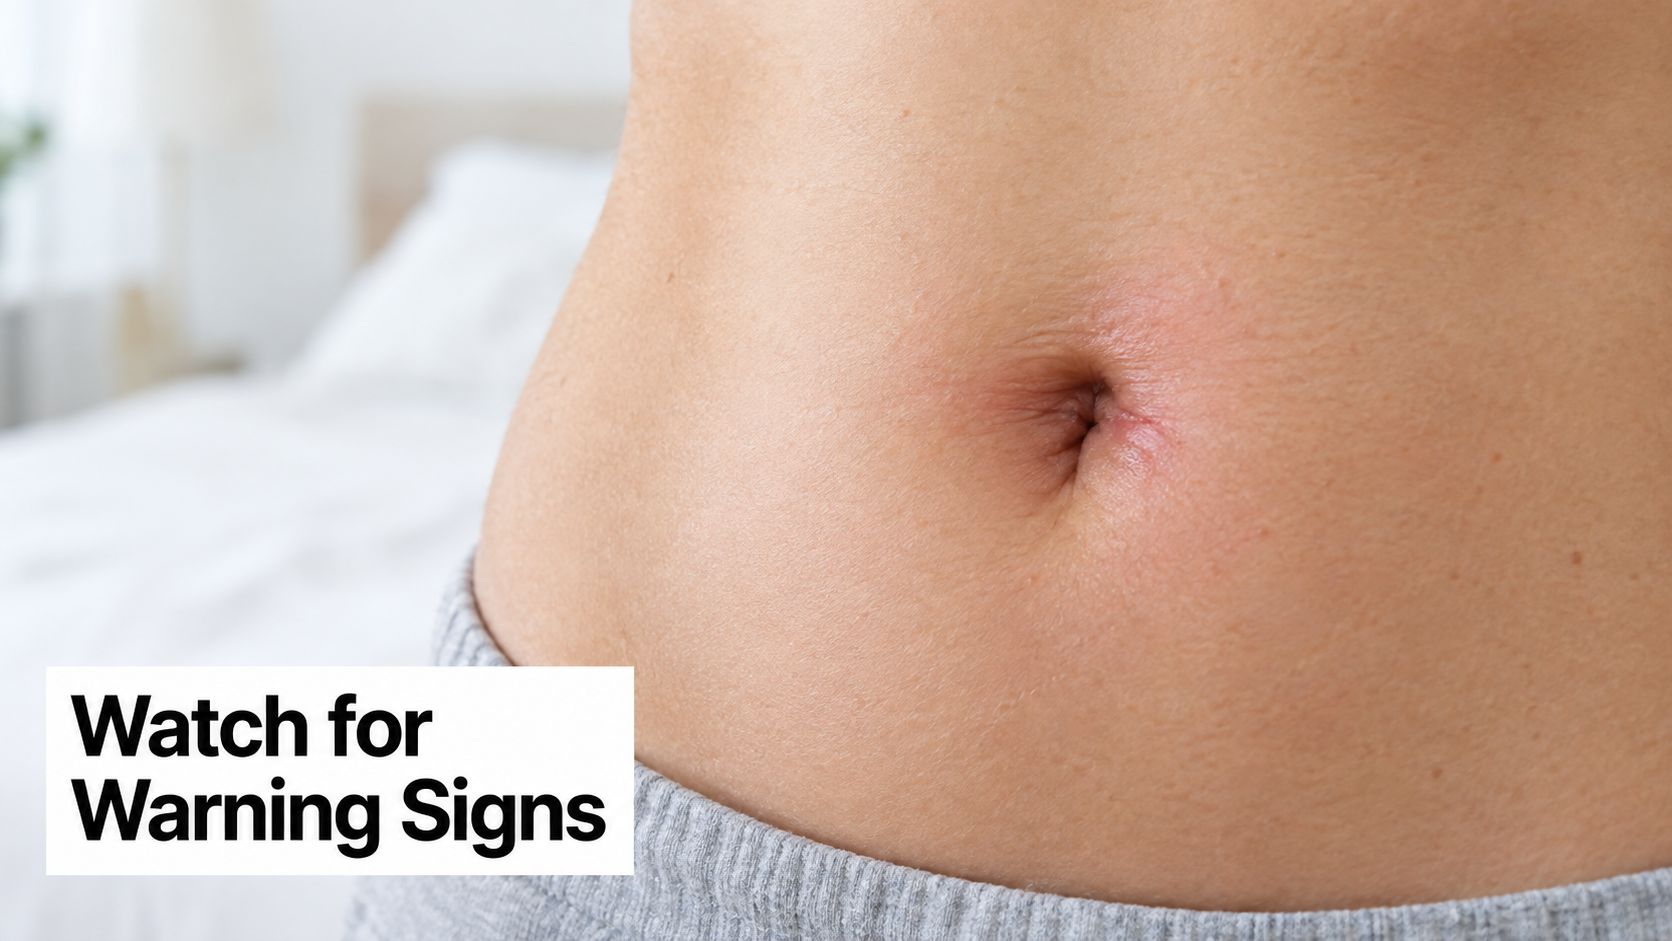
A healing piercing can be tender and can produce a small amount of clear fluid. Concern rises when symptoms become progressively worse, spread beyond the immediate piercing, or change in character. Increasing pain, pronounced heat, persistent swelling, spreading redness, or thick, discoloured discharge shouldn't be treated as a signal to intensify home cleaning.
Separate ordinary irritation from escalation
| More consistent with early healing | More concerning and worth checking |
|---|---|
| Mild tenderness that remains manageable | Pain that intensifies or becomes severe |
| Limited swelling near the jewellery | Swelling that persists or continues to increase |
| Clear fluid that dries lightly | Thick or discoloured discharge |
| Local sensitivity after clothing contact | Heat or redness spreading around the navel |
A professional piercer can assess jewellery fit, placement, pressure, and mechanical irritation. If symptoms suggest a medical problem, seek medical care rather than relying solely on studio advice. Don't remove jewellery without professional guidance, because closing tissue can complicate assessment and drainage.
This guide to navel-piercing infection signs offers a useful reference for recognising symptoms that need closer attention. When in doubt, take a clear photograph for your piercer and describe when the change began, what products you've used, and whether clothing or exercise has aggravated it.
Practical Aftercare Tips and Next Steps
Good navel-piercing aftercare is deliberately uncomplicated. Clean the area gently with sterile saline, keep the routine limited to twice daily, dry the navel thoroughly, and prevent waistbands or tight clothing from rubbing the jewellery. Leave the bar alone between cleaning sessions.
Keep this checklist nearby
- Clean hands: Wash and dry your hands before touching the piercing.
- Gentle saline: Use a consistent sterile saline product where possible.
- Limited routine: Don't exceed twice-daily cleaning unless a qualified professional gives you a specific reason.
- Dry skin: Pat the front, back, and inside of the navel dry with fresh disposable paper towel or kitchen roll.
- No forced movement: Don't rotate, slide, lift, or remove the jewellery to clean it.
- Reduced friction: Choose clothing that doesn't press on the bar.
- Early support: Contact a professional piercer or healthcare professional if heat, spreading redness, worsening swelling, or unusual discharge develops.
A reputable UK studio should use single-use sterile needles, suitable implant-grade jewellery, and clear, personalised aftercare advice. The studio should also explain placement, jewellery choice, clothing considerations, and what to do if healing becomes uncomfortable.
Piercing Near Me provides studio information and aftercare resources for clients looking for professional piercing services, including guidance on navel-piercing tips. For support, the phone number is 01202 9000 50, and WhatsApp is 07752913846.
If your piercing is tender, return to the gentle routine and remove the source of friction. If it looks increasingly hot, swollen, red, or produces concerning discharge, stop experimenting with products and arrange a professional assessment.
Piercing Near Me helps you find professional studios, suitable jewellery, and practical aftercare guidance for navel piercings and other placements. Visit Piercing Near Me to explore studio information and get support with your piercing journey.