
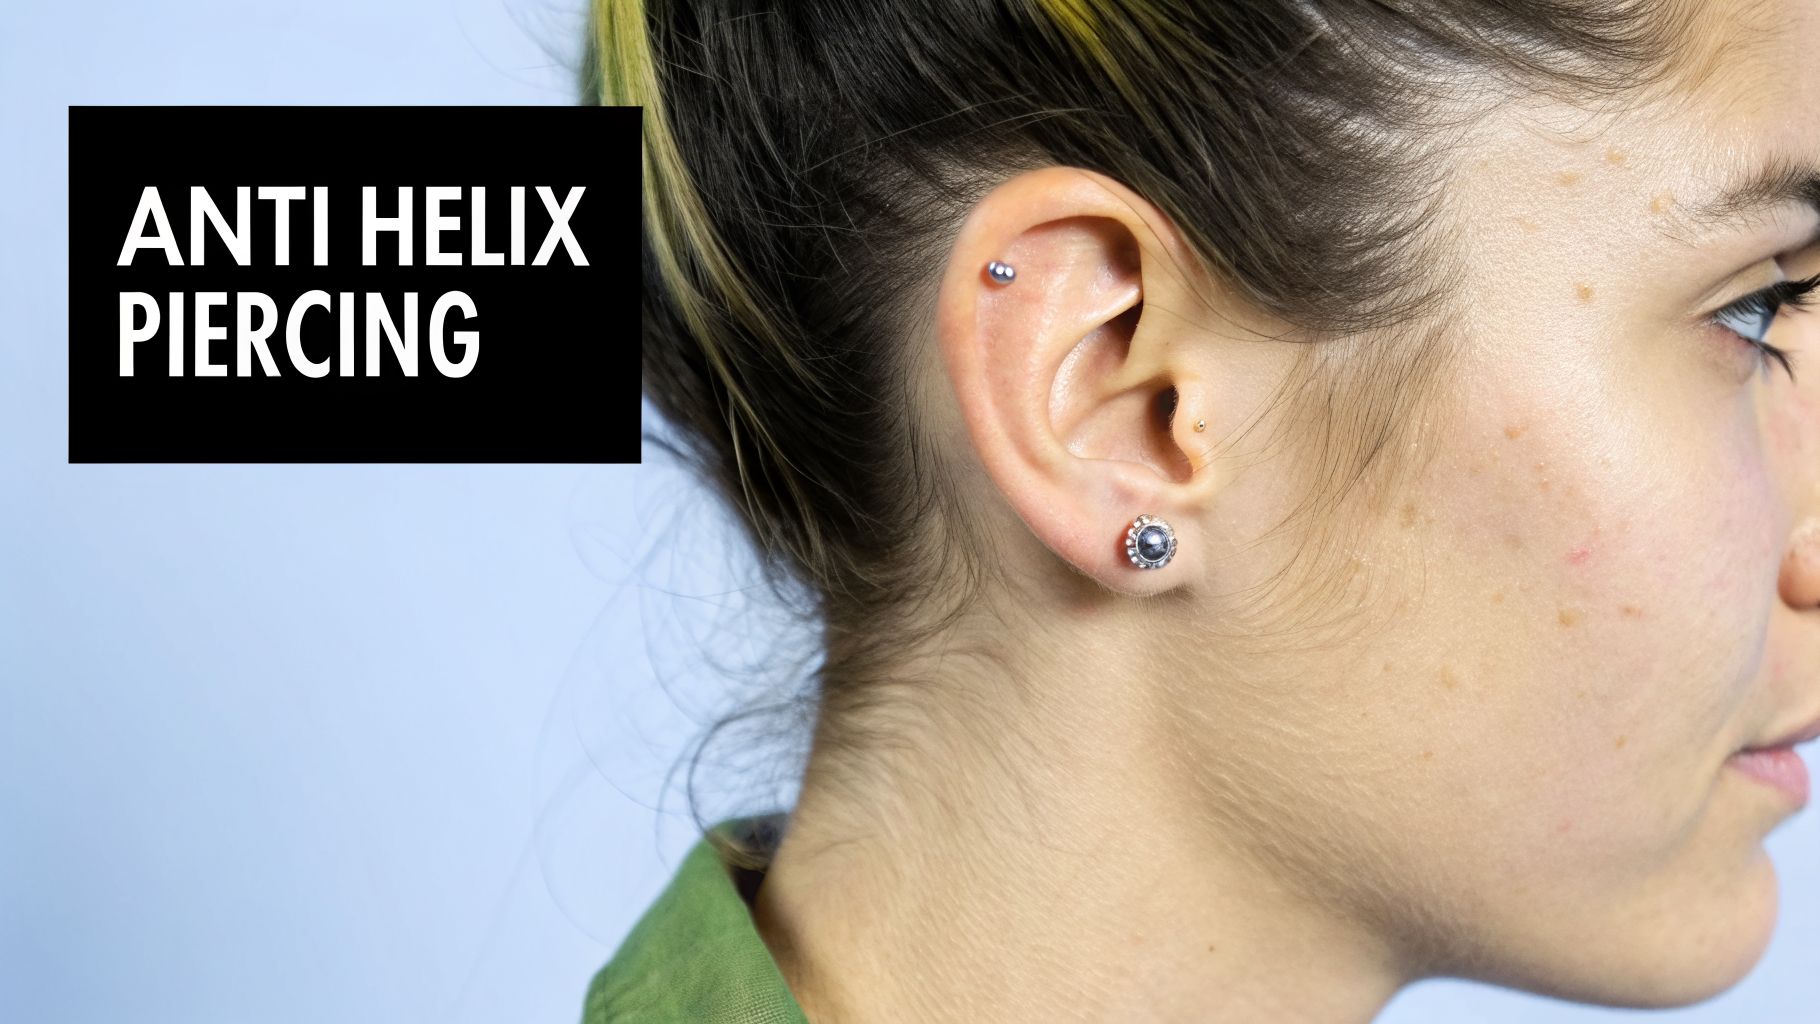
If you've ever admired the delicate studs nestled in the forward-facing ridge of cartilage just above the tragus, you've seen an anti-helix piercing. Sometimes called a forward helix, it’s a stunning choice that works with your ear's natural shape, adding a subtle but distinct flair to any ear styling project. Its unique placement makes it a go-to for anyone looking to add a little something special.
Getting to Know the Anti-Helix Piercing
So, you're considering an anti-helix piercing? You've come to the right place. This piercing has become incredibly popular, and for good reason. It creates a beautiful focal point on the ear without being too loud, sitting neatly on the cartilage fold that faces forward, just opposite the main outer rim (the helix). This spot is perfect for showing off tiny, decorative jewellery.
Unlike piercings on the outer curve of the ear, the anti-helix is tucked away, drawing the eye inward. Think of it as a beautiful little secret that adds depth and interest to your overall look. It shines on its own but also works wonderfully as part of a larger collection of ear piercings.
Why Is the Anti-Helix So Popular?
The real magic of an anti-helix piercing is its unique placement and incredible versatility. It’s a fantastic way to express your personality, whether it’s your very first piercing or the latest addition to a growing collection. Because of where it sits, it's the perfect stage for smaller, more intricate jewellery that might otherwise go unnoticed.
Here are a few reasons people fall in love with it:
- A Unique Look: It’s a step away from the more common lobe or standard helix piercings, giving you a look that feels more personal and curated.
- Works With Your Anatomy: A well-placed anti-helix doesn't just sit on your ear; it enhances its natural curves, creating a look that feels completely bespoke to you.
- Endless Styling Options: It’s perfect for everything from simple, tiny studs to brilliant little gems, letting you go as subtle or as bold as you feel.
The true beauty of an anti-helix piercing is how it collaborates with your individual anatomy. A professional piercer doesn't just make a hole; they analyse the curves and folds of your ear to find the perfect spot where the jewellery will sit beautifully and heal optimally.
Building Your Confidence for Piercing Day
Deciding to get a new piercing is an exciting moment of self-expression, and it should never feel like an intimidating medical procedure. Feeling confident and well-informed is the key to having a fantastic experience. We’ve put this guide together to walk you through the entire process, from understanding your ear’s anatomy to mastering aftercare.
We truly believe that knowledge is power. When you know exactly what to expect, any nervousness quickly turns into excitement. The single most important decision you'll make is choosing a reputable, professional piercer who puts your safety and comfort first. A great piercer will be your partner in this, guiding you through every step to make sure you'll love your new anti-helix for years to come.
Understanding Your Ear Anatomy and Finding the Perfect Spot
Getting an anti-helix piercing that looks fantastic and heals well is a team effort between you, your piercer, and the unique shape of your ear. It’s not like a lobe piercing that works for pretty much everyone. The success of this one really hinges on whether your ear has the right anatomy to support it.
Think of your ear as a tiny landscape of ridges and folds. The anti-helix is that forward-facing rim of cartilage that sits just above your tragus. For this piercing to work, that ridge needs to be well-defined – it can't be too flat or thin. If there isn't enough of a 'shelf' of cartilage, there's simply nowhere to safely place the jewellery, and it will likely struggle to heal or even reject.
Is an Anti-Helix Piercing Right for Your Ear?
The very first thing we do in any piercing appointment is have a good look at your anatomy. Our piercers are trained to assess the structure of your ear to make sure an anti-helix is a safe and viable option for you.
This isn't something you can really check for yourself at home. A piercer needs to physically feel the cartilage, check its thickness, and see how that ridge is formed. They're looking for a pronounced fold that can securely hold the jewellery in place without putting stress on the surrounding tissue. If it's too shallow, the piercing just won't have a good chance of healing properly.
It's so important to remember that not every ear is suited for every piercing. If we advise that an anti-helix isn't a good fit for you, it's never a personal thing. It's a professional judgement call made purely for your health, ensuring any piercing you get has the best possible chance to heal perfectly and last a lifetime.
The Art of Pinpointing the Placement
Once we’ve established that your anatomy is good to go, we get to the fun part: finding the perfect spot. This is where the real skill of a piercer comes into play. We’re not just poking a hole; we're placing a piece of art that should complement the natural curves of your ear.
There are a few things we're looking at during this mapping stage:
- The Angle: The piercing has to go through the tissue at a 90-degree angle. If it’s angled even slightly off, it creates constant pressure, which is a one-way ticket to irritation bumps and a very unhappy piercing.
- The Big Picture: We'll chat about the overall look you're going for. Are you dreaming of a double or triple anti-helix in the future? We need to plan for that from the start so everything lines up beautifully later on.
- Your Jewellery: The jewellery you choose makes a difference, too. A larger, decorative piece needs more room than a tiny stud, so we need to factor that into the placement right from the beginning.
Your piercer will use a sterile, single-use skin marker to make a small dot on your ear. We’ll then hand you a mirror so you can have a proper look and give us the thumbs up. This is your moment to make sure you're 100% happy with where it's going. After all, it's your ear, and you have the final say before we proceed. This little back-and-forth ensures you'll walk out with a result you absolutely love.
Pain and Healing: What You Really Need to Know
Let's get straight to the two questions on everyone's mind: "Will it hurt?" and "How long until it's healed?" When it comes to any piercing, especially cartilage, honesty is the best policy. So here’s the reality of it.
So, How Much Does an Anti Helix Piercing Hurt?
Most people will tell you the piercing itself feels like a quick, sharp pinch that’s over in a flash. On a pain scale of 1 to 10, clients typically put it at around a 5 or 6. It’s definitely more noticeable than a soft lobe piercing, but if you have other cartilage work like a helix or tragus, you’ll find the sensation very familiar. The feeling is so brief that it's over before you can really dwell on it.
The Healing Timeline: A Marathon, Not a Sprint
When it comes to healing cartilage, patience isn't just a virtue—it's a requirement. Unlike your fleshy earlobes that have plenty of blood flow, cartilage has a very limited supply. This means the healing process is much slower and needs a bit more respect.
It's a point worth stressing. In the South East of England, which includes our Croydon studio, the interest in body piercing is quite high—around 10.3% of adults have at least one, which is even higher than in London. With so many people getting pierced, it's vital everyone understands that cartilage healing takes time and commitment.
To help you know what to expect, we’ve created this stage-by-stage guide.
Anti Helix Piercing Healing Timeline
| Healing Stage | Typical Duration | What to Expect |
|---|---|---|
| Stage 1: Inflammation | First 1-2 weeks | Your body's initial reaction. Expect some redness, swelling, and tenderness. You might also notice a little bleeding or some clear/yellowish fluid (lymph). This is all normal! |
| Stage 2: Proliferation | Several weeks to months | The initial swelling and soreness will fade. Your body is busy building a new channel of tissue (a fistula) through the piercing. You'll likely see 'crusties' form—don't pick them! |
| Stage 3: Maturation | From 6 months to 1+ year | The home stretch. The piercing might look and feel healed on the outside, but the tissue inside is still strengthening. It's crucial not to change jewellery too soon during this final phase. |
Remember, this timeline is a guide. Everyone heals differently, so just focus on giving your body the time it needs.
This concept map shows how a professional piercer approaches placement. It’s not just about picking a spot; it’s a careful process of assessing your specific anatomy.
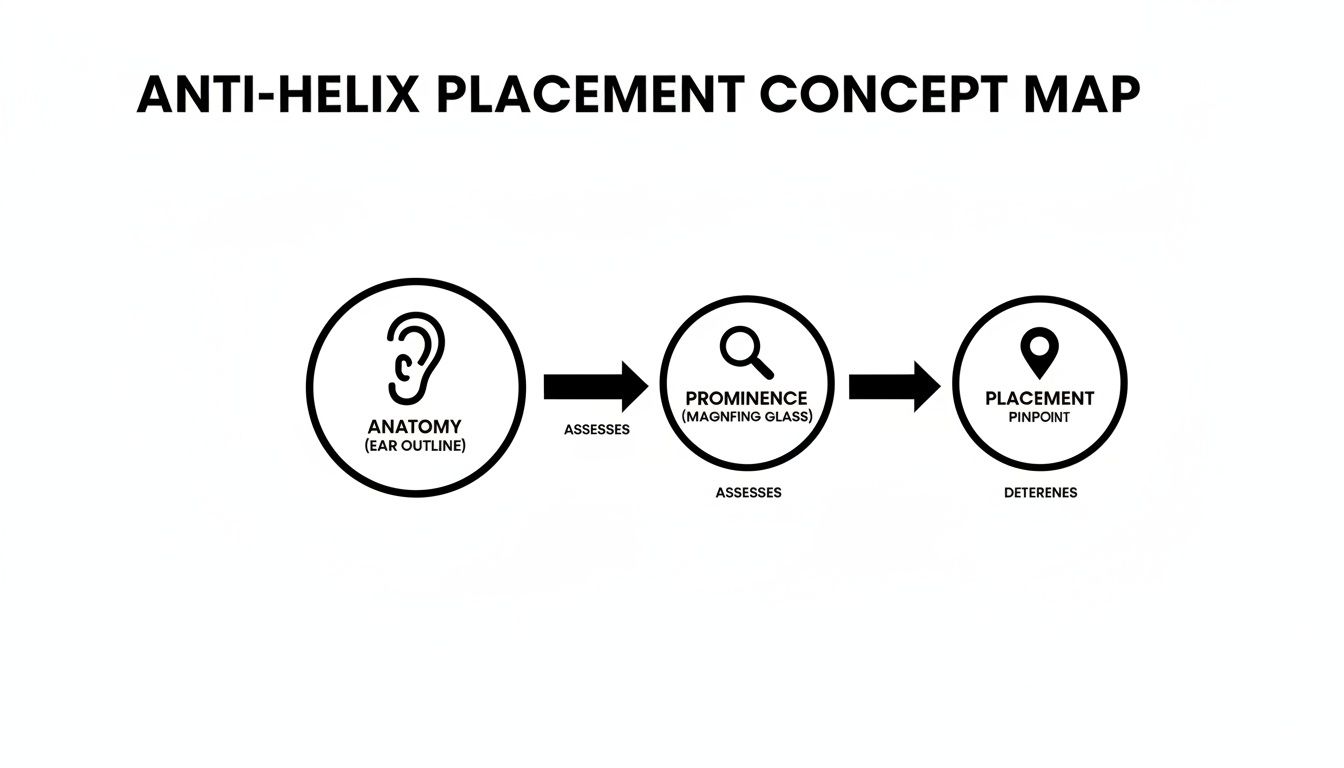
As you can see, we move from a general check of your ear's structure to evaluating the specific ridge before marking the final, perfect position for your jewellery.
How Long Does an Anti Helix Piercing Really Take to Heal?
So, what's the final verdict? You should be prepared for a full healing time of 9 to 12 months, and in some cases, a little longer.
Now, that doesn't mean it will be painful or swollen for a whole year. After the first couple of months, it should feel pretty comfortable day-to-day, as long as it's not being bumped or slept on.
The biggest mistake we see is people assuming a piercing is fully healed just because it doesn't hurt anymore. The final maturation stage is invisible, and swapping jewellery too early is the fastest way to get irritation bumps and set your healing back weeks, if not months.
Your overall health, stress levels, and—most importantly—how well you follow aftercare will all influence your personal healing speed. If you're curious about how this compares to other placements, check out our general guide on ear piercing healing times.
The bottom line is to be patient. Listen to your piercer, be diligent with your aftercare, and whatever you do, avoid sleeping on it. A travel pillow can be your best friend—just pop your ear in the hole to keep pressure off. Give your anti-helix the time and care it deserves, and you'll have a stunning and healthy piercing for life.
Choosing Your Perfect Anti-Helix Jewellery
Picking out the jewellery for your new anti-helix piercing is easily one of the most exciting parts of the process. But what you start with is about more than just aesthetics; it's the single most important factor for a smooth, successful healing journey. As professional piercers, we're incredibly particular about the jewellery we use for a fresh piercing, and for very good reason.
Think of it this way: the jewellery is the foundation for your piercing's future. You can't build a solid house on dodgy ground, and you can't expect a piercing to heal well with low-quality metal in it.
The Only Materials We Trust
When a piercing is new and healing, your body is on high alert. It can spot the difference between a safe, inert material and a cheap alloy in a heartbeat. The wrong metal can cause irritation, allergic reactions, and massive delays in healing. This is exactly why we only use implant-grade materials specifically designed to live happily inside the human body.
Here’s what you should be looking for:
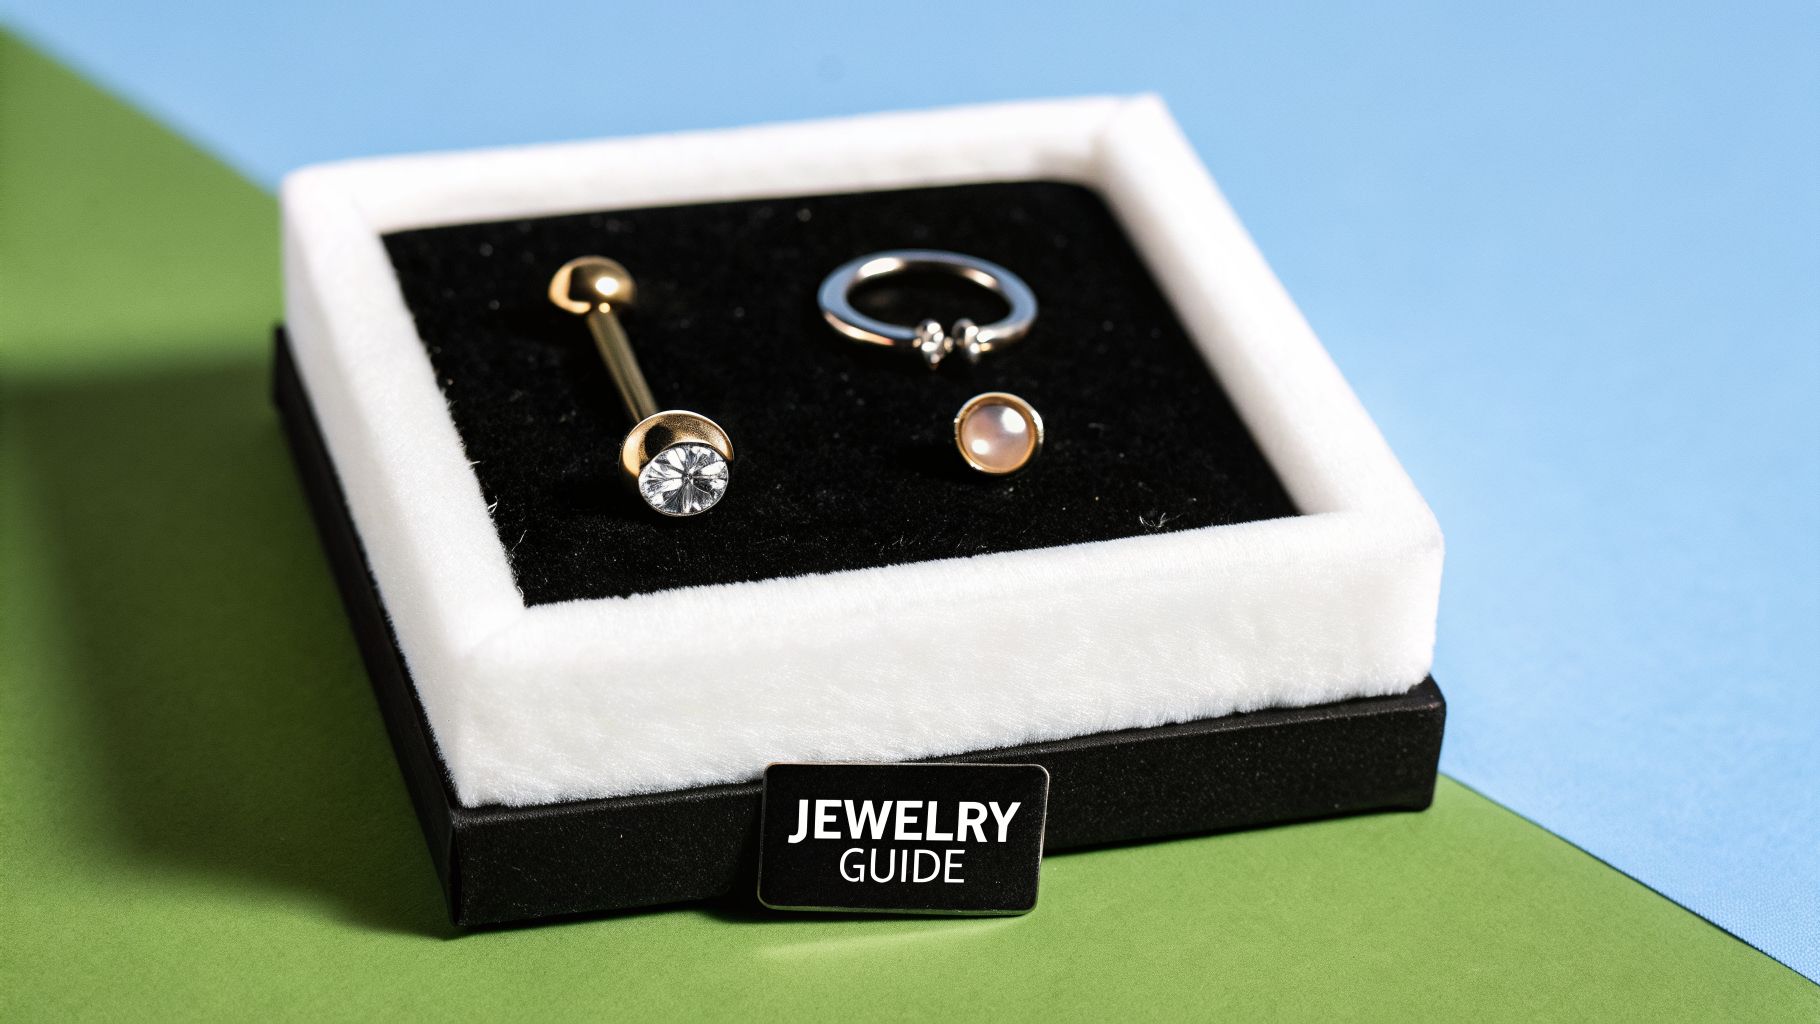
- Implant-Grade Titanium (ASTM F-136): This is our go-to and the industry's top choice. It’s the very same stuff used for medical implants like bone screws. It's completely nickel-free, surprisingly lightweight, and has a mirror-like polish that won't tarnish or trigger the nasty reactions often blamed on 'surgical steel'.
- Solid 14k or 18k Gold: If you're after that classic gold look, solid gold is a beautiful and safe choice. The key word here is solid. Gold-plated jewellery is a huge no-no, as the plating inevitably wears away, exposing your delicate healing tissue to whatever mystery metal is hiding underneath. We only use gold that is nickel-free and alloyed to be completely body-safe.
A lot of people assume 'surgical steel' is a safe bet for a new piercing. The truth is, it's a catch-all term for a huge range of metal alloys. Most of them contain enough nickel to cause a reaction in many people. Sticking to verified implant-grade titanium or solid gold takes that gamble completely off the table.
Why Your First Piece of Jewellery Is Longer
When you look at your initial jewellery, you'll notice the post is a bit longer than you might expect. This isn't a mistake—it's essential.
Every new piercing swells, and your anti-helix is no exception. That extra length provides the necessary space to accommodate this swelling. If the bar were too short, it would press into the tissue, causing pain, embedding, and some serious healing complications.
The Flat-Back Labret: Your Piercing’s Best Friend
For a fresh anti-helix, we will almost always fit you with a flat-back labret stud. It's a simple, elegant piece of engineering made of a decorative top, a straight post, and a small, flat disc for the back.
We insist on this style for a few critical reasons:
- It avoids snags. The low-profile disc on the back is a game-changer. It’s far less likely to get snagged on your hair, glasses, or pillow than a traditional ball-back barbell or a ring.
- It helps you heal straight. The straight post acts like a splint, guiding the piercing channel (the fistula) to heal in a perfectly straight line. Rings, on the other hand, can twist and pull, causing an awful 'cheesecutter effect' and chronic irritation bumps.
- It’s simple to clean. With only two clear points of entry, keeping the piercing clean and free of crusties is so much easier.
I know that tiny, snug-fitting ring is probably what you're dreaming of, but it’s crucial to be patient. You need to wait until your anti-helix is 100% healed (which takes at least 9-12 months) before you can safely switch to a hoop.
Starting with a flat-back labret gives you the best shot at a fast and problem-free heal. Once that's done, you'll have a lifetime to play with all the endless styling options out there.
What to Expect During Your Piercing Appointment
It’s completely normal to have a few butterflies before getting a new piercing. But knowing exactly what’s going to happen, step-by-step, can turn those nerves into pure excitement. We want the whole experience to feel professional, collaborative, and, most importantly, comfortable for you.
So, let's pull back the curtain and walk you through what your appointment will look like from start to finish.
From the moment you step into the studio, our first job is to make you feel welcome and relaxed. We'll start with a friendly chat to confirm you're here for an anti-helix piercing, go over your consent form, and answer any last-minute questions you might have. No rush, no pressure.
Consultation and Marking the Perfect Spot
Honestly, this is the most important part of the whole appointment. As we’ve mentioned, a great anti-helix piercing is all about working with your individual anatomy. Your piercer will take a close look at your ear, feeling the cartilage ridge to make sure it's defined enough to hold the jewellery and heal well.
Once we’re sure your ear is a good candidate, the fun part begins. Using a sterile, single-use skin marker, your piercer will suggest a placement with a tiny dot. Then, we’ll hand you a mirror. This is your moment to be picky!
We will never proceed until you are 100% happy with the placement. This is your ear and your piercing. We encourage you to take your time and make sure the spot feels absolutely perfect for you.
The Sterile Setup and Piercing Procedure
Once you’ve given the green light on the placement, we get everything ready. Your piercer will set up a sterile field, and you’ll see them open all the equipment right in front of you. Every single thing that touches your skin—the needle, the jewellery, even the gauze—is brand new and individually sealed for your safety.
We only ever use a brand-new, single-use, hollow needle for every cartilage piercing. It’s sharper, more precise, and much gentler on the tissue than a piercing gun, which causes unnecessary trauma. A needle creates a clean channel, which is exactly what you want for a smoother, faster healing journey. If you’re curious about the details, we break it all down in our guide on piercing gun vs needle techniques.
When you’re ready, we'll have you lie down and get comfortable. Your piercer will ask you to take a nice deep breath in, and as you breathe out, they’ll perform the piercing. The actual sensation is very quick—just a sharp pinch that’s over in a second or two. Before you can even think about it, your beautiful, implant-grade jewellery will be securely in place.
Final Checks and Aftercare Guidance
With the jewellery in, your piercer will clean the area one last time and double-check that everything looks perfect. Then comes the aftercare talk. They will walk you through exactly how to clean and care for your new anti-helix piercing to ensure it heals beautifully.
We'll make sure you leave the studio feeling totally confident and knowing what to do. You'll get an aftercare guide to take home, and we'll remind you that we're only a message away if you have any questions during healing. Our goal is to see you walk out the door, all nerves gone, just thrilled to show off your new piercing.
Mastering Your Aftercare Routine

You’ve got your beautiful new anti-helix piercing, and now the healing journey begins. How you look after your piercing over the next few months is the single most important factor in a smooth, successful recovery. It might sound like a lot of pressure, but the best aftercare is actually surprisingly simple.
Successful healing isn’t about complicated routines or constantly checking on the jewellery. In fact, it's quite the opposite. The golden rule is to be gentle, be consistent, and let your body do its thing.
The Less Is More Approach
One of the biggest mistakes we see is people over-cleaning or using harsh products on a new piercing. Your body is incredibly good at healing itself; your job is simply to provide a clean and stable environment for it to work its magic. This is why we are huge advocates for a ‘less is more’ philosophy.
For your new anti-helix piercing, the only product you need is a sterile saline solution. These sprays are specifically formulated for wound care. They’re sterile, gentle, and have the perfect salt-to-water ratio, which is why they are far better than any homemade salt soaks.
Your Daily Cleaning Routine
- Wash Your Hands: Before you even think about touching your ear, wash your hands thoroughly with soap and water.
- Spray the Area: Give the front and back of the piercing a quick mist with your sterile saline solution. You don’t need to drench it; a gentle spray is perfect.
- Gently Dry: Use a fresh piece of non-woven gauze or a paper towel to carefully pat the area dry. Try to avoid cotton buds or bath towels, as their fibres can snag on the jewellery and cause irritation.
That’s it. Do this twice a day—once in the morning and once in the evening. There's no need to twist, turn, or rotate the jewellery. Moving it around only tears the delicate new tissue your body is working so hard to build.
Adopting the LITHA Method
Outside of your twice-daily cleaning, the best advice we can give you is to LITHA—Leave It The Hell Alone. This simple acronym is the absolute cornerstone of great piercing aftercare. It means fighting that temptation to poke, prod, or fiddle with your new jewellery.
The LITHA method is all about respecting the healing process. Every time you touch or move the jewellery unnecessarily, you’re causing tiny amounts of trauma and introducing bacteria into what is essentially a small wound. Let it be, and your piercing will thank you for it.
This also means being mindful of anything that might catch or knock your anti-helix. Be extra careful when brushing your hair, putting on glasses, or pulling jumpers over your head. These small moments of awareness make a huge difference. For a deeper dive into this topic, our guide on helix aftercare has some fantastic tips that apply to all cartilage piercings.
Navigating Common Setbacks
Even with perfect aftercare, you might run into a few bumps in the road (sometimes literally!). The most common issues are irritation bumps and difficulty sleeping.
- Avoid Sleeping On It: This one is non-negotiable. Putting pressure on a new piercing all night will cause swelling, irritation, and can even permanently change the piercing's angle. A travel pillow can be a lifesaver here—just pop your ear in the hole to sleep comfortably on your side.
- Don't Panic About Bumps: If you notice a small bump forming, stay calm. It’s almost always a sign of irritation, not an infection. Take a moment to think: have you been sleeping on it? Did you snag it? Go back to basics with your simple saline cleans and the LITHA method, and it will usually settle down on its own.
A Few Common Questions About the Anti-Helix Piercing
It's totally normal to have a few last-minute questions before getting a new piercing. To help put your mind at ease, I've gathered some of the most common queries we get from clients in the studio. Think of this as a final chat to clear up any lingering doubts before you take the plunge.
Can I Still Wear My Earbuds?
This is a big one, especially for music and podcast lovers. For the first few months, you’ll need to avoid earbuds or any over-ear headphones that press directly on your new piercing. It’s not just about the pressure, which can be incredibly irritating; they can also be a breeding ground for bacteria.
The best solution is to simply use an earphone in your other ear for a while. Once everything is fully healed and no longer tender to the touch, you can usually go back to using your favourites. Just be mindful of how they fit against your new jewellery and your ear's unique shape.
What's the Minimum Age for This Piercing?
In the UK, you need to be 16 or older to get a cartilage piercing like the anti-helix, and you'll have to show a valid photo ID. If you're under 16, a parent or legal guardian must come with you to give their consent in person.
We're sticklers for safety and the law, so we follow our local council's regulations to the letter. It's always a good idea to give the studio a quick call beforehand to double-check exactly what ID they need from you.
A quick note on anatomy: People often ask if an anti-helix is the same as a snug piercing. The key difference is the angle and placement. A snug goes horizontally through the ridge of the anti-helix, whereas an anti-helix piercing sits vertically on that forward-facing rim of cartilage above the tragus. We'll always assess your ear to see which will heal best and suit you most.
How Much Will It Actually Cost?
The price you pay is made up of two parts: the piercing service fee and the cost of the jewellery you choose. Think of the service fee as covering the piercer's time, expertise, and all the sterile equipment used to ensure a safe procedure.
Then comes the fun part: picking your jewellery! We only use implant-grade materials, but the final price will depend on whether you go for a simple, high-quality titanium stud or a more decorative solid gold piece. The best way to get an accurate figure is to contact the studio directly for a quote.
Ready to book your anti-helix piercing with a team that puts your safety and personal style first? Head over to Piercing Near Me to find our trusted studios in Croydon or Bournemouth and schedule your appointment today. https://piercingnearme.co.uk