
You've seen the photo: a small, polished stone sitting neatly at the nape of someone's neck, visible above a collar and almost impossibly clean. It looks simple enough to book on impulse. Then real life begins, with hair catching on the top, a coat rubbing the area, a seatbelt crossing it, and a restless night spent turning your head into the pillow.
A dermal piercing on the neck can look elegant and distinctive, but it isn't a low-maintenance version of an ordinary piercing. The neck moves whenever you speak, sleep, turn your head, or lift your shoulders. Its skin also meets clothing, straps, hair and jewellery throughout the day. Those repeated small movements often matter more than whether you remember one extra cleaning session.
Why a Neck Dermal Is Different From Other Piercings
Someone may scroll past a sleek dermal on a model's nape, book an appointment, and assume the aftercare will resemble a cheek or chest piercing they healed without trouble. That comparison can be misleading. A neck dermal sits in a site that bends, stretches and rubs almost constantly, so the anchor can experience repeated mechanical stress before the surrounding tissue has settled.
The most common trouble isn't always poor cleaning. It can be a shirt collar catching the top as you dress, long hair looping around the jewellery, a scarf pressing against it during a commute, or a backpack strap landing directly over the site. Sleeping creates another challenge because many people rotate their head or rest part of the neck against a pillow without realising it.
Practical rule: Treat the neck as a high-friction placement, not simply as another patch of skin.
Why movement changes healing
A traditional piercing passes through tissue and forms a channel between two openings. A dermal anchor has one visible exit point and relies on tissue growing around a small base beneath the skin. If the anchor is repeatedly pulled, compressed or twisted, the body may gradually push it towards the surface.
That's why a beautiful placement can still become a difficult piercing if it doesn't fit your routine. A person who wears high work collars, cycles with straps across the shoulder and sleeps on their back may face different practical problems from someone with loose clothing, short hair and a stable sleeping position.
The right question before booking
Don't ask only whether the piercing will look good immediately after the appointment. Ask whether the exact location will survive your normal week. Consider uniforms, gym clothing, seatbelts, helmets, necklaces, hair styling and the way you sleep.
The sections below cover what sits beneath the skin, how placement decisions are made, what the procedure involves, the warning signs that need medical help, and how to assess a UK piercer before you pay a deposit.
What a Dermal Anchor Actually Is
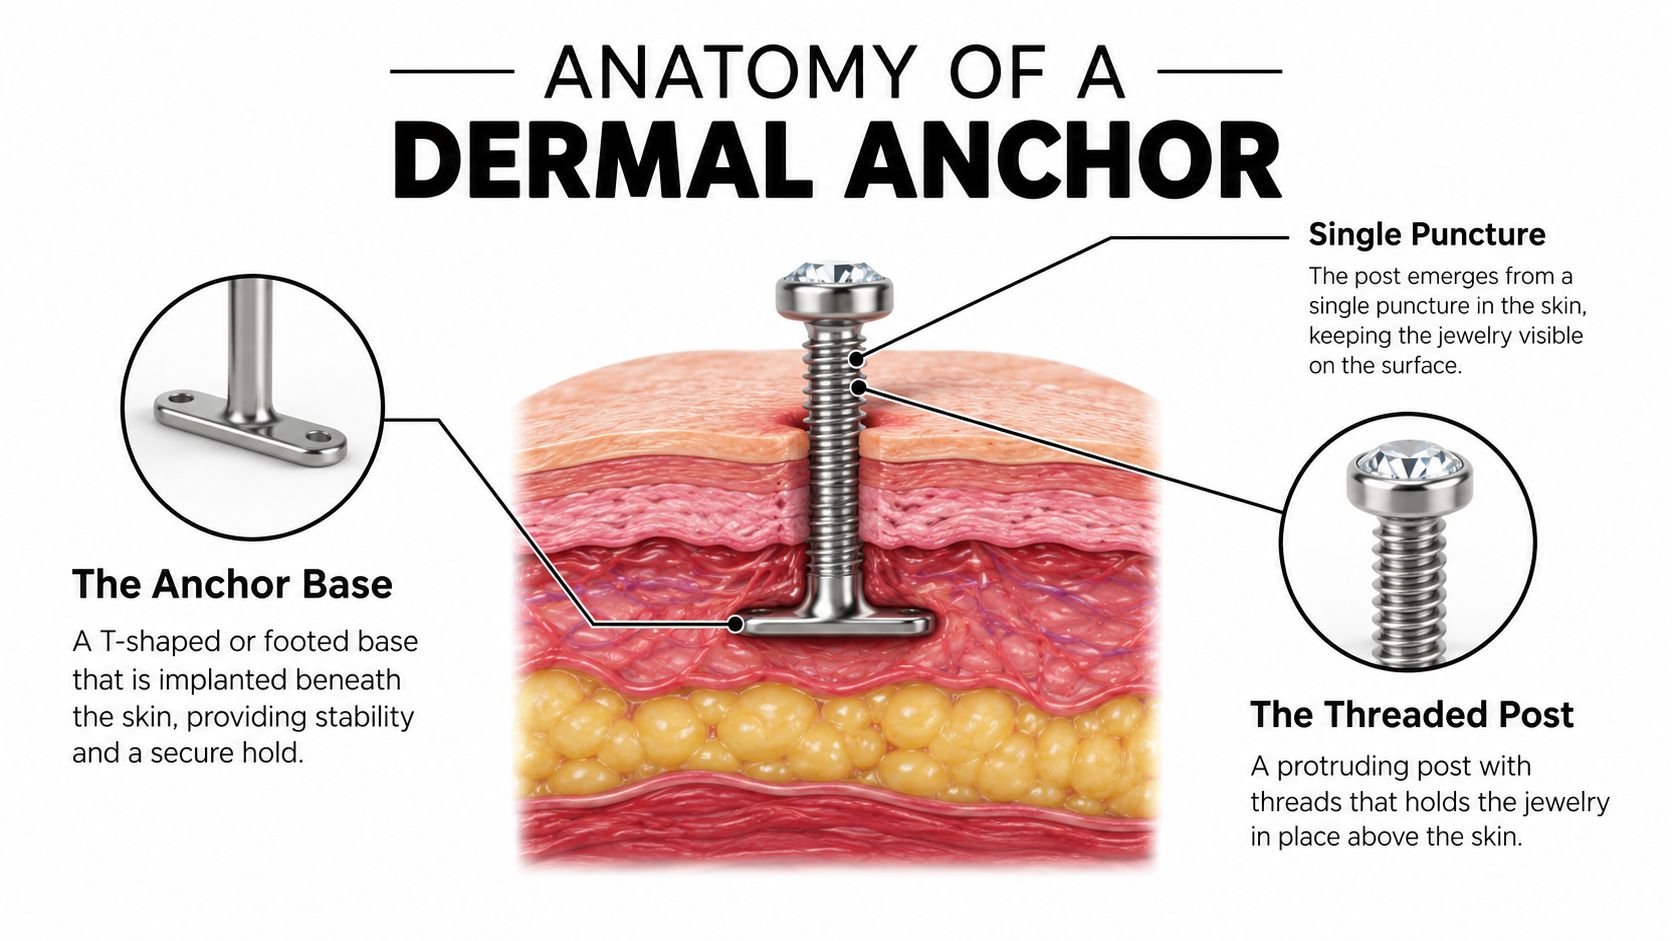
A microdermal, also called a single-point piercing, uses a small anchor placed beneath the surface of the skin. The anchor usually has a T-shaped or footed base, with a threaded post rising through one small puncture. A decorative top then screws onto that post, so the visible jewellery can be changed without creating a second opening.
The process is easier to understand in three layers:
- The anchor base sits under the skin. Its shape gives the surrounding tissue something to hold around.
- The threaded post reaches the surface through one opening.
- The jewellery top attaches to the post and provides the visible design.
How the anchor stays in place
With a conventional piercing, the body heals a fistula, meaning a lined tunnel of tissue between two openings. A dermal anchor heals differently. The skin forms a pocket around the base, and that tissue helps hold the implant in position.
The hold is more limited than a deep, fully healed piercing channel. That doesn't mean every dermal will fail, but it does mean rejection and migration are genuine possibilities, particularly in a mobile area such as the neck. If the top starts sitting higher, the skin becomes increasingly thin over the base, or the anchor appears to move, a professional should assess it rather than you waiting for it to “settle”.
Jewellery materials and placement
Implant-grade titanium is a common choice for the anchor and is valued for its compatibility with healing tissue. Some studios may also discuss niobium, depending on their jewellery range and the specific design. Ask the piercer to identify the material and explain why it suits your skin and the proposed placement.
The nape and back of the neck are recognised placement options for a microdermal anchor. You can compare the terminology and typical creative placements in this microdermal anchor piercing guide. The important point is that the jewellery top is only the visible part. The anchor's size, shape, depth and relationship with the skin determine how well the piercing can tolerate everyday movement.
Neck Anatomy and Placement Choices
A skilled piercer doesn't choose a neck site from a photograph alone. They assess how much usable tissue is available, how the skin moves when you turn your head, and what structures lie beneath the proposed mark. Skin thickness and tension can vary between the nape, the side of the neck and the hollow above the collarbone.
The most stable-looking spot while you're lying down may behave differently once you sit, speak and move your shoulders. A careful consultation should therefore include marking and checking the position in an upright posture.
Areas that demand caution
High-movement zones include areas over the trapezius, near the jawline and anywhere the skin folds or stretches as you turn your head. The neck also contains important superficial structures. A piercer must avoid the external jugular vein, pulse points along the carotid, superficial lymph node chains and the bony prominence of the cervical spine.
This isn't a reason to panic. It's a reason to choose someone who assesses anatomy rather than treating every neck as interchangeable. A proposed site should have enough tissue for the anchor without placing it directly over a pulse point, a prominent bone or a repeatedly compressed crease.
Comparing common zones
| Zone | Typical Stability | Main Concerns |
|---|---|---|
| Upper nape | Often more stable when the skin is broad and relatively flat | Hair, collars, pillow pressure and clothing catches |
| Flat area behind the ear | Can offer a defined surface away from the central spine | Hair movement, glasses or mask straps, head turning |
| Side of the neck | Visually striking but more exposed to movement | Jaw movement, hair, collars and nearby superficial structures |
| Hollow above the collarbone | May suit some anatomy and jewellery styles | Shoulder movement, straps, clothing pressure and thinner tissue |
| Over the trapezius | Usually a high-motion choice | Muscle movement, shoulder straps and repeated friction |
| Directly over the cervical spine | Poor choice for many clients | Bony pressure, sleeping contact and limited soft tissue |
The upper nape and the flatter area just behind the ear often make more practical sense than a point over a moving muscle or bone, but there's no universal safe mark. Your piercer should draw the placement, let you inspect it from different angles, and adjust it while you're sitting upright.
What Happens During the Piercing Procedure
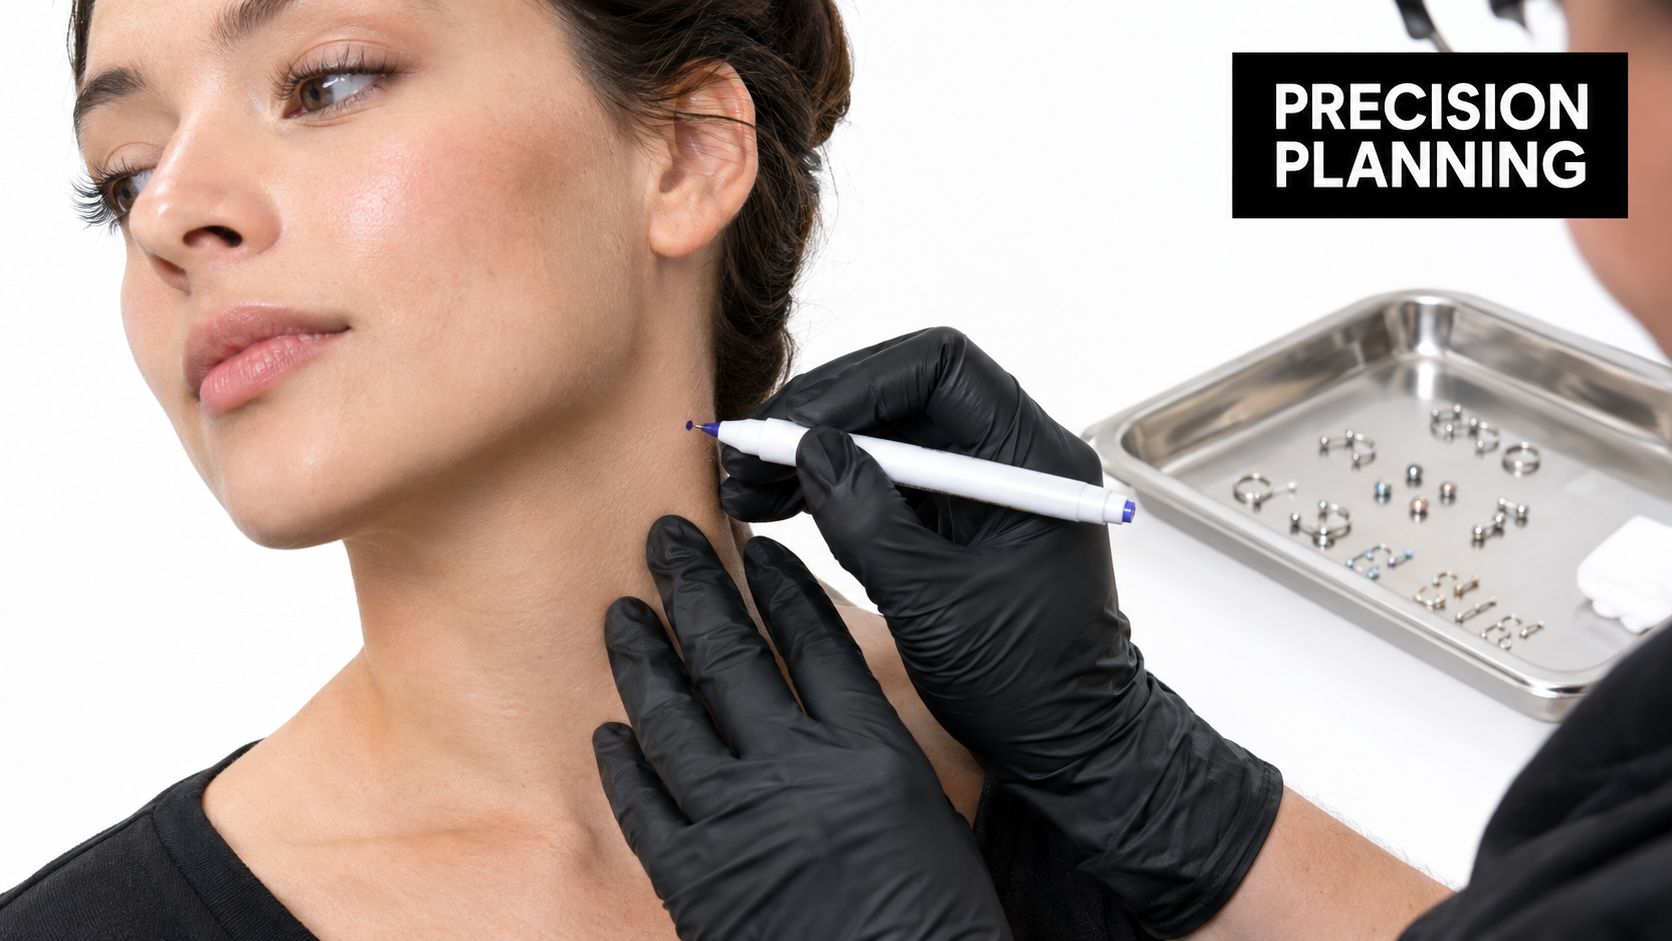
A proper appointment starts with discussion, not a rushed mark. The piercer should assess the skin, talk through the location, explain the jewellery and ask about clothing, work, sport, allergies and previous healing problems. They'll normally mark the site with a single-use surgical pen and check that the position remains suitable while you sit naturally.
Sterile preparation comes first
You should see the piercer open a sterile, single-use needle or 11 or 14 gauge cannula from sealed packaging. The studio should use an autoclave for reusable equipment, keep the treatment area visibly clean and separate piercing work from activities that could compromise hygiene.
The skin may be prepared with chlorhexidine or surgical spirit, according to the studio's protocol and your skin needs. The piercer can use their non-dominant hand to stabilise and stretch the skin, helping them create a controlled pocket in the correct plane.
Creating the pocket and fitting the jewellery
Depending on their training and technique, the piercer may use a needle, a 3 mm skin punch or a small scalpel to create the pocket in the dermis. The anchor then slides beneath the skin, with the threaded post left at the single opening. The skin settles around the base, and the chosen top is screwed into place.
A breathable adhesive dressing may protect the fresh site. You should feel pressure and deliberate handling rather than a chaotic or hurried procedure. Pain varies with anatomy and technique, but rushing is never a sign of quality.
Before leaving, confirm how to clean the area, what clothing to avoid, when the studio wants to review it and who to contact if the top loosens or the anchor begins to shift. A responsible piercer will explain removal too. You shouldn't pull out a dermal anchor at home.
Risks Specific to Neck Dermals You Should Weigh
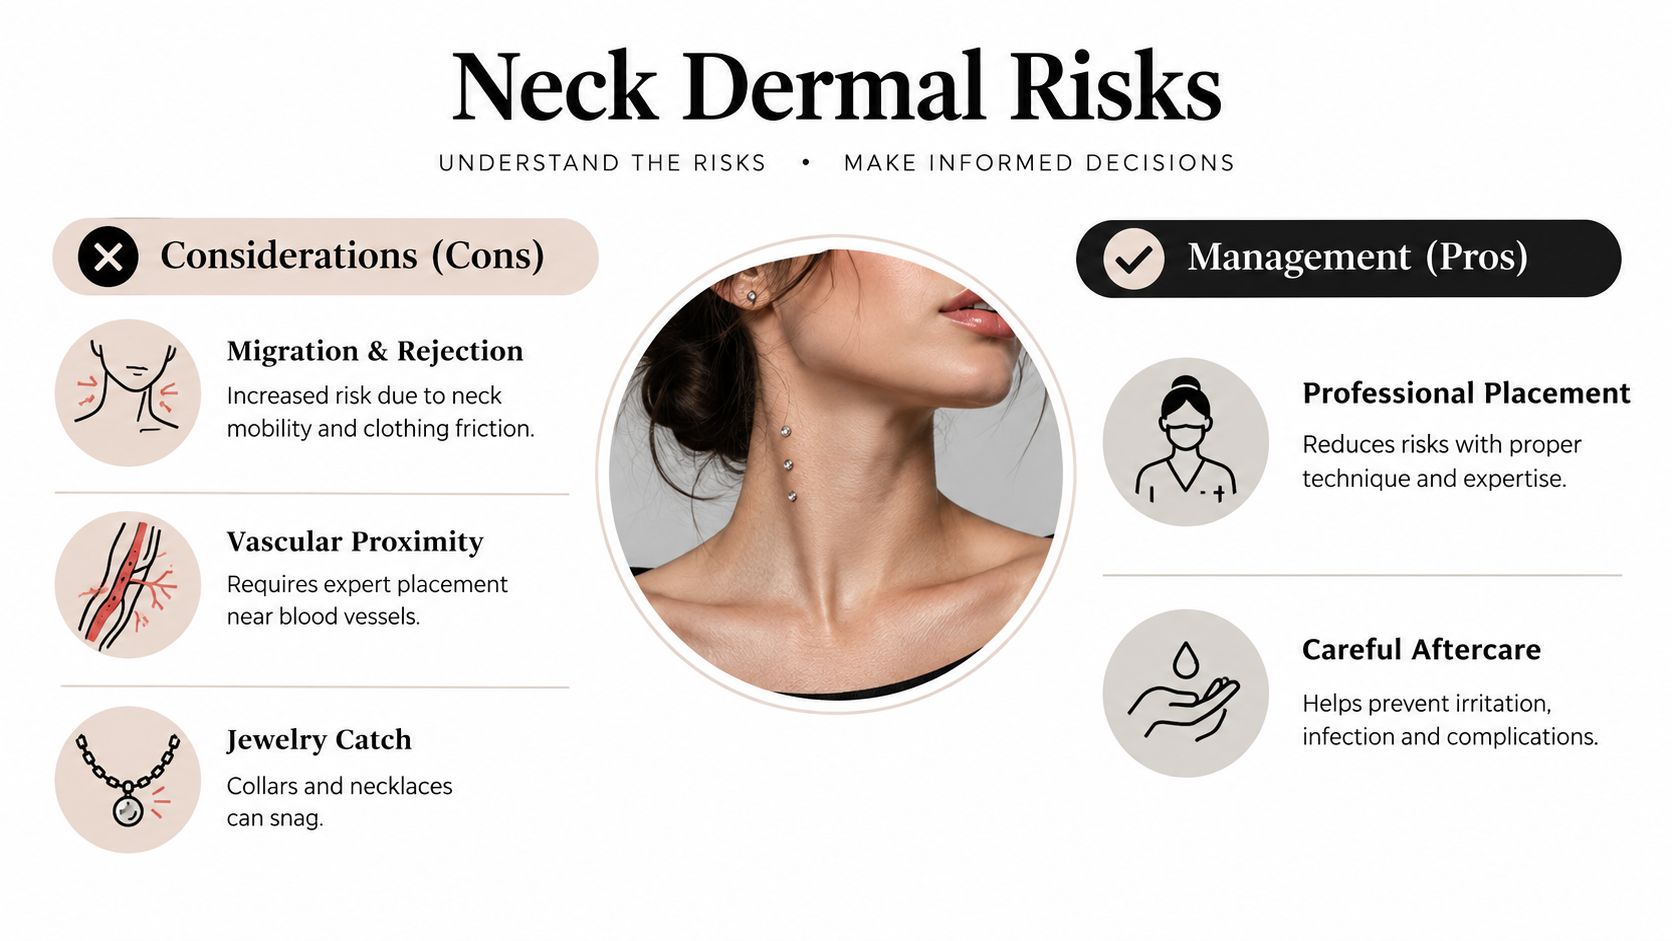
Neck dermals aren't automatically unsafe, but they deserve a more realistic conversation than “it's tiny, so it's easy”. Migration, rejection, irritation, infection and scarring can all occur. The neck adds repeated motion and contact from clothing, hair and sleeping, which can make mechanical problems harder to avoid.
A large population-based survey in England, published in 2008, recorded complications in 27.5% of 1,940 body piercings, while 12.9% were serious enough for people to seek further help. Among 16 to 24-year-olds, complications affected 31.0% of 754 piercings, and 15.2% led to professional help. The same survey recorded swelling in 15.4% of piercings and identified infection as one of the common problem types. You can read the England population-based piercing survey for the full findings.
These figures aren't a prediction of what will happen to your neck dermal. They do show why complications should be treated as a real possibility rather than a remote inconvenience.
Mechanical failure is a central concern
The anchor can migrate if daily friction continually pulls at the skin. Rejection happens when the body gradually moves the implant towards the surface, sometimes leaving a visible scar after removal. Collars, scarves, seatbelts, necklaces, hair and pillows can all become sources of repeated pressure.
The neck also has superficial veins, lymph node regions and nerves near some popular placement areas. A piercer must avoid the external jugular vein, carotid pulse points and other structures rather than relying on appearance alone. If a mark sits over a bony prominence or moving muscle, the jewellery may experience more pressure than the client expects.
Removal and scarring matter before you book
A dermal isn't an ordinary stud that you can slide out. Removal should be handled by the studio or an appropriately trained medical professional, particularly if the anchor has become embedded, infected or surrounded by substantial scar tissue. The British Association of Dermatologists' information on dermal piercings highlights concerns around the invasive nature of these procedures and possible complications such as inflammation, infection, embedding, migration and scarring.
A Wales look-back exercise involving clients of premises with poor hygiene practices found that 36.3% of 579 respondents reported a skin infection after their procedure. The report also included neck piercings in its dataset. Its findings are context-specific and don't represent every professional studio, but they reinforce why sterile technique and prompt medical attention matter. The Wales public-health report explains the background and limitations.
Aftercare That Fits the Way You Actually Live
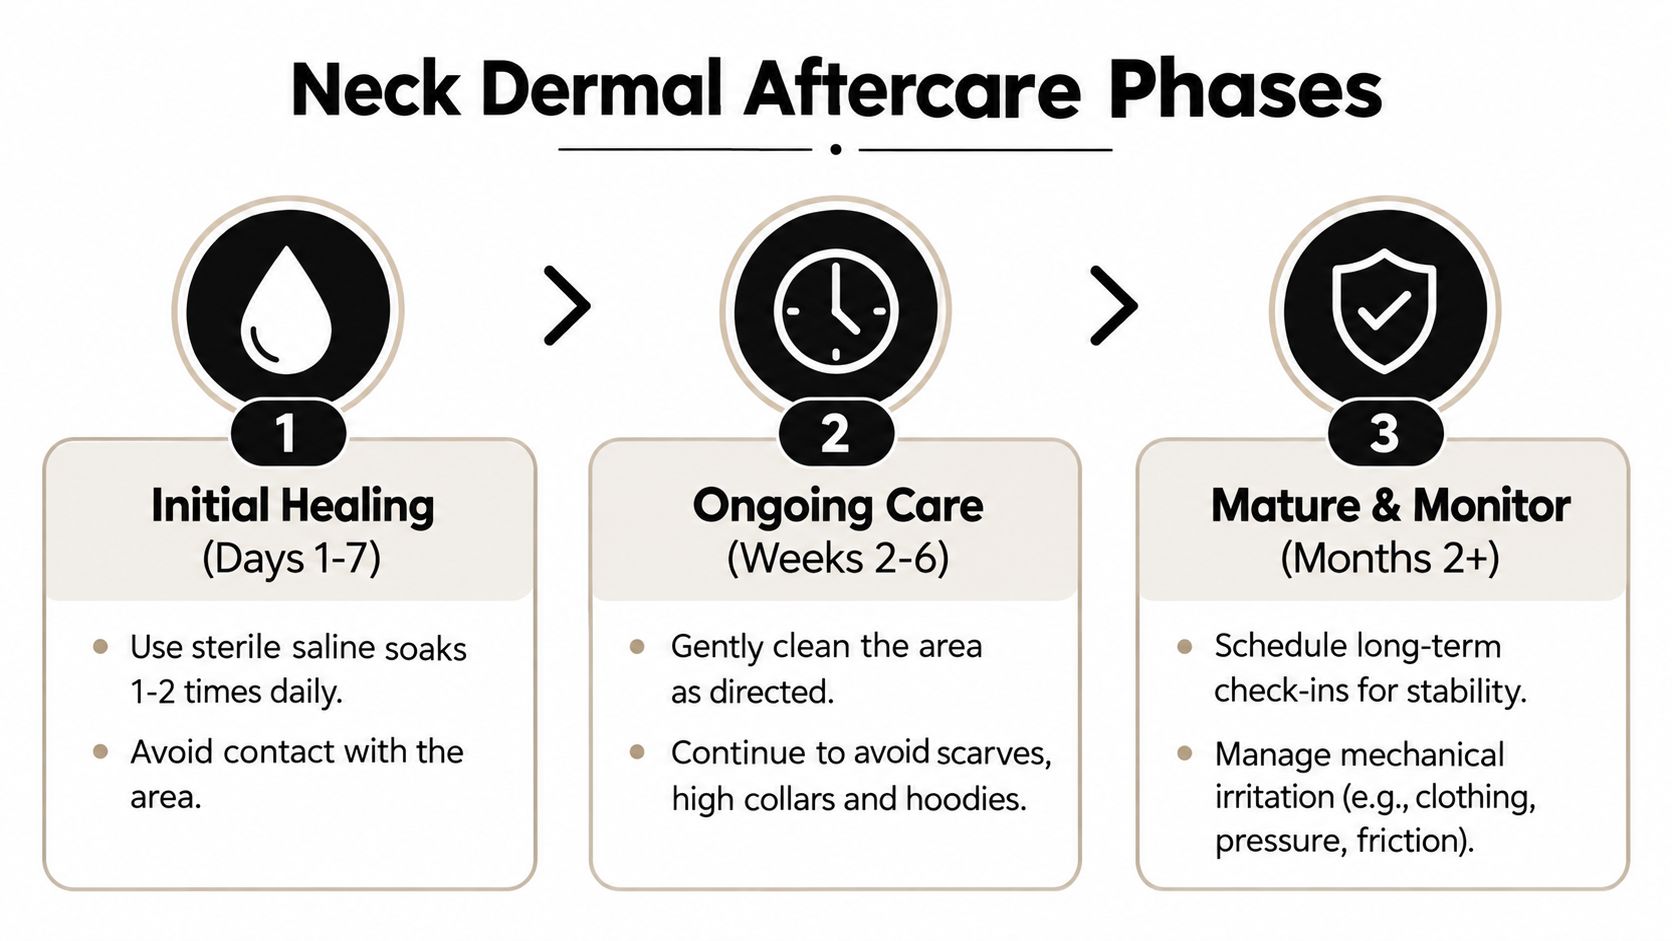
Cleaning matters, but neck aftercare succeeds or fails largely through snag prevention. A perfect saline routine won't compensate for a collar catching the top several times each day. Before booking, plan how you'll protect the site at work, in bed, during exercise and while washing your hair.
Torbay Council guidance for microdermal implants advises cleaning the implant twice each day, washing hands with warm water and liquid soap first, drying them thoroughly and seeking medical attention if infection or allergy signs appear. The UK saline spray guide can help you choose a practical cleaning product, but follow your piercer's individual instructions if they differ for your anatomy.
Build the routine around friction
Use clean hands and sterile saline, then allow the area to dry gently. Don't rotate, twist or lift the top to “check underneath”. Touching the jewellery repeatedly disturbs the healing pocket and gives hair, fabric and fingers more opportunities to irritate the opening.
For the early healing period, avoid scarves, high collars, hoodies with zips and backpack straps that cross the site. Tie long hair away from the jewellery, and consider whether necklaces, helmet straps or uniform fastenings will repeatedly contact the area.
Make sleep and clothing part of the plan
Sleep on the opposite side where possible. A U-shaped travel pillow can help keep the neck from pressing directly into bedding, provided it doesn't rub the jewellery. Loose, smooth fabrics are usually easier to manage than textured knitwear or tight necklines.
Don't submerge the piercing in baths, hot tubs or swimming pools while it heals. Running shower water is generally easier to control than soaking, and you should avoid directing strong water pressure at the top.
A flat, well-fitted disc usually catches less than a high-profile gem during healing. Tissue may need six to nine months before it reliably holds the anchor, and arranging studio check-ups at four and eight weeks gives the piercer an opportunity to identify pressure, looseness or early migration. Those timeframes are practical guidance from the requested care plan, not a guarantee for every body.
Recognising Infection and When to Seek Medical Help
After a collar catch, a neck dermal may feel tender, look slightly swollen or show mild irritation. These reactions should gradually settle once the mechanical trigger stops. Concern rises when pain intensifies, warmth increases, or redness spreads beyond the opening rather than staying local.
The NHS guidance on infected piercings identifies swelling, pain, heat, marked redness or darkening, and blood or pus as warning signs. Thick discharge, green or foul-smelling fluid, throbbing pain, red streaks, or increasing warmth around the anchor warrant prompt attention. For a fuller checklist, see how to tell if a piercing is infected.
Use a simple decision framework
If irritation follows a snag, remove the source of friction, wash your hands, and return to gentle aftercare. Avoid repeated touching or cleaning experiments. Observe whether the discomfort improves as the mechanical pressure ends.
Contact your GP promptly if redness spreads, the skin becomes hotter or more painful, you feel unwell, or tender lymph nodes appear under the jaw or in the neck. Fever and swollen or tender glands also need medical review. The local authority body-art aftercare advice explains why spreading redness and symptoms affecting your general health should not be managed solely at home.
Know when the neck makes symptoms urgent
Use NHS 111 or seek urgent help if an infection appears to be worsening, swelling develops quickly, or the anchor is visibly being pushed out. Difficulty swallowing, changes in breathing, or swelling close to the throat require urgent assessment. The neck leaves less room for waiting when swelling is near the airway.
Do not remove the jewellery unless a clinician tells you to. NHS advice warns that removal during infection can let the opening close, potentially trapping infection or making assessment harder. Prompt professional care may still allow the piercing to be managed safely.
Choosing a Reputable Piercer in the UK
A portfolio full of attractive neck dermals isn't enough. Look for a practitioner who can explain anatomy, jewellery materials, removal and aftercare without minimising the risks. A competent studio should make you feel comfortable asking difficult questions before you hand over money.
Check the studio before the appointment
You should see a clean treatment room reserved for piercing work, not a cluttered space shared casually with other activities. The piercer should open sterile, single-use needles in front of you, use an autoclave for reusable instruments and show you sealed jewellery packaging before the procedure begins.
Ask these questions directly:
- Experience: How many neck dermals have you placed, and what problems do clients most often encounter?
- Assessment: How will you check skin thickness and movement before choosing the mark?
- Jewellery: Is the anchor implant-grade titanium, and can you identify the relevant ASTM F136 specification?
- Technique: Do you use a needle, skin punch or scalpel, and what training supports that method?
- Aftercare: What will you do if the anchor loosens, migrates or shows infection signs?
- Removal: Who removes the anchor if it rejects or becomes embedded?
A piercer doesn't need to promise a particular rejection rate. They should be straightforward, explain that outcomes vary and tell you when they'd advise against the placement.
Verify local registration and consultation standards
In the UK, skin-piercing businesses may fall under local council registration and health and safety byelaws. Contact the relevant council or check its public licensing information to confirm that the premises is registered where applicable. You can also ask whether recent Environmental Health Officer checks or ratings are available.
For clients in Croydon and Bournemouth, compare studios by visiting before booking. Look for a consultation that includes upright marking, a discussion of collars and hair, a clear jewellery specification, sterile-packaging checks and written aftercare. Timebomb Tattoo & Piercing is among the studio options presented through the publisher's local booking platform, alongside information about consultation and appointment routes.
Walk away if the piercer refuses to discuss risks, marks the site without assessing movement, uses vague jewellery descriptions, opens no sterile packaging, pressures you to book immediately or suggests removing an infected dermal yourself. A low price and impressive photographs can't compensate for poor hygiene or careless placement.
Piercing Near Me helps you compare piercing services and arrange consultations through its Croydon and Bournemouth studio listings, including advice on dermal placement, implant-grade jewellery and personalised aftercare. Visit Piercing Near Me before booking, write down your questions, and choose a consultation where your neck anatomy and daily routine receive as much attention as the jewellery design.