
You're in the chair with a friend's photo on your phone, or maybe you've been staring at your own ear in the mirror and wondering whether a cuff could give you that layered look without adding another piercing. That's a sensible question, especially if you already have pierced lobes and you want something that looks styled, not busy. A good ear cuff for pierced ears sits in that middle ground, part jewellery choice, part anatomy choice, part comfort choice.
The important bit is this. A cuff shouldn't be bought like a ring off the shelf and hoped for the best. The right one depends on your ear shape, the metal it's made from, and whether you want a piece that decorates or one that uses a piercing as part of its support. If you're new to the idea, start with the practical basics and work upwards, not the other way round. For a quick reference point on the non-pierced side of the picture, see this guide to ear cuffs for non-pierced ears.
The Ear Cuff Moment and What This Guide Covers
The first thing people want is the look, then they realise there are a few different ways to get it. Some cuffs sit on the outer ear like a tiny clamp, some are built to use a piercing for support, and some are better thought of as styling pieces than everyday fixtures. If you already have pierced ears, that gives you more options, not fewer.
For UK buyers, the appeal is straightforward. A cuff can add height, texture, and a bit of edge without asking for another healing period. That matters because ear cuffs are often chosen by people who want a cartilage-style finish without committing to a fresh puncture or extra aftercare. In the UK context, that makes them relevant for clients with single lobes, layered lobes, helix piercings, or a curated ear that's nearly finished but needs one more visual anchor.
The decisions ahead are more practical than fashionable. You need to know what the cuff is doing on the ear, which metals are sensible for long wear, how to fit it without irritation, and when a studio consult makes more sense than a marketplace order. The sections below move in that order so you can judge a piece by comfort, support, and safety before you judge it by sparkle.
What an Ear Cuff Actually Is and How It Stays On
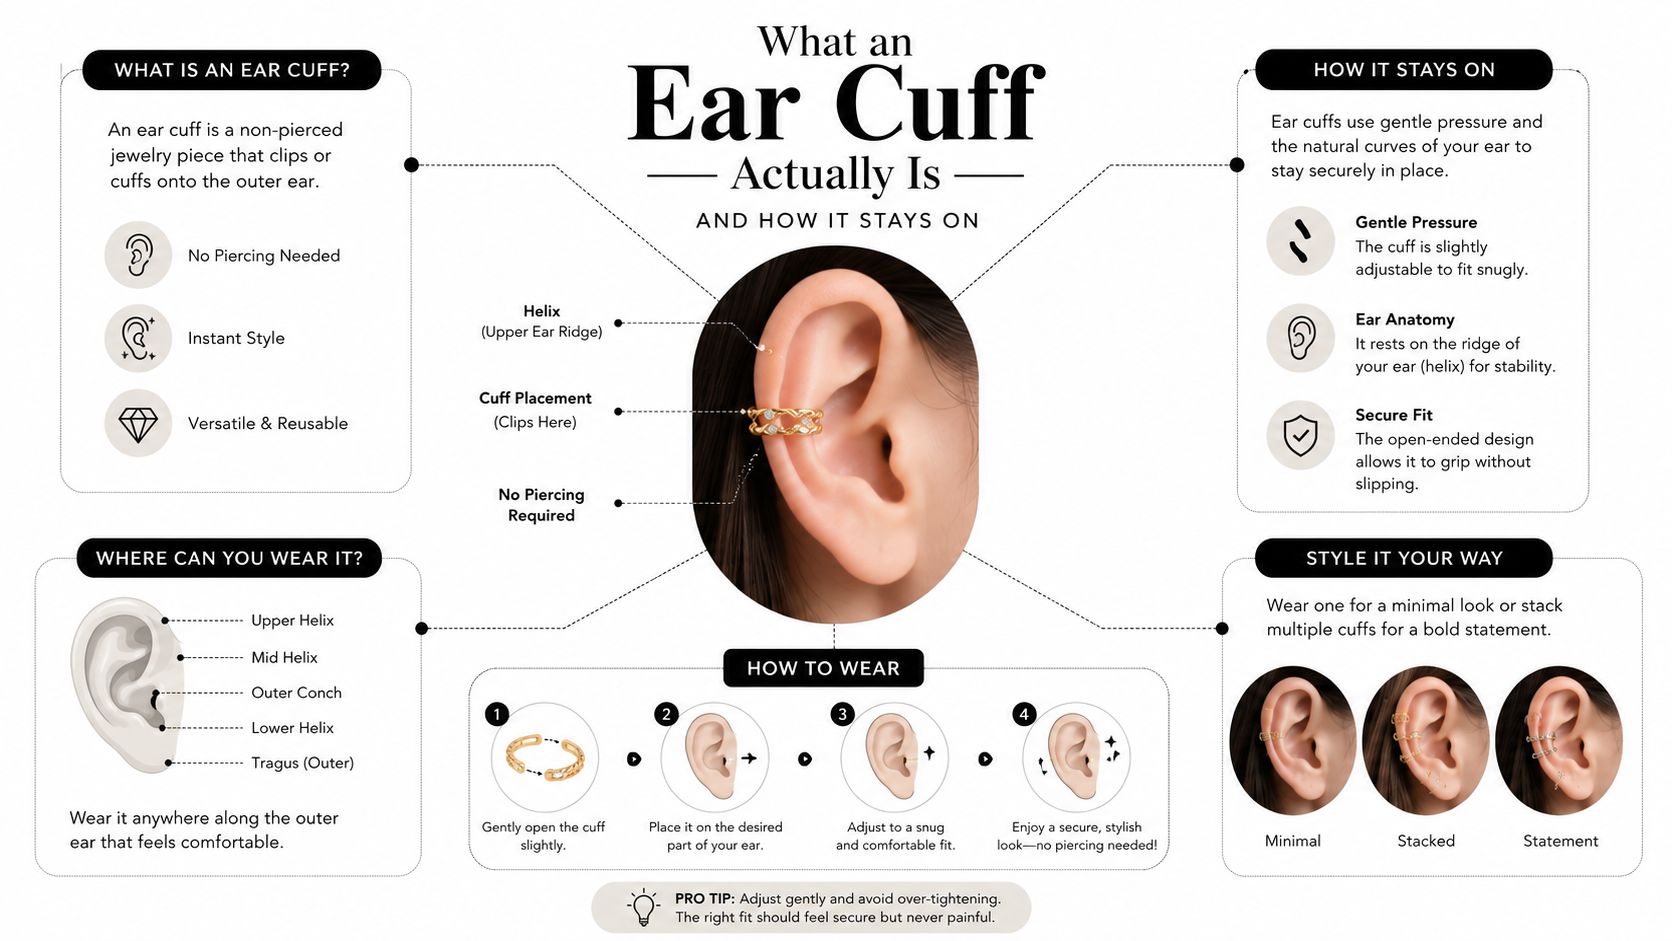
Strip away the styling language and a cuff is just shaped metal that grips the ear. The hold comes from spring tension, an adjustable hinge, or a flexible metal band, so it doesn't need a post, backing, or a hole to sit in place. That's the core difference between a cuff and a standard earring.
Picture a clothes peg resting on fabric. The peg doesn't pass through the cloth, it grips it. An ear cuff works on the same principle, only the surface it grips is the curve of the outer ear, usually around the helix or anti-helix where the edge gives the piece something to hold on to. The design on top might be ornate, but the curve underneath is doing the essential work.
That's why fit matters more than the visual detail when you first try one on. If the band shape doesn't match your ear, it slips, pinches, or leaves a mark. If it does match, it feels almost ordinary after a few minutes, which is exactly what you want from a pressure-fit piece.
Practical rule: if the cuff only looks good but feels vague on the ear, the fit is wrong even if the design is lovely.
An ear cuff can also be a pierced design, where a real piercing acts as the anchor point. That's a different engineering idea, and it needs a different approach to sizing and support. For a simple overview of what that means in practice, the distinction between pierced and non-pierced styles is covered well in the section on whether ear cuffs require a hole.
Cuff Types and Materials Worth Knowing
The easiest way to sort cuffs is by how they hold, then by what they're made from. A plain pressure-fit cuff, a hinged cuff, and a pierced cuff can all look similar at a glance, but they behave differently on the ear. The one thing they share is that the shape has to work with the ear, not against it.
Different structures, different wear
A non-pierced cuff relies on friction and tension. A pierced cuff uses the piercing itself as structural support, so it can sit more securely in some styles. That doesn't make one automatically better, it just means the right choice depends on what you already have in your ear and how much movement you want from the jewellery. A cuff that's meant for all-day wear should feel stable when you talk, turn your head, or brush your hair back.
Materials that make sense for healed ears
For daily wear on healed ears, implant-grade titanium and solid 14k or 18k gold are the most sensible starting points because they're commonly used in piercing jewellery and are built for long-term contact with skin. Surgical stainless steel can also be a workable option for some people, though quality still matters. Plated alloys and mystery metals are the ones I'd be cautious about, especially if you already know your skin reacts to cheaper jewellery.
| Material | Common Label | Safe for Daily Wear | Best For |
|---|---|---|---|
| Implant-grade titanium | Titanium, ASTM titanium | Yes | Sensitive ears, long wear, healed piercings |
| Solid 14k or 18k gold | Gold, yellow gold, white gold, rose gold | Yes | Everyday styling, long-term comfort, premium finish |
| Surgical stainless steel | Steel, stainless steel | Sometimes | Occasional wear, people who tolerate steel well |
| Plated alloy | Gold-plated, silver-plated, fashion metal | Usually no | Short wear, low-cost styling only |
| Acrylic | Acrylic, resin | Usually no | Costume use, brief wear, not for fussy ears |
The price often reflects the metal underneath the finish, not just the branding on the box. If you want a deeper look at why titanium keeps coming up in piercing conversations, this internal guide to titanium piercing jewellery gives useful context without the sales fluff.
How to Put On, Adjust, and Remove a Cuff Safely
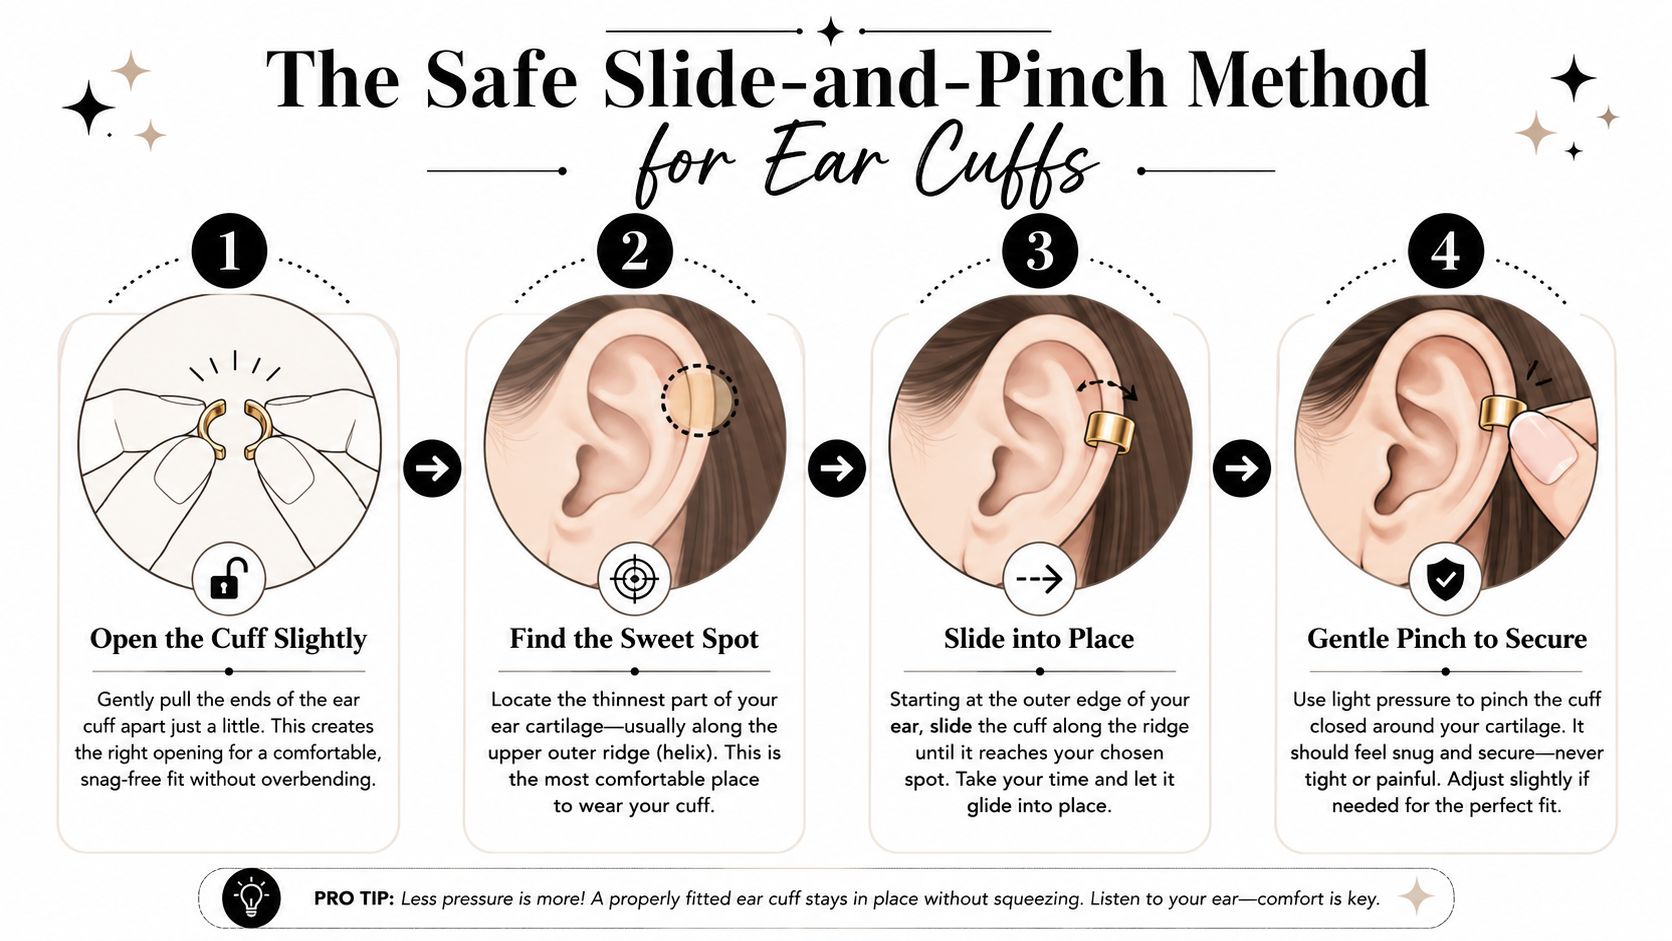
A cuff that pinches gets abandoned in a drawer. The aim is snug, not trapped. Start by opening it slightly, just enough to clear the thinnest part of the cartilage edge, then slide it into position and rotate it where you want it to sit.
The last movement should be a light pinch, not a squeeze. If it feels like it's gripping hard, stop and ease it off. The correct fit should feel steady, but it shouldn't leave a lasting line after a few minutes. The safest habit is to check the cuff after you've moved around normally, because a piece that feels fine in the mirror can feel different after talking, walking, or putting your hair up.
A simple fit test saves a lot of regret.
- Talk out loud: if the cuff shifts every time your jaw moves, it needs adjusting.
- Turn your head side to side: movement shouldn't create pressure spikes.
- Brush your hair back: the cuff shouldn't catch or drag.
- Check the skin after ten minutes: redness that lingers means the tension is too high.
Take it off for sleep and for sport. If it's loosened during the day, re-adjust it rather than forcing it tighter.
The cleanest removal is the reverse of the first fit. Open it slightly, lift it back over the thinnest part of the ear, and don't yank. For a more detailed piercing-cleaning routine, especially if you're also caring for a new piercing elsewhere on the ear, the studio guide on how to clean a new piercing is the better place to start.
Styling Configurations for Real Pierced Ears
A cuff can look tiny in the hand and surprisingly decisive on the ear. The trick is matching the scale of the cuff to what's already there, so the whole ear feels intentional instead of crowded. I'd think about it in three common setups.
Single lobe
With one lobe piercing, a slim cuff near the upper ear can give you height without competing with the lobe. It works best when the cuff is quiet and the lobe jewellery is the main focus. If you try to make both pieces loud, the ear starts to look busy rather than styled.
Lobe plus helix
A second lobe and a healed helix give you room for a more defined cuff. Here, a pierced ear cuff can act like a bridge between the lower and upper half of the ear, especially if the metal tone matches the existing pieces. The key is balance, not quantity. A small cuff can make the ear look finished, while a bulky one can overwhelm the line of a delicate helix stud.
Curated constellation
Once you've got a conch, tragus, or a few well-placed studs, the cuff becomes a shaping tool. It can anchor one side of the ear stack, especially if the rest is kept visually light. In this setup, the cuff should support the composition, not fight it. If the ear already has strong points, choose a cuff that adds contour rather than more shine.
A true pierced cuff should be fitted to your ear rather than guessed from a generic label. Technical guides recommend measuring helix rim thickness, often around 2 to 4 mm, piercing-to-rim distance of about 1.5 to 3.5 mm for hook-style pieces, and the ear's curve radius so the cuff sits flush without gaps or pinching. Those numbers matter because a beautiful design can still feel wrong if the shape is off. For a more technical fit discussion, the guide on finding pierced ear cuffs by anatomy is worth a read.
Cleaning the Cuff and Caring for the Piercing Underneath
A cuff needs cleaning because it lives against skin, hair, and daily residue. The piece itself can be washed gently with mild soap and warm water, then dried well with a soft cloth. That's enough for most well-made metal cuffs, especially if they're titanium or gold.
The skin under it is a separate matter. If the piercing below is healed, leave it alone. Don't keep rotating jewellery in and out, and don't treat the cuff like a medical device. If you're still healing a fresh piercing anywhere on the ear, that needs its own careful routine, and the cuff should stay out of the way until everything is settled.
A few basic habits make life easier.
- Use a soft cloth: good for titanium and gold, and less likely to scratch a polished finish.
- Avoid harsh household cleaners: especially on plated pieces, which can lose finish quickly.
- Dry it fully: trapped moisture sits badly on the skin and on low-cost finishes.
- Look at the ear, not just the metal: redness, heat, or tenderness under the cuff matters more than surface shine.
Cartilage piercings carry more severe infection risk than earlobe piercings, and healing depends on proper aseptic technique and daily cleaning in the early stages, as noted in UK-focused clinical literature on ear-piercing complications (PMC clinical review). That's one reason a cuff that gives you a cartilage look without a fresh wound can feel simpler to manage day to day.
Three Myths That Lead UK Buyers Astray
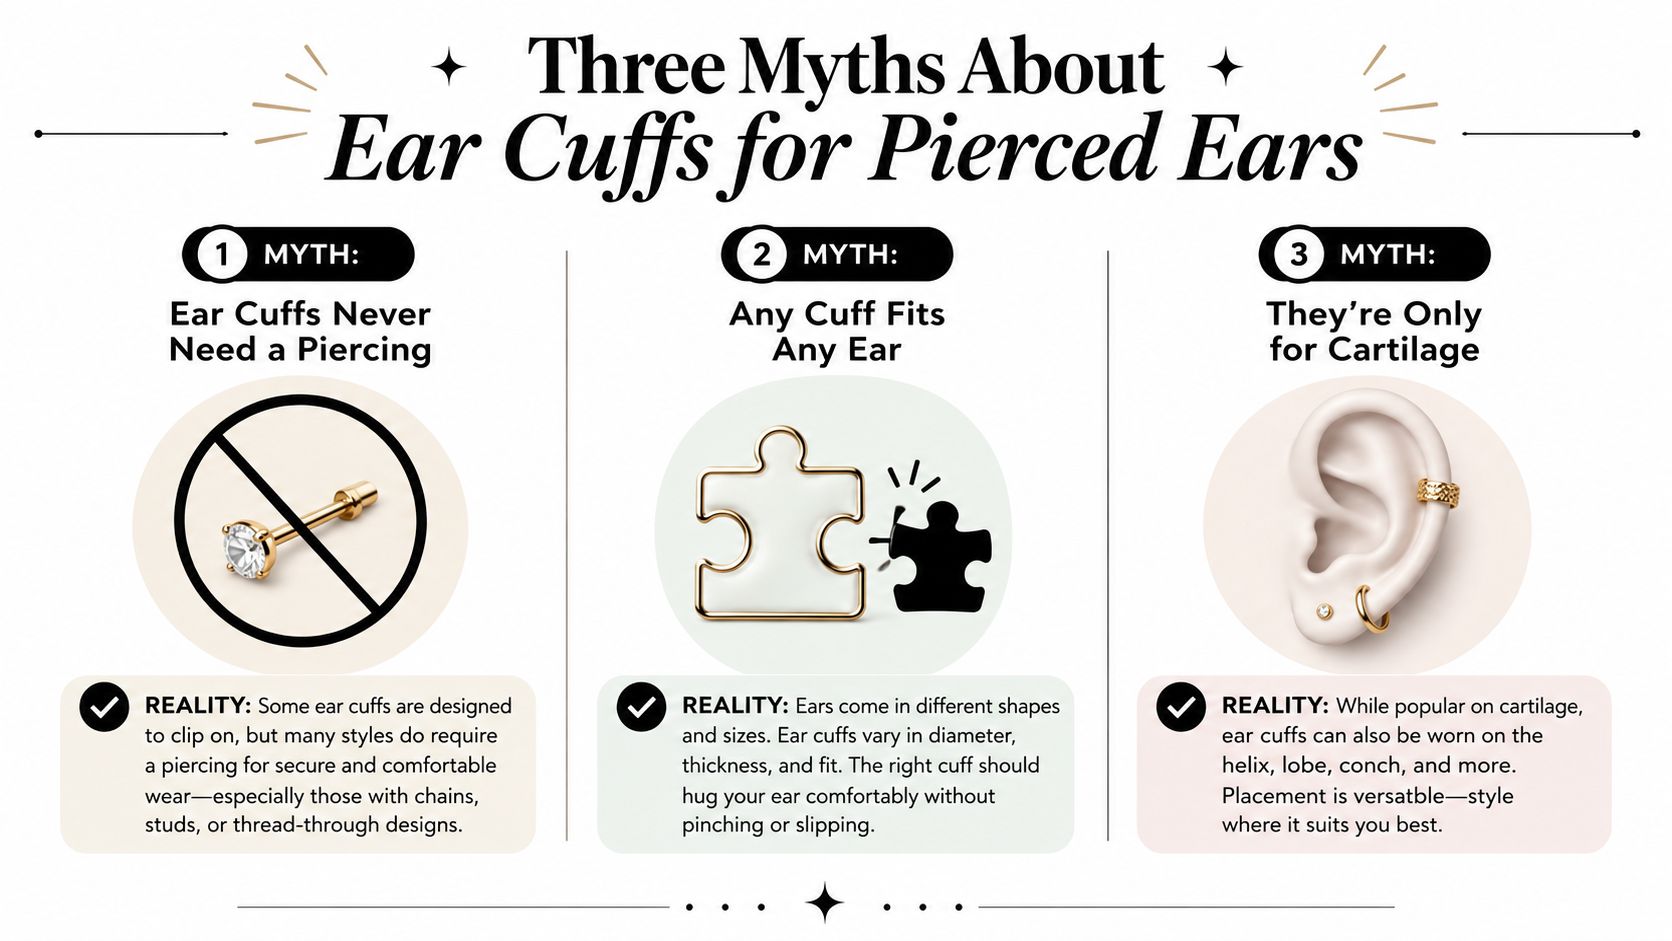
The first myth is that every cuff works without a piercing. That's not true. Some of the most secure designs do use a piercing as part of the support, so the label matters more than the marketing photo.
The second myth is that anything shiny is safe. It isn't. Unknown alloys and plated finishes can be fine for a short outing, but they're a poor bet if your skin is reactive or you plan to wear the piece often. A cheap-looking clasp isn't the problem, the metal under the finish is.
The third myth is that tighter means better. It doesn't. Tight cuffs are the ones most likely to leave marks, redness, and that annoyed feeling that makes you stop wearing the piece altogether. A cuff should stay put because the fit is right, not because it's squeezing.
Short version: security comes from fit and shape, not force.
If you're browsing online or on a stall, slow down when a product page avoids material detail or only shows one angle. That's usually where fit problems hide.
When to Book a Professional Consult and How to Reach a UK Studio
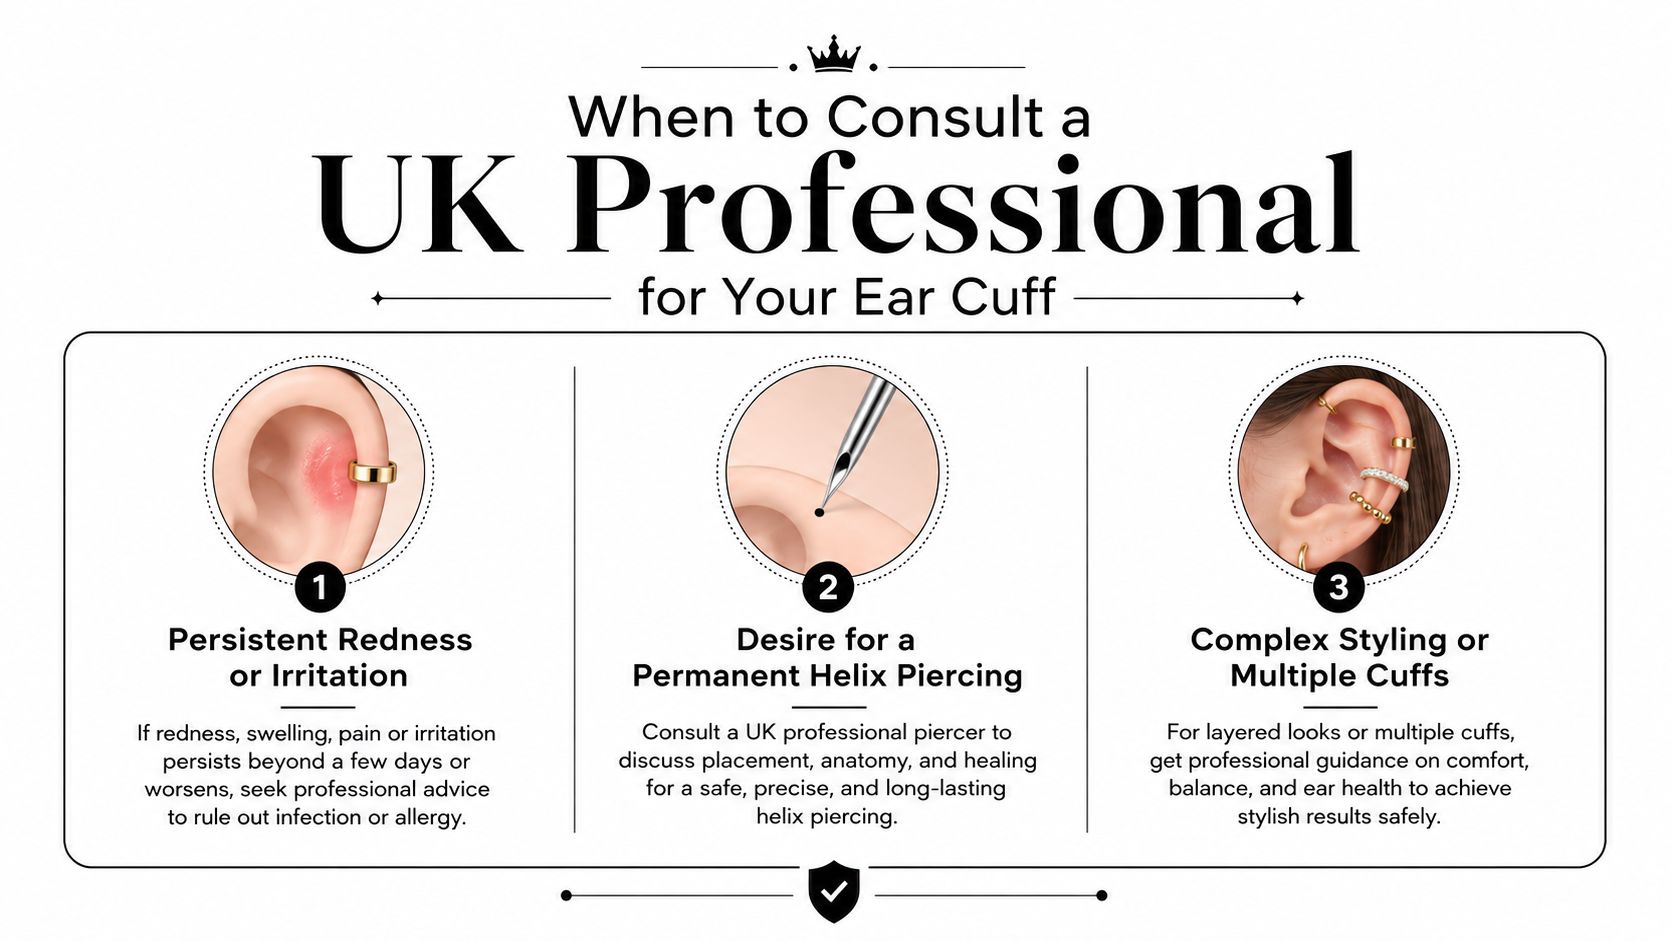
Book a consult if a cuff keeps leaving a red mark, if the ear feels sore long after removal, or if you're trying to build a look that really needs a fresh helix or conch piercing to sit properly. A professional can tell you whether the problem is the cuff, the metal, or the fit on your specific ear. That's often the difference between a piece you enjoy and one that stays in the box.
It also makes sense to speak to a studio if you want to upgrade from plated jewellery to implant-grade titanium or solid gold, or if you're a parent arranging a first ear piercing for a teen and want clear guidance on placement and aftercare. The conversation is usually short, but it's useful because it turns guesswork into a plan. If the styling is getting more complex, a second opinion helps more than another online checkout.
Good sign to ask for help: the cuff looks fine, but your ear keeps telling you it's not.
For personalised advice, you can call 01202 900050 (Bournemouth) / 020 8686 7730 (Croydon) or message 07752 913846 (Bournemouth) / 07902 490584 (Croydon). If you want to speak with a team that can talk through styling, jewellery, and piercing options in one place, visit Piercing Near Me and take the next step with a studio that puts fit and safety first.