
What makes a great ear piercing design in 2026, the jewellery on display, or the anatomy that lets it sit cleanly and heal well? A great place to start is with a photo, but the strongest results come from placement, metal choice, and a realistic plan for healing. Ear piercing has been part of human adornment for at least 5,000 years, from Ötzi the Iceman to ancient Egyptian references, and that long history helps explain why today's designs are no longer just about a single lobe puncture, but about building a balanced ear with lobe, helix, conch, tragus, rook, and industrial placements PMC historical overview.
At Timebomb Tattoo & Piercing, the best-looking ears are never rushed. A design that works on one person can sit strangely on another if the anatomy is different, so the job is to match jewellery, spacing, and healing time to the ear in front of you. If you're in Croydon or Bournemouth and want honest guidance, call 01202 900050 (Bournemouth) / 020 8686 7730 (Croydon) to talk through your ideas, or message 07752 913846 (Bournemouth) / 07902 490584 (Croydon) on WhatsApp for a consultation.
1. Classic Lobe Piercing
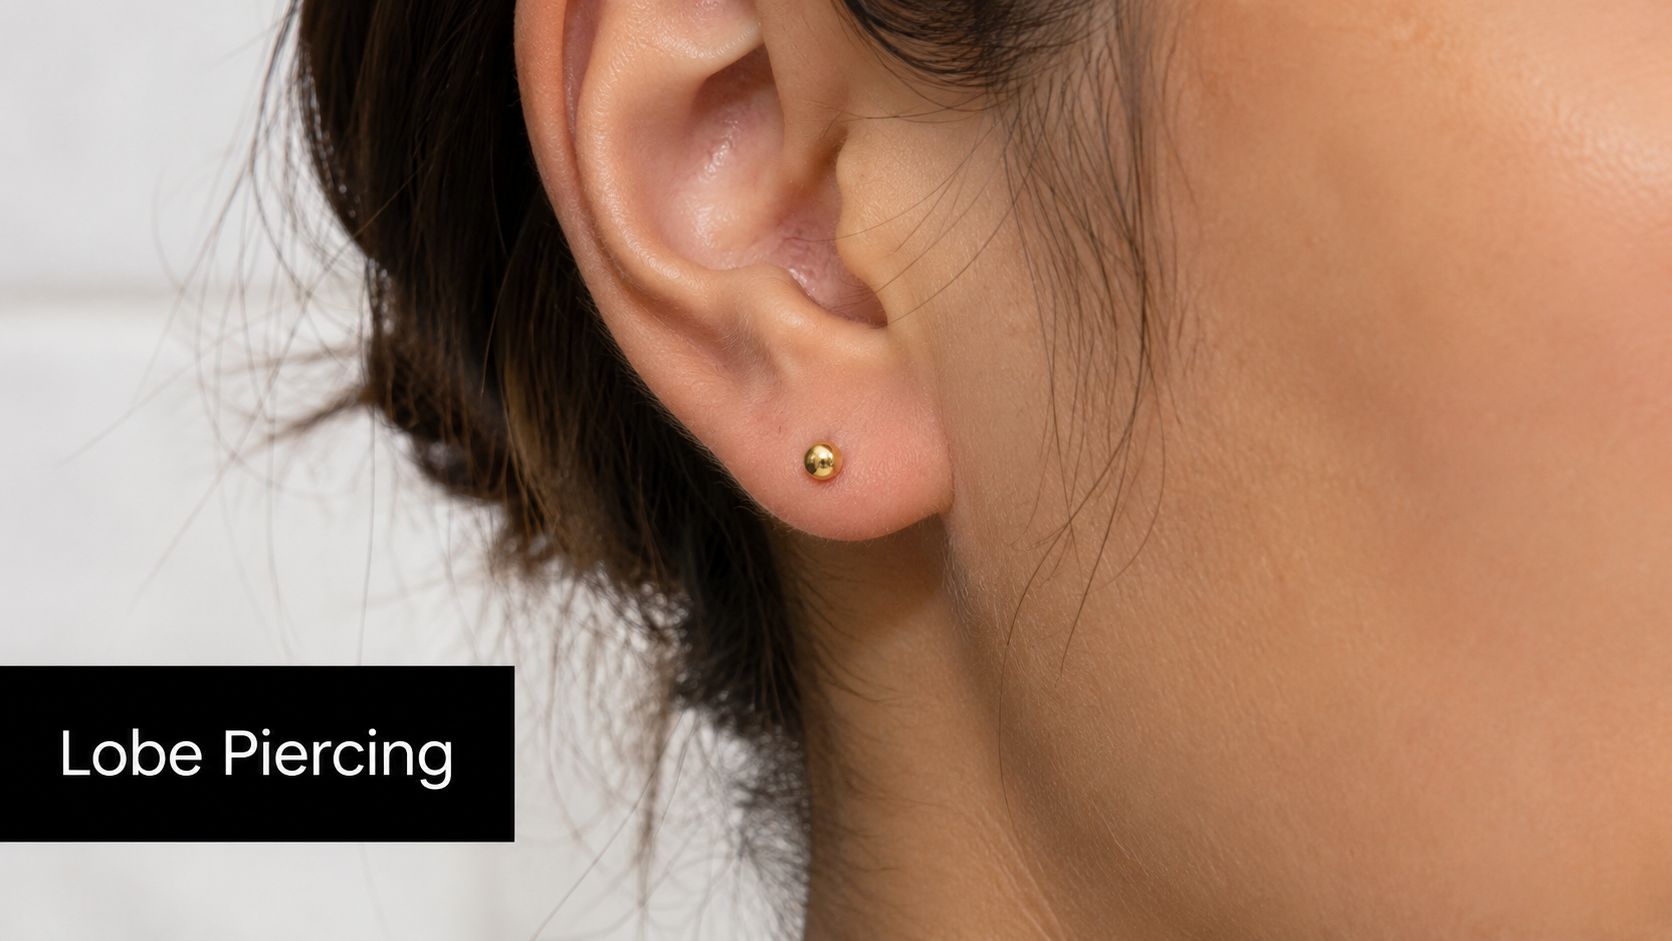
The classic lobe piercing still earns its place because it's the easiest way to build a clean, wearable ear. The lower lobe is soft tissue, so it takes a very different approach from cartilage, and that's exactly why so many first-time clients start here. A simple stud in implant-grade titanium or a neat 14k gold piece can look polished on day one and still feel understated enough for work, study, or daily wear.
Why the lobe is still the best starting point
For new clients, the lobe offers the most flexibility with the least visual commitment. A single stud, matching pearl pair, diamond solitaire, or a sentimental family design can all work, because the placement is simple and the styling options are broad. That's why first-time clients often use a lobe as the base of a future curated ear rather than treating it as a standalone choice.
Practical rule: choose jewellery that sits flat, doesn't snag, and feels calm against the ear while the tissue settles.
Initial healing is usually straightforward, but the aftercare still matters. Clean twice daily with saline, avoid sleeping on the pierced side for the first two weeks, and don't rush to change the jewellery before the tissue has settled. If you want a plain-English guide on suitable first earrings, this new-ears jewellery guide is a helpful companion read.
- Choose the right first metal: implant-grade jewellery reduces avoidable irritation during healing.
- Respect the lobe thickness: the starting gauge should suit the tissue, not just the look you want.
- Keep pressure off the area: side-sleeping too early can make an easy piercing feel fussy.
For many clients, the classic lobe is the foundation of the whole design. Once it's healed, it becomes much easier to stack, frame, or balance with cartilage piercings above it.
2. Helix Piercing
A helix piercing sits on the curved outer cartilage, and one clean placement can change the whole line of the ear. It suits clients who want something visible without going fully bold, and it works well as a single point or as part of a stacked ear. At Timebomb, shape matters as much as style here, because the rim of the ear changes how a hoop reads compared with a labret stud.
Placement and healing with cartilage in mind
Cartilage asks for more patience than a lobe, so the jewellery needs to suit that from the start. A fresh helix usually starts at 16G (1.2 mm) with a 5 to 8 mm post so there is space for swelling, then gets downsized later for a cleaner fit Musemond size guide. That longer first post matters, because a tight fit too early can create pressure and make the piercing unhappy.
Placement should follow the ear's curve, not fight it. A stud gives a crisp, minimal look, while a hoop brings more movement once healing has settled. For clients booking a helix at either studio, the trade-off is straightforward. You get a striking placement, but you also need to protect it from hair, pillows, and over-cleaning.
Sleep on the opposite ear, use a travel pillow if needed, and keep the routine boring. With helix healing, boring is good.
For aftercare, twice-daily saline is enough. More cleaning does not help, and rough handling usually causes more trouble than the piercing itself. If you want a clearer breakdown of what to do at home, our aftercare guide for helix piercings covers the practical basics. If you are planning a hoop later, the cleaner the initial placement, the better the finished look will be.
3. Conch Piercing
The conch is where ear piercing design starts to feel more sculptural. It sits in the bowl of the inner ear, which gives you room for a statement piece, but it also means the placement has to be precise. A conch can anchor a whole curated ear, especially when you want something bolder than a simple lobe and more central than a helix.
Bigger visual impact, more technical precision
The best conch placements are the ones that work with the ear's natural bowl rather than fighting it. A single labret stud with a gemstone can look elegant and balanced, while a shield or more decorative end creates a much stronger statement. That makes the conch a favourite for clients who want one piercing to carry real visual weight without stacking several smaller pieces together.
Cartilage choice matters here. Implant-grade titanium is the safest starting point for fresh work, and the initial post must allow for swelling, not just the final look. A conch also needs sensible aftercare, because headphones, earbuds, and sleeping pressure can all slow the healing process or irritate the area before it settles.
The practical downside is that not every ear has the same room for a conch to sit comfortably. An experienced piercer earns their keep here, because the difference between a dramatic conch and a cramped one is often just a few millimetres of placement. For styling inspiration and jewellery discussion around this area, this conch hoop guide is a useful starting point.
- Use flat-back jewellery first: it's usually the cleanest fit for healing cartilage.
- Protect the area from pressure: headphones and sleeping on that side can be a real nuisance.
- Keep the design intentional: the conch looks best when it balances the rest of the ear, not when it crowds it.
4. Tragus Piercing
The tragus is small, but it changes the face of the ear immediately. Because it sits on the little cartilage flap near the canal entrance, the jewellery is front-facing and very noticeable in profile. That makes it a strong choice for clients who want a subtle piercing that still reads as a deliberate style decision.
Small area, precise execution
A good tragus piercing relies on careful placement and sensible jewellery. A labret stud in gold or titanium usually gives the cleanest first result, especially if the client wants a minimal look that still catches the light. The area is compact, so sharp edges and rough finishes are a bad idea while it's healing.
The biggest mistake people make with a tragus is treating it like a simple lobe. It isn't. You don't want anything going into the ear canal during healing, and earbuds or headphones can create repeated friction where the skin doesn't want it. That's why a tragus is a better choice for clients who are willing to change their habits for a while rather than forcing the piercing to adapt to them.
What works best in real life
A tragus usually works best when it's kept simple at first. Once the piercing has settled, it can be dressed up with a tiny gem, a polished metal end, or a miniature hoop if the anatomy allows it. The cleanest results come from clients who understand that the early months are about stability, not constant styling.
The tragus looks tiny on a tray, but it has a big effect on the finished ear. Placement needs to be exact, because there isn't much room for error.
For first-time clients who want something distinctive without moving too far into visible cartilage, the tragus sits in a sweet spot. It's understated, but not forgettable.
5. Industrial Piercing
An industrial piercing is a statement, and it acts like one. The classic version links two cartilage points with a single barbell, usually across the upper ear, so the design depends on the shape and angle of the ear as much as it does on the jewellery itself. When it works, it gives a strong architectural line that changes the whole profile of the ear.
Anatomy decides the design
This is the piercing where anatomy limits matter most. Some ears don't have the right angle or the right amount of cartilage for a bar to sit comfortably without pressing into tissue, and that's not a failure, it's the reality of the ear. A good piercer measures carefully before anything is marked, because the bar has to clear the ear cleanly rather than rest against it.
Industrial jewellery is usually best kept in a biocompatible metal such as titanium, especially at the beginning. A custom-bent barbell can follow the ear more naturally than a one-size-fits-all option, but it still needs proper alignment and enough room to avoid pressure points. Healing is slower and more demanding than a standard lobe, so aftercare has to be consistent and realistic.
Clients who want an industrial usually want a dramatic finish, but the best version isn't always the most aggressive one. A clean line, correct angle, and comfortable fit will always beat a forced placement that looks impressive in a photo but hurts in daily wear. For active clients, protective headgear during sports can help, and any discomfort from the bar should be checked rather than ignored.
6. Daith Piercing
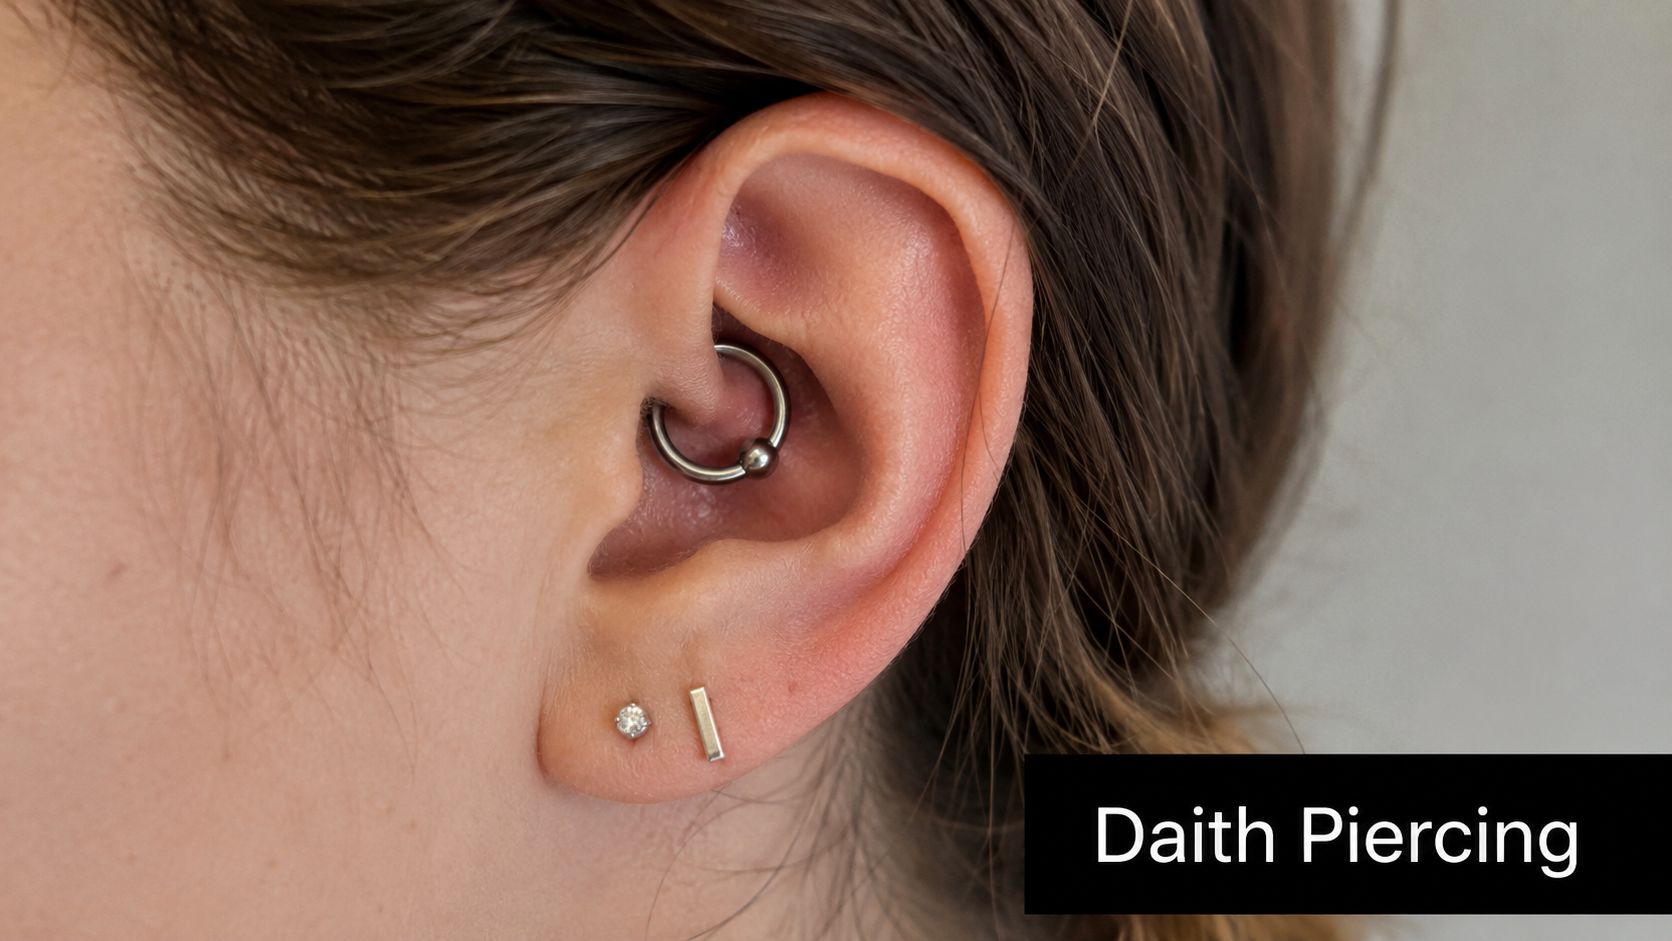
The daith sits deep in the innermost cartilage fold, which gives it one of the most distinctive silhouettes in ear piercing design. It's tucked-in, jewellery-forward, and visually different from the outer-ear placements people see all the time. That's part of the appeal, because a daith can look delicate from the front and highly styled from the side.
A placement that rewards patience
This is a piercing where experience matters. The fold is compact and curved, so the placement has to be exact for the jewellery to sit properly and for the piercing to heal without unnecessary friction. Once the jewellery is in, the look can be striking, especially with a curved titanium barbell or a dedicated daith hoop in gold or titanium.
Some clients ask about migraine relief, but that conversation belongs with a healthcare professional, not a piercing chair. The aesthetic appeal is real, the anecdotal claims are separate, and it's best to keep those two things distinct when making a decision. The main commitment here is healing time, because a daith can ask for patience long after the initial excitement has passed.
For daily life, the practical rules are simple. Don't sleep on it, don't submerge it in water during healing, and don't keep twisting the jewellery to “check” it. A daith tends to reward calm, minimal handling more than frequent attention. If you want a piercing that feels unique without shouting, this is one of the strongest options.
7. Forward Helix Piercing
A forward helix sits on the small ridge near the temple side of the ear, and that position makes it feel refined rather than loud. It's a good choice when you want the top of the ear to look deliberate but not overcrowded, especially if you're building a stack that already includes lobes or a central cartilage piece. Because it sits closer to the face, even a tiny stud can have a lot of visual presence.
Good for coordinated ear stacks
This piercing works best when the rest of the ear has room to breathe. A single gold stud, a slim titanium end, or a small gemstone can all look elegant, but the design has to consider how the piercings beside it will sit. That's where forward helix styling gets more interesting than it looks at first glance, because the line between elegant and crowded is usually quite narrow.
Healing is often manageable, but you still need to protect it from face touching, hair, and pressure while it settles. Sleeping on the opposite side helps, and saline twice daily is enough for routine care. A lot of clients make the mistake of treating small cartilage piercings as low-maintenance, then wonder why the area stays irritated. Small doesn't mean careless.
A forward helix can also be a very good bridge between a classic lobe and a more statement-heavy top ear. It gives the ear a clear upward flow without forcing the whole design into something busy. For clients who like symmetry, it can also be mirrored or stacked in a way that feels intentional rather than decorative for its own sake.
8. Anti-Tragus Piercing
The anti-tragus is one of the most underused pieces of ear anatomy in everyday piercing design, and that's exactly why it stands out. It sits opposite the tragus, above and behind the lobe, so it adds balance to the lower ear while giving you a different angle of visual interest. Paired with a tragus, it can create a very polished frame around the ear canal area.
A balanced option with a technical edge
This is another placement where the curve of the anatomy really matters. The area is small and contoured, so the piercer has to measure carefully and choose jewellery that suits the shape rather than forcing a look that won't sit properly. Curved jewellery often works well here because it respects the anatomy, and a simple titanium or gemstone end can keep the design clean.
The anti-tragus is often chosen by clients who want something a little more unusual without going into a full statement arrangement. It can work beautifully as part of a paired design, but it also holds up on its own if the rest of the ear is kept minimal. The biggest aftercare challenge is the same one that affects many cartilage piercings, pressure from sleeping, hair, or casual touching.
Practical rule: if a cartilage piercing feels fussy in the first few weeks, simplify the routine instead of changing the jewellery too soon.
For clients comparing tragus and anti-tragus, the most useful question is not which one is trendier. It's which one suits the ear shape, the healing commitment, and the look you wear every day. When those three things line up, the result feels designed, not assembled.
8 Ear Piercing Designs Compared
| Piercing | Implementation Complexity 🔄 | Resource Requirements ⚡ | Expected Outcomes ⭐📊 | Ideal Use Cases 💡 | Key Advantages ⭐ |
|---|---|---|---|---|---|
| Classic Lobe Piercing | Low 🔄 | Low ⚡, standard studs, basic aftercare | Healing 4–6 w; low pain; versatile visual ⭐⭐⭐ | First-time clients; workplace-friendly; easy concealment | Fast healing; forgiving for jewellery changes; low infection risk |
| Helix Piercing | Medium 🔄🔄 | Medium ⚡, cartilage needle, implant-grade jewellery | Healing 6–12 w; moderate pain; visible fashion accent ⭐⭐⭐⭐ | Stacking arrangements; fashion-forward looks | High visibility; versatile jewellery options; popular trend piece |
| Conch Piercing | Medium–High 🔄🔄🔄 | High ⚡, experienced piercer, statement jewellery | Healing 8–12 w; higher pain; strong visual impact ⭐⭐⭐⭐ | Statement jewellery; creative ear designs and stacking | Large surface for statement pieces; distinctive aesthetic |
| Tragus Piercing | Medium 🔄🔄 | Medium ⚡, precise placement, small labret studs | Healing 6–10 w; moderate–high pain; subtle profile statement ⭐⭐⭐ | Subtle yet noticeable looks; complements facial profile | Visible in profile; less prone to hair catching; minimalist options |
| Industrial Piercing | High 🔄🔄🔄🔄 | High ⚡, precise measurement, custom barbell, extended aftercare | Healing 8–12 w; high pain; dramatic unified look ⭐⭐⭐⭐ | Bold statements; alternative and punk aesthetics | Dramatic impact; unified jewellery across two holes; highly customisable |
| Daith Piercing | Very High 🔄🔄🔄🔄🔄 | Very High ⚡, specialist piercer, specialised hoops, long aftercare | Healing 6–9 months; very high pain; subtle/unique; anecdotal wellness claims ⭐⭐⭐ | Clients seeking subtle distinctiveness; possible migraine anecdote seekers | Deep, concealable placement; unique anatomical look; conversation piece |
| Forward Helix Piercing | Medium 🔄🔄 | Medium ⚡, precise front-facing placement, implant-grade jewellery | Healing 6–9 w; moderate pain; front-facing accent ideal for stacks ⭐⭐⭐ | Ear-stacking; modern front/side visibility | Works well in coordinated stacks; visible from front; moderate healing |
| Anti‑Tragus Piercing | High 🔄🔄🔄 | High ⚡, skilled piercer, curved jewellery fit | Healing 8–12 w; significant pain; balanced aesthetic ⭐⭐⭐ | Paired with tragus or for symmetrical ear designs | Creates facial balance; unique placement that complements tragus |
Ready to Design Your Perfect Curated Ear?
Choosing the right ear piercing design is personal, but it doesn't need to feel complicated. The best results come from a piercer who looks at your anatomy, talks openly about healing, and helps you choose jewellery that suits your lifestyle. That's how you build an ear that looks good now and still works six months down the line.
At Timebomb Tattoo & Piercing, we focus on clean placement, implant-grade jewellery, and aftercare that makes sense in real life. Whether you're planning a first lobe, a tidy helix stack, a bold conch, or a more advanced cartilage layout, the point is to make the design fit you, not force your ear into a trend. Our Croydon and Bournemouth studios are set up for first-time clients, teens with a parent or guardian, and anyone who wants a more considered ear curation.
If you're still deciding between placements, that's the right time to book a consultation. A short conversation can save you from choosing the wrong size, the wrong angle, or the wrong starting point for your ear shape. Call 01202 900050 (Bournemouth) / 020 8686 7730 (Croydon) or message 07752 913846 (Bournemouth) / 07902 490584 (Croydon) on WhatsApp, and we'll help you map out a design that looks balanced, heals well, and feels like yours.
Piercing Near Me helps you find safe, professional piercing services with clear advice on placement, jewellery, healing, and hygiene. If you want to plan your next ear piercing design with confidence, visit Piercing Near Me and use it to explore trusted options at Timebomb Tattoo & Piercing in Croydon and Bournemouth.