
So, you’re thinking about a new ear piercing. It’s an exciting thought, isn't it? Whether you’re planning your very first lobe piercing or mapping out a whole constellation of new cartilage studs, you’ve come to the right place.
Think of this as a chat with a seasoned piercer, answering all those questions buzzing around in your head before you even step into the studio. We'll cover everything you need to know, from picking the perfect spot to making sure it heals beautifully.
Here at Piercing Near Me, our whole focus is on making sure your experience is safe, clean, and leaves you with a look you absolutely love. We partner with some of the best professional studios in the business, like Timebomb Tattoo & Piercing in Croydon and Bournemouth, who share our commitment to incredible artistry and the highest hygiene standards. If you have any quick questions, feel free to give us a call on 01202 9000 50.
What to Expect: From Idea to Healed Piercing
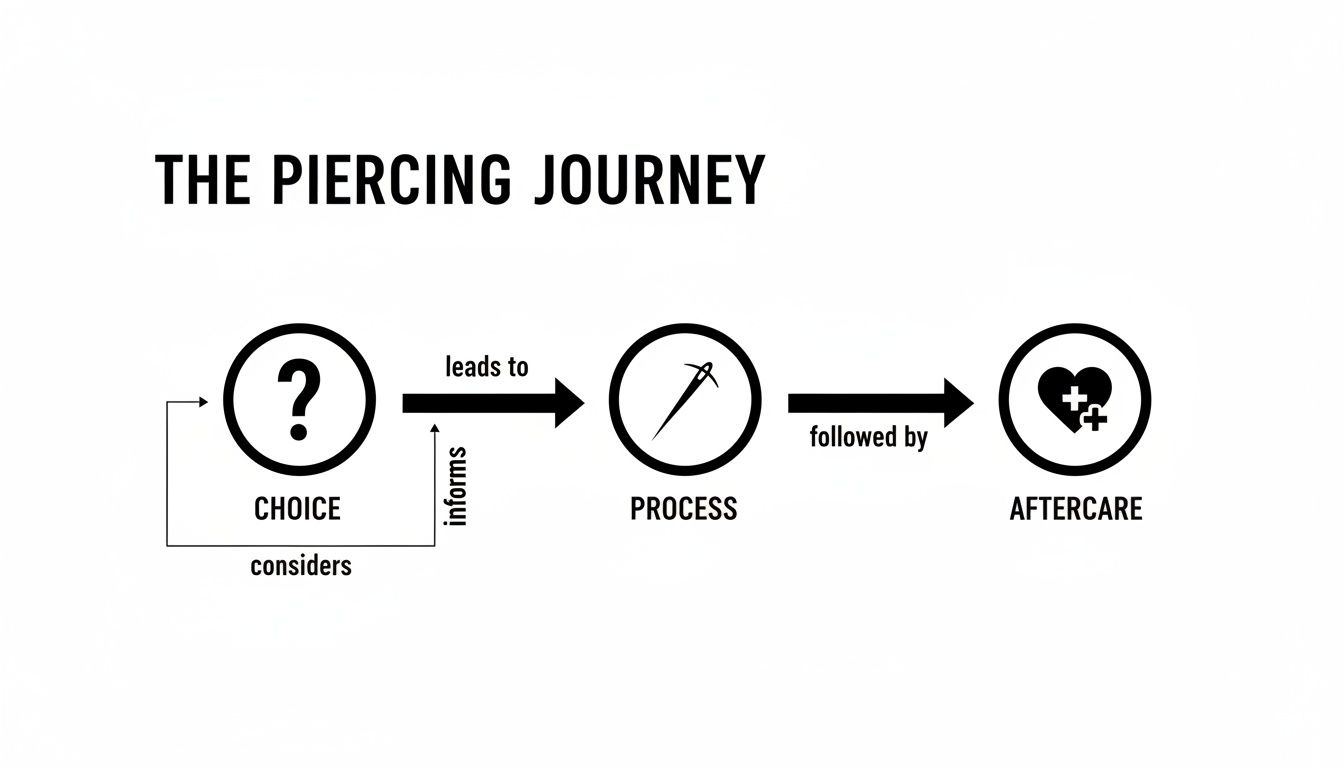
Getting a piercing is about so much more than just picking a pretty bit of jewellery. It's a process, and understanding that process is the key to a great result. It all starts with a bit of inspiration and ends with a perfectly healed piercing you can enjoy for years.
First, you've got the fun part: research and dreaming. This is where you figure out what style speaks to you. Next comes the professional consultation and the piercing itself, followed by the most important stage of all – your aftercare. Nailing the aftercare is what makes all the difference.
We can break it down into four simple stages:
- Inspiration & Choice: You decide on the placement (like a helix, conch, or classic lobe) and the initial jewellery that fits your anatomy and style.
- Professional Consultation: You'll chat with an experienced piercer. They’ll offer advice on what works for your ear shape and answer any questions.
- The Piercing Procedure: A quick, clean, and sterile process using a single-use needle. This is vital for creating a precise channel that heals properly.
- Diligent Aftercare: This is your job! It means following a strict cleaning routine to avoid any bumps in the road and help your piercing heal smoothly. We'll get into the specifics later.
Think of your ear as a blank canvas. Each piercing you add is like a deliberate brushstroke, helping you curate a personal collection of art that’s uniquely you.
Our goal is simple: to give you the confidence to make choices you’ll be happy with for the long haul. Whether this is your first time or you're adding to your collection, we've got you covered. For a chat or to book a consultation, you can also pop us a message on WhatsApp at 07752913846. Let's get started.
A Map of the Ear: Finding the Perfect Spot for Your Next Piercing
Thinking about a new ear piercing is exciting, but with so many options, where do you even start? Let's walk through the different parts of the ear, what they're called, and what kind of piercings work best in each spot.
Getting familiar with the "map" of your ear helps you and your piercer get on the same page. When you can point to your daith or talk about a helix, you can be sure you're getting exactly the look you've been dreaming of. Think of this as your personal tour guide to creating a beautifully curated ear that’s all you.
If you're ever unsure what might suit your anatomy, just give us a ring for a friendly chat on 01202 9000 50.
The Lobe: A Classic for a Reason
The earlobe is where most of us start our piercing journey. It’s that soft, fleshy bit at the bottom, and because it has no cartilage, piercings here are generally less painful and heal much faster. But don't think for a second that means it's boring! The lobe offers a surprising amount of creativity.
- Standard Lobe: This is the one everyone knows – right in the fleshy centre. It’s the perfect foundation for any ear project and works with almost any style of jewellery.
- Upper Lobe: Stacking is a huge trend, and for good reason. Placing piercings just above your first one lets you create a beautiful ladder effect with tiny studs. Two or three in a row is a timeless look.
- Transverse Lobe: For something a bit different, the transverse lobe is a fantastic choice. Instead of going from front to back, a barbell is inserted horizontally through the lobe tissue. From the front, it looks like you have two separate piercings, offering a cool, unexpected twist.
The Outer Cartilage: The Helix and Beyond
The defined outer rim of your ear is made of cartilage, a spot we in the industry call the "helix." This area has a graceful curve that’s perfect for everything from tiny, subtle studs to bold, statement hoops.
The helix itself is any piercing along this upper cartilage edge. Its versatility is what makes it so popular. You can get a single, a double, or even a triple helix to create a stunning layered effect. We'll start you off with a stud for healing, but once it's settled, a snug-fitting hoop looks absolutely amazing.
Another great option here is the forward helix, sometimes called an anti-helix. This piercing sits on that small ridge of cartilage just above your ear canal opening, opposite the main helix. For a deeper look at this placement, check out our guide on the anti-helix piercing. Just like a standard helix, you can stack two or three for a delicate, clustered look.
Every piercing, no matter how simple, follows a three-step path: your choice, the piercing process, and the all-important aftercare. This is your piercing journey.
As you can see, getting pierced is just the beginning. Looking after it properly is what ensures you end up with a happy, healthy piercing you’ll love for years.
The Inner Ear: Creating a Unique Focal Point
Now let's venture into the inner landscape of the ear. The unique folds and shapes of the inner cartilage are perfect for creating a striking centrepiece and adding real depth to your curation.
- Conch: Found in the large, cup-shaped area in the middle of your ear, the conch is a bold statement. An inner conch, pierced right through the "bowl," is ideal for a beautiful stud. An outer conch on the flatter cartilage above can eventually hold a large hoop that spectacularly wraps around the outside of your ear.
- Tragus: This is the small, thick piece of cartilage that partially covers your ear canal. It’s a hugely popular spot for a single, dainty stud that adds a perfect touch of sparkle.
- Daith: Tucked away right in the innermost fold of cartilage, a daith piercing is a real showstopper. Because it's so snug, it’s almost always pierced with a hoop or curved barbell, making it a truly unique and protected placement.
- Rook: Sitting on the ridge of cartilage just above the daith, a rook piercing goes through the cartilage vertically. It’s usually fitted with a small curved barbell and adds a fantastic, edgy dimension to the upper inner ear.
Quick Guide to Popular Ear Piercings
To help you visualise all these options at a glance, we've put together a simple table summarising some of the most popular placements. It gives you a rough idea of what to expect in terms of jewellery and sensation.
| Piercing Type | Location on Ear | Best Initial Jewellery | Average Pain Level (1-10) |
|---|---|---|---|
| Lobe | Soft, fleshy bottom part | Stud or Hoop | 2/10 |
| Helix | Upper, outer cartilage rim | Stud (Labret) | 5/10 |
| Forward Helix | Forward-facing cartilage rim | Stud (Labret) | 6/10 |
| Conch | Inner cup-shaped cartilage | Stud (Labret) | 6/10 |
| Tragus | Small cartilage nub at ear canal | Stud (Labret) | 5/10 |
| Daith | Innermost cartilage fold | Hoop or Curved Barbell | 6/10 |
| Rook | Cartilage ridge above the daith | Curved Barbell | 7/10 |
Remember, pain is subjective, and this is just a general guide! Our expert piercers work quickly and smoothly to make the experience as comfortable as possible for you.
Hopefully, this little tour has sparked some ideas! When you're ready to chat about your vision or book in, just send us a message on WhatsApp at 07752913846.
What to Expect During Your Piercing Appointment
Walking into a piercing studio for the first time can feel like a big step. There’s a mix of excitement and maybe a few nerves, and that’s completely normal! But knowing exactly what happens during a professional appointment helps turn any butterflies into pure anticipation.
Let’s walk you through the process at a top-tier studio like Timebomb Tattoo & Piercing, where everything is centred around your safety and comfort.
The Consultation and Preparation Stage
First things first, we talk. A great piercing appointment is never rushed; it begins with a proper chat. This is our chance to discuss the exact placement you've been dreaming of and make sure it works perfectly with your unique ear anatomy.
Next up is choosing your first piece of jewellery. This isn't just about style—it's a crucial step for healthy healing. We'll guide you through our selection of beautiful, implant-grade metals that your body is designed to accept without any fuss. Once you’ve picked the perfect piece, we get everything ready.
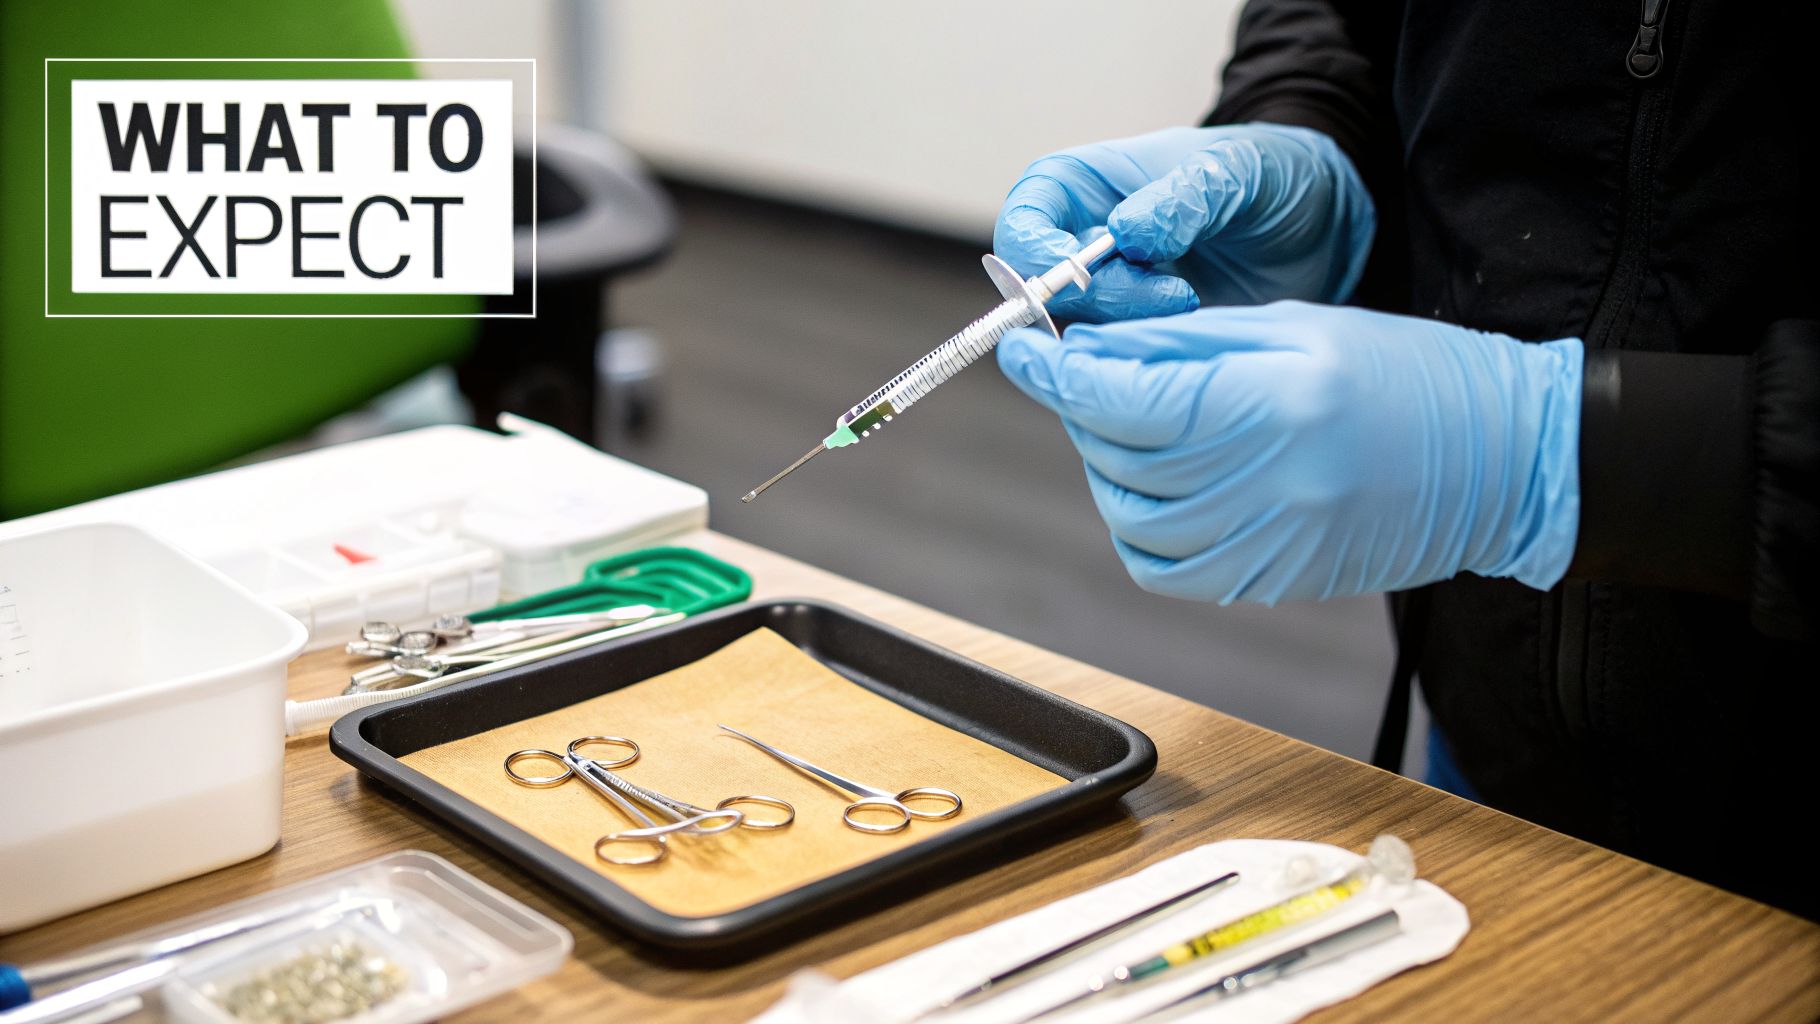
Think of it like a surgeon preparing for a procedure. Every single tool is laid out with precision, and absolutely everything that will touch your skin is sterilised and single-use.
This level of hygiene is non-negotiable. As cartilage piercings became more popular, hospital data from the 1990s in England revealed that complications like auricular perichondritis had more than doubled. This was directly linked to the rise in high ear piercings being performed with improper equipment. It’s a stark reminder of why choosing a professional studio in Croydon or Bournemouth that uses properly sterilised, single-use tools is so important.
The Piercing Procedure Itself
Once you're happy with the placement, marked with a tiny dot from a surgical pen, it's time for the main event. Your piercer will instruct you to take a deep, steadying breath in and exhale slowly. The piercing itself is incredibly fast—a sharp but very brief pinch that’s over in a moment.
This is where you see the profound difference between a proper piercing needle and a piercing gun. Reputable professionals exclusively use a brand-new, sterile, single-use hollow needle, and for good reason:
- Precision: A hollow needle is razor-sharp. It cleanly parts the tissue, creating a perfect, smooth channel for the jewellery with minimal trauma to the surrounding area.
- Hygiene: That needle is used once, on you, and then immediately disposed of in a sharps container. This completely eliminates any risk of cross-contamination.
- Safety: A needle is gentle. By contrast, a piercing gun uses blunt force to ram a stud through your skin, which can shatter delicate cartilage and cause significant, unnecessary damage.
The piercing gun vs. needle debate is a critical safety issue, and we’ve covered it in more detail in our article here: https://piercingnearme.co.uk/piercing-gun-vs-needle/. As soon as the needle has created the channel, your chosen jewellery is smoothly inserted, and just like that, you're done!
Final Checks and Aftercare Instructions
With your beautiful new jewellery secure, your piercer will clean the area one last time and give it a final check. We would never send you on your way without making sure you feel completely confident about looking after your new addition.
You’ll receive crystal-clear aftercare instructions. We'll cover exactly how to clean your piercing (usually with a simple sterile saline solution), what to avoid (like twisting the jewellery or going for a swim), and what to expect as it heals. You’ll also get our contact details, so you can reach out with any questions at all.
You’ll leave the studio feeling informed, empowered, and ready to start your healing journey. If you’re ready to book your own supportive and professional piercing experience, just send us a message on WhatsApp at 07752913846.
Of all the questions we get asked in the studio, two always top the list: “Is it going to hurt?” and “How long will it take to heal?” They’re great questions, and having honest answers is the first step towards a happy, healthy piercing. So, let’s walk through what you can really expect.
What Does Getting Pierced Actually Feel Like?
Let's get the pain question out of the way. Everyone’s experience is unique, but we can definitely give you a good idea of the sensation. For most people, a piercing is just a sharp, quick pinch that’s over and done with in a single breath. On a pain scale of 1 to 10, a standard lobe piercing is barely a 2/10 – it’s a quick sting, and that's it.
Cartilage piercings, like a helix or a tragus, are a little more noticeable, usually landing somewhere between a 5/10 and a 7/10. The feeling is definitely sharp, but it's incredibly brief. Honestly, before you’ve even had a moment to really process it, the jewellery is in place, and that initial pinch fades into a dull, warm throb. Our piercers are so swift and practiced that we find the anticipation is almost always worse than the piercing itself!
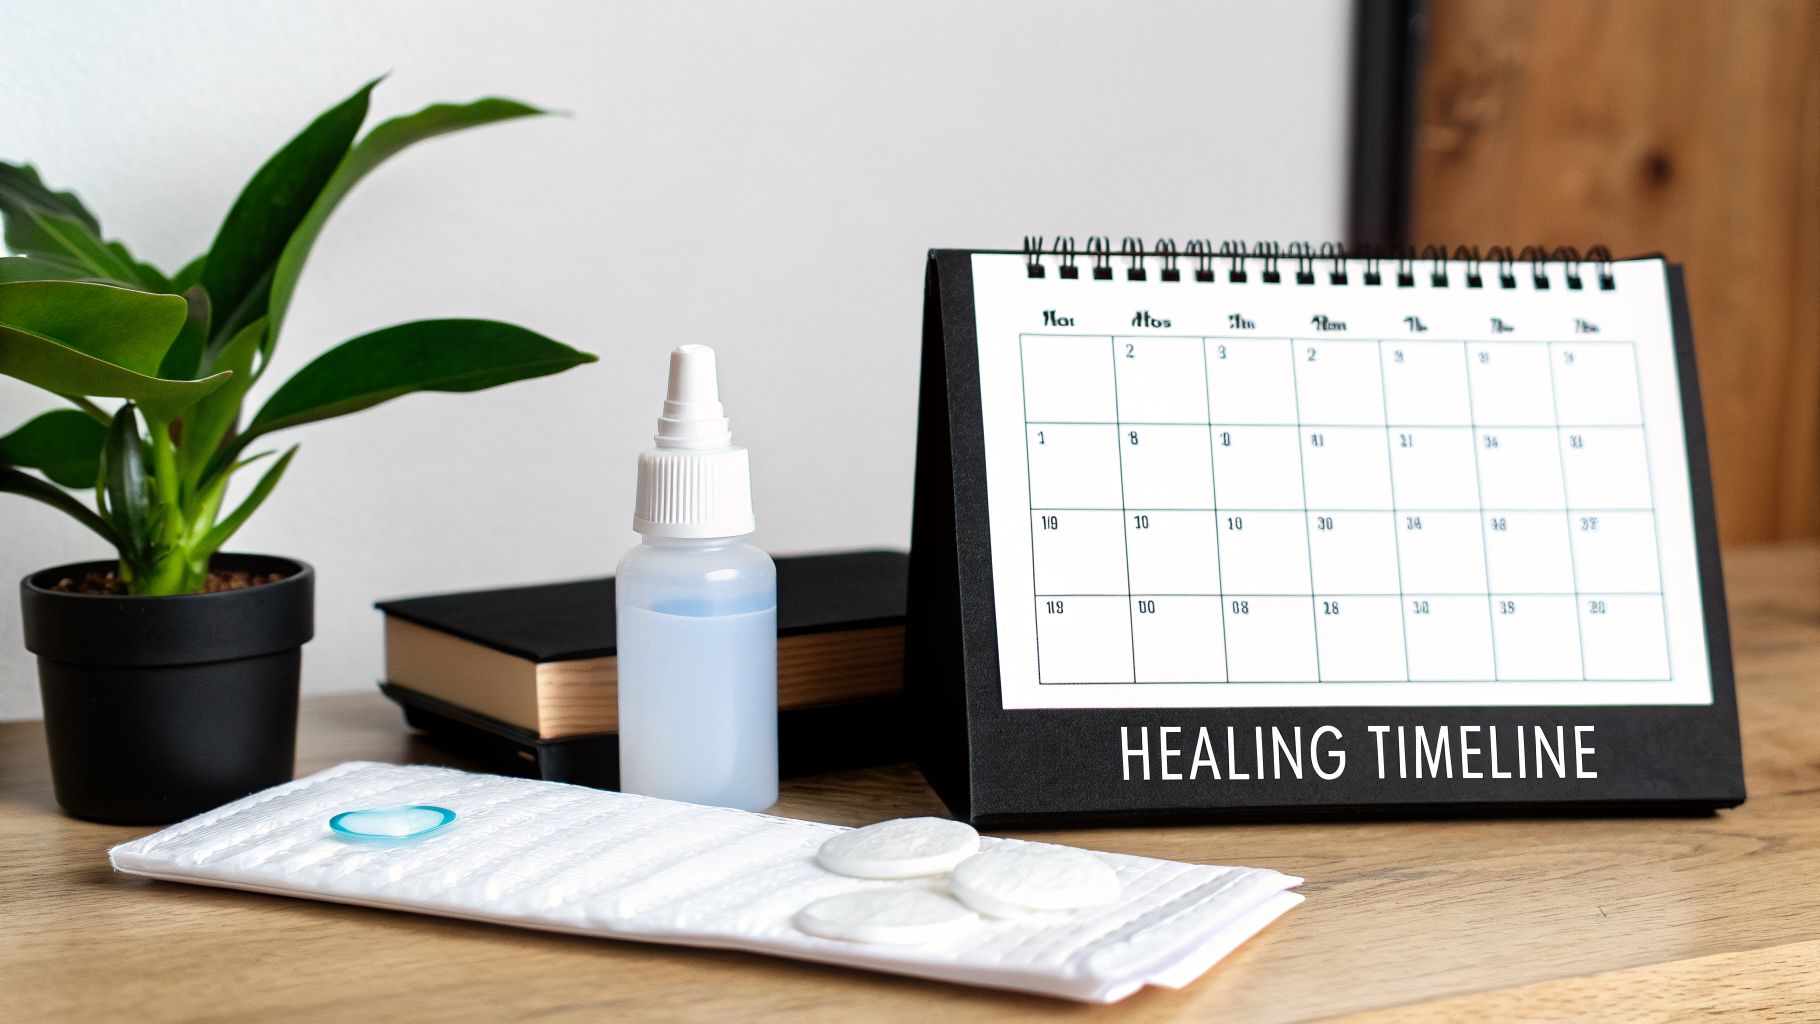
The Healing Journey: A Marathon, Not a Sprint
Healing is a process that demands patience, especially with cartilage. A lobe piercing is like a short road trip; you can expect it to be fully healed and settled in about 6-8 weeks. Cartilage, on the other hand, is more of a long-haul flight. It takes a lot more time, typically anywhere from 6 to 12 months, to fully heal from the inside out.
It’s really important to grasp that a piercing can look and feel perfectly fine on the surface long before it's truly stable. That’s because the internal channel, called a fistula, takes time to mature. This is exactly why you have to stick with your aftercare for the entire recommended period, no exceptions. If you want a more detailed breakdown for a specific placement, our guide on ear piercing healing times is a great resource.
Think of it this way: your body is building a brand-new tunnel of skin right through your ear. Your aftercare routine isn't just about cleaning; it's about creating the perfect, undisturbed environment for that delicate construction project to succeed.
To help you visualise this, here’s a quick summary of what to expect for some popular ear piercings.
Ear Piercing Healing Times & Aftercare Summary
| Piercing Type | Estimated Full Healing Time | Key Aftercare Tip | When to Downsize Jewellery |
|---|---|---|---|
| Lobe | 6 - 8 weeks | Clean twice daily with saline. | After 4 - 6 weeks |
| Helix | 6 - 12 months | Avoid sleeping on it; use a travel pillow. | After 4 - 8 weeks |
| Conch | 6 - 12 months | Be mindful of earbuds and glasses. | After 4 - 8 weeks |
| Tragus | 6 - 9 months | Keep earbuds clean and avoid pressure. | After 4 - 8 weeks |
| Daith | 6 - 9 months | Clean inside the ear curve thoroughly. | After 6 - 10 weeks |
| Rook | 6 - 12 months | The trickiest to clean; be patient. | After 6 - 10 weeks |
Remember, these are just estimates. Your own healing journey might be a little quicker or take a bit longer, and that's completely normal. The key is consistency.
The Dos and Don'ts of Flawless Aftercare
Good, consistent aftercare is the single most important part of healing your piercing. It’s not complicated, but you do need to be diligent. Think of this as your simple but non-negotiable roadmap.
What You Should Do:
- Clean Twice a Day: Just use a sterile saline wound wash spray. A quick spritz on the front and back of the piercing is all you need. Let it air dry, or gently pat the area dry with a piece of clean, non-woven gauze.
- Wash Your Hands: This is a big one. Always wash your hands thoroughly with soap and water before you touch your piercing for any reason.
- Use a Piercing Pillow: If you’re a side sleeper, this is a game-changer. A travel pillow with a hole in the middle lets you sleep comfortably without putting any pressure on your new piercing.
What You Should Never Do:
- Don't Twist or Turn It: This is old, terrible advice! Twisting your jewellery only tears the fragile healing tissue inside, introduces bacteria, and is a one-way ticket to getting irritation bumps. Just leave it alone.
- Don't Use Harsh Products: Steer clear of alcohol, hydrogen peroxide, and antibacterial soaps. They are far too aggressive, drying out the skin and irritating your piercing, which only slows down healing.
- Don't Go Swimming: For at least the first 4-6 weeks, you must avoid submerging your piercing in pools, hot tubs, lakes, or the sea. These bodies of water are full of bacteria that can lead to a nasty infection.
Normal Healing vs. Warning Signs
Knowing the difference between what’s normal and what’s a red flag is crucial. For the first week or two, it’s completely normal to experience some redness, swelling, and tenderness. You might also see some clear or whitish fluid (this is lymph, not pus) that dries into little “crusties” around the jewellery. This is all part of a healthy healing process.
However, be on the lookout for signs that something isn’t right. If the pain gets worse after the first few days, you see thick yellow or green discharge, or the area feels hot to the touch, it’s time to get in touch. Don’t wait. Contact your piercer straight away so they can take a look. For any concerns, you can call our partner studios on 01202 9000 50 or send a message via WhatsApp to 07752913846.
Choosing the Right Jewellery Materials and Styles
Let's talk about one of the most critical decisions for your new piercing, and it’s not just about what looks good. The piece of jewellery we start you with isn't just an accessory; think of it as a medical implant that will live inside your body for weeks, or even months, while you heal. Getting this choice right from the get-go is fundamental to a smooth and happy healing process.
Your body's immune system is incredibly smart. When you introduce a foreign object like a new earring, it immediately goes into assessment mode, trying to figure out if it's a threat. High-quality, biocompatible metals get a quiet pass, allowing your body to focus on healing. The wrong material, however, triggers alarms, leading to irritation, allergic reactions, and a real headache for you and your piercing.
This is exactly why professional piercers are so strict about the jewellery we use for that initial piercing. We only work with materials that have a long, proven track record of being safe and non-reactive.
Materials That Promote Healing
When you come into a reputable studio like Timebomb Tattoo & Piercing, we won’t show you a massive tray of every style under the sun. Instead, you’ll see a curated selection of metals. These are the industry’s gold standard for safety.
Here’s what you can expect to choose from for a fresh piercing:
- Implant-Grade Titanium (ASTM F-136): This is the champion of piercing materials, and for good reason. It’s the very same metal used in surgical implants like bone pins and joint replacements. It's 100% nickel-free, super lightweight, and won’t tarnish, making it the safest bet for absolutely everyone, especially if you have sensitive skin.
- Implant-Grade Steel (ASTM F-138): Another robust, body-safe option, this surgical steel has an extremely low nickel-release rate, making it a great fit for most people. It's polished to a mirror finish, tough as nails, and a totally reliable choice.
- Solid 14k or 18k Gold: If you love the classic warmth of gold, this is your best option. We’re talking solid gold, not plated. It must be at least 14 karats and specifically alloyed to be biocompatible (meaning no nickel). Anything above 18k is actually too soft to hold up in a new piercing, while lower-karat gold often contains other metals that can cause a reaction.
A professional piercer's insistence on implant-grade materials isn't about being picky—it's about protecting your health. We follow strict industry standards designed to give your piercing the absolute best chance to heal without a single complication.
Metals and Styles to Avoid in a New Piercing
Knowing what to avoid is just as important as knowing what's safe. A lot of the cheap, attractive jewellery you see out there is completely wrong for a piercing that's still healing.
Until your piercing is fully healed (and we mean fully), steer clear of these:
- "Mystery Metals": If you don't know exactly what it's made of, don't let it near your piercing. Cheap costume jewellery is notorious for containing high levels of nickel, lead, and other nasty irritants.
- Sterling Silver: While it’s beautiful for healed piercings, sterling silver tarnishes (oxidises) when it comes into contact with the fluids from a healing wound. This can permanently stain your skin a greyish-black colour (a condition called argyria) and cause serious irritation.
- Plated Jewellery: That gold-plated earring has only a microscopic layer of gold over a base of cheap, reactive metal. That plating can—and will—chip away, exposing your sensitive new piercing to whatever junk metal is hiding underneath.
Beyond the metal itself, the shape of the jewellery makes a huge difference. For most new cartilage piercings, like a helix or a conch, a flat-back labret stud is the only way to go. Stylish hoops might be tempting, but they move around constantly, creating friction and dragging bacteria into the piercing channel. A labret stays put, which means less irritation and a much smoother heal.
Have questions about jewellery? Our partner studios are happy to help. You can call them on 01202 9000 50 or message them via WhatsApp on 07752913846.
Frequently Asked Questions About Ear Piercings
Getting a new piercing is exciting, but we know it can bring up a lot of questions. It's completely normal! Feeling informed is the best way to feel calm and ready for the chair.
Over the years at our Croydon and Bournemouth studios, we've heard them all. So, we've put together answers to the queries that pop up time and time again, giving you the expert insight you need to feel confident.
How Old Do I Need to Be for an Ear Piercing?
Let's get the big one out of the way first. Age requirements are there for a reason – mainly to make sure you’re ready for the responsibility of aftercare. It’s a commitment, and we take that seriously.
For a standard lobe piercing, if you’re under 16, you’ll need a parent or legal guardian to come with you and give their consent. For everything else – that’s all your cartilage piercings like a helix, tragus, or conch – the minimum age is 16 years old. You'll need to bring a valid photo ID, like a passport or driving licence, to prove your age.
This isn’t just our policy; it’s a standard that reflects what most people think is sensible. A 2011 YouGov poll actually found that 52% of adults in Great Britain believe 16 is the right age for piercings without parental consent. It’s all about making sure you're prepared. You can dive deeper into the research behind UK body piercing regulations and public opinion if you’re curious.
What Is the Difference Between a Needle and a Piercing Gun?
This is a crucial one, and it goes right to the heart of your health and safety. At a professional studio like Timebomb Tattoo & Piercing, we will only ever use a sterile, single-use, hollow needle. You should steer clear of piercing guns, especially for cartilage.
Here’s why a needle is the only professional choice:
- Precision: A needle is incredibly sharp. It glides through the tissue to create a clean, perfect channel, which means less trauma to the area and a much smoother healing journey.
- Hygiene: Every needle we use is brand new, pre-sterilised, and used only on you before being disposed of safely. This completely eliminates the risk of passing on any blood-borne pathogens.
- Safety: A piercing gun uses blunt force to slam a stud through your ear. This shatters the surrounding tissue and can cause serious problems like keloid scarring. For cartilage, it's even worse – it can literally fracture it. Plus, guns can't be properly sterilised, which opens the door to nasty infections.
Think of it this way: a needle is like a surgeon’s scalpel making a clean incision. A piercing gun is like a blunt-force office stapler. For the health of your ear, you always want the scalpel.
If you want to chat more about this, our team is always happy to explain the process in detail. Just give us a call on 01202 9000 50.
How Can I Tell if My Piercing Is Infected?
It’s completely normal for a new piercing to be a little unhappy at first. For the first week or two, you can expect some redness, localised swelling, and general tenderness. You might also spot some clear or whitish fluid that dries into "crusties" – that’s just lymph fluid, and it’s a good sign your body is healing.
An infection, though, looks and feels very different. It’s vital you know the warning signs so you can get on top of it quickly.
Key Signs of a Potential Infection:
- Worsening Pain: The initial soreness should be getting better, not worse after a few days.
- Increased Swelling and Redness: The area gets more swollen and the redness spreads or deepens.
- Heat: The piercing site feels genuinely hot to the touch.
- Coloured Discharge: You notice thick, yellow or green pus oozing from the piercing.
If you spot any of these signs, do not take the jewellery out. Removing it can trap the infection inside. Get in touch with your piercer straight away so we can take a look and advise you on what to do next.
Can I Go Swimming with a New Piercing?
This is a hard no, unfortunately. We strongly advise you to keep your new piercing out of any body of water for at least the first 4-6 weeks. That means no swimming pools, hot tubs, lakes, rivers, or the sea.
These places are basically a party for bacteria, and dunking an open wound into them is asking for a nasty infection. Even chlorinated pools aren't sterile enough to be safe. The golden rule of aftercare is to keep your piercing clean and dry, and swimming is the opposite of that.
If you're a keen swimmer or have a holiday booked, it’s best to schedule your piercing for a time when you can comfortably commit to staying out of the water. For any urgent aftercare questions on the go, you can always reach us on WhatsApp at 07752913846.
Ready to start your piercing journey with a team you can trust? At Piercing Near Me, we connect you with the highest-rated professional piercers at Timebomb Tattoo & Piercing in Croydon and Bournemouth. Book your consultation today and let us help you achieve your dream look safely and stylishly. Find your nearest studio and book now on Piercing Near Me.