The best way to avoid keloids from your piercing is to be proactive. It all starts with choosing a highly skilled piercer and understanding your personal risk factors before you even sit in the chair.
Making smart choices—like picking implant-grade titanium jewellery, selecting a low-risk piercing spot like an earlobe, and committing to a solid aftercare routine—is your strongest defence against this type of aggressive scarring.
Understanding Keloids and Assessing Your Personal Risk

Before you fall in love with a new piercing, it’s really important to know what you’re up against, especially when it comes to keloids. So, what are they? A keloid isn't just a standard piercing bump. It’s an overgrowth of scar tissue that spreads well beyond the original piercing site.
Unlike more common hypertrophic scars that stay put, keloids can keep growing over time. They often become firm, rubbery, and sometimes quite itchy.
Know Your Personal Risk Factors
Without a doubt, the single biggest risk factor for developing a keloid is your genetics. If your parents, siblings, or other close relatives have a history of keloids from injuries, surgery, or even old piercings, your own risk is significantly higher. This isn't something to ignore.
Your skin type also plays a huge part. The British Association of Dermatologists highlights that people with more melanin in their skin are more susceptible. In fact, studies show that individuals of African, Hispanic, or Asian descent have a 15-20 times greater risk of keloids compared to Caucasians. Age is another factor, with keloids being more common in those under 30.
A pre-piercing consultation is far more than just a formality—it’s a crucial risk assessment. Being completely honest about your family’s medical history and any past scarring issues gives your piercer the information they need to offer the safest advice for you.
Let's say you're in Croydon and dreaming of a new cartilage piercing but know keloids run in your family. Popping into a reputable studio like Timebomb Tattoo & Piercing for a chat can make all the difference. Our piercers are trained to ask the right questions and properly assess your skin before moving forward.
Distinguishing Keloids from Piercing Bumps
It’s incredibly easy to mistake a new keloid for a simple piercing bump, but they behave very differently. Knowing what to look for is key.
- Piercing Bumps (Hypertrophic Scars): These are small, reddish bumps that stay right around the piercing hole. They’re usually just a sign of irritation and tend to shrink or disappear once you remove the cause of the problem (like snagging or improper jewellery).
- Keloids: These also start small, but they grow larger than the original piercing wound. They feel much firmer to the touch and can continue to expand for months or even years.
Figuring out your personal predisposition is the first real step in learning how to avoid keloids from piercings. If you're in a higher-risk group, it doesn’t automatically rule out getting pierced. It just means that choosing the right piercer and the right piercing location is absolutely critical.
If you want to explore your options, have a look at the different types of piercings and their associated risks. For a personal consultation, give our Bournemouth studio a call on 01202 9000 50.
Your First Defence Against Keloids: Choosing a Professional Piercer
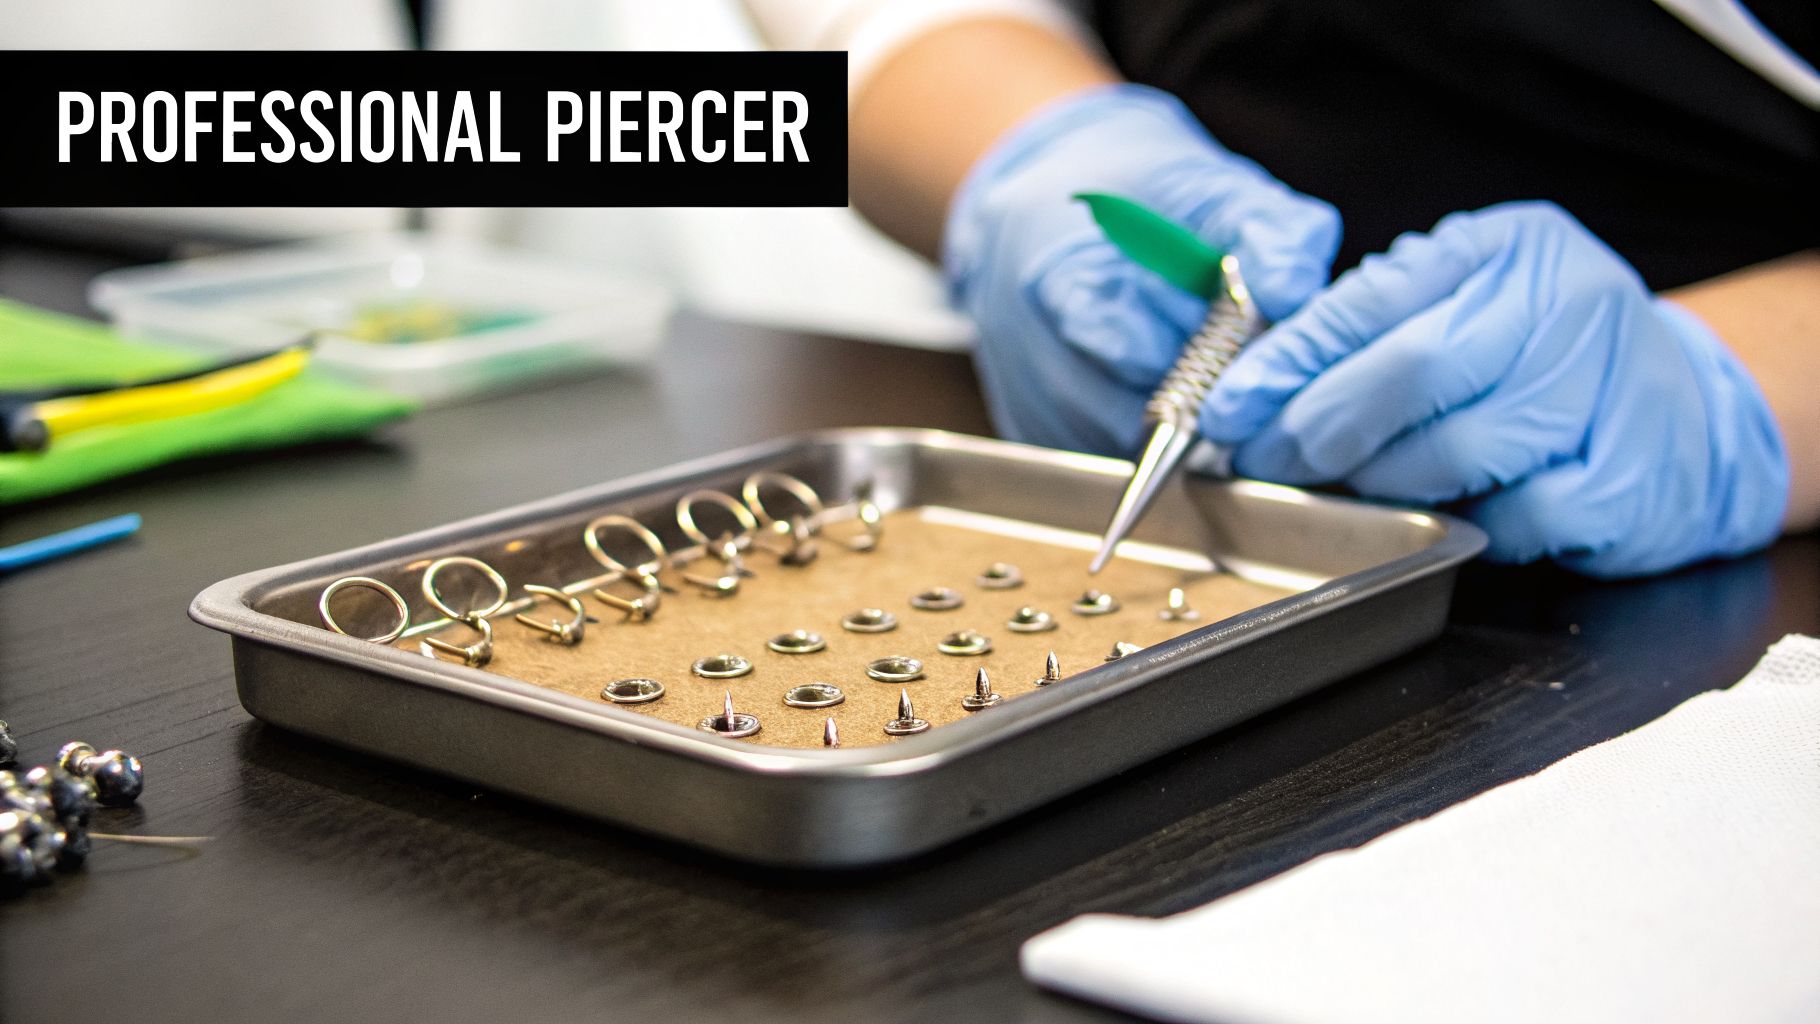
When you're worried about how to avoid keloids from piercings, the most important decision you'll make happens long before the needle ever touches your skin. It’s all about who you trust to do the piercing. This is absolutely not the time to be tempted by a DIY kit or hunt for the cheapest deal you can find.
A reputable studio is your first and most powerful line of defence against unwanted scarring. The difference in safety and technique between a pro and an amateur is massive. Every single part of a professional piercing process is designed to minimise trauma to the skin, which is the number one trigger for keloid formation.
Needle vs. Gun: Why It’s Not Even a Debate
A huge part of a professional’s technique comes down to the tool they use: a sterile, single-use, hollow needle. This is worlds apart from the piercing guns you might see in a mall kiosk. A proper piercing needle is incredibly sharp, creating a clean, precise channel for the jewellery by removing a tiny sliver of tissue.
Piercing guns, however, work by brute force. They ram a blunt-ended stud through your skin, causing a messy tear. This blunt force trauma creates significant damage and inflammation, dramatically increasing your risk of developing a scar.
Prevention really starts with the right technique and materials. Using implant-grade metals can cut down adverse tissue reactions by up to 80% compared to low-quality silver or nickel, which are linked to 40% of allergic keloid triggers. It’s why piercing guns, which can increase your keloid risk by up to 3x, were banned from professional UK settings back in 2016. You can read more about the impact of material choice in this detailed study on biomaterials.
The Importance of Implant-Grade Jewellery
What goes into your fresh piercing is just as critical as how the hole was made. In professional studios, like our own at Timebomb in Croydon and Bournemouth, we only use implant-grade jewellery. That isn't just marketing speak; it's a medical standard.
Materials like ASTM F-136 titanium are biocompatible, which means your body is far less likely to see the jewellery as a foreign invader and attack it. Keloids are often triggered by allergic reactions or constant irritation, both of which are common problems with cheap metals that contain nickel. Starting with implant-grade jewellery is a non-negotiable step for a safe healing process.
How to Spot a Trustworthy Piercing Studio
So, how can you tell a top-tier studio from a place that might cut corners? Here’s a quick checklist of what to look for:
- Check Their Reviews: Look for genuine Google reviews that specifically talk about cleanliness, professionalism, and a supportive, helpful atmosphere.
- Observe the Environment: The studio should be spotless. You should be able to see sterilisation equipment (like an autoclave) and watch piercers open fresh, sterile gloves for every single client.
- Ask About the Jewellery: A great piercer will be more than happy to talk you through their jewellery materials. They should show you that the jewellery comes in sealed, pre-sterilised packages.
- They Offer a Consultation: A good piercer won’t just rush you into the chair. They should take the time to discuss your risks, the best placement for your anatomy, and walk you through the aftercare.
Choosing the right expert is fundamental. Our guide on finding a professional for ear piercings has even more detailed tips to help you.
Ready for a safe and professional piercing experience? For consultations or bookings in our Bournemouth or Croydon studios, give us a call at 01202 9000 50 or send a message via WhatsApp to 07752913846.
Choosing Your Piercing Wisely to Avoid Keloids
When you're trying to prevent keloids, aftercare is only half the battle. The real groundwork starts before the needle even touches your skin—it all begins with where you get pierced. Some parts of the body are simply more prone to this type of aggressive scarring, and making a smart choice from the outset can save you a world of trouble later on.
Think about it: a piercing is a wound that your body needs to heal. The biggest trigger for keloids is excessive trauma and tension during that healing process. Areas where your skin is tight, constantly moving, or stretched are the riskiest spots. Places like the chest, shoulders, or upper back are prime examples because every time you move your arms or torso, you're putting stress on the healing tissue.
High-Risk vs. Low-Risk Piercing Zones
This constant, subtle pulling can confuse your body's healing signals, causing it to go into overdrive and produce far too much collagen. That’s how a keloid is born. On the flip side, areas with softer, more stable skin give your piercing a much easier time healing.
Lowest Risk: The earlobe is, without a doubt, the safest place to get pierced if you're worried about keloids. The tissue is soft, has fantastic blood flow, and doesn't get pulled around much.
Medium Risk: Piercings in the ear cartilage (like a helix or conch) and the navel fall into a middle ground. Cartilage takes longer to heal and can be easily irritated, but the skin itself is fairly stable, which helps keep the risk moderate.
Highest Risk: We strongly advise caution with surface piercings (like on the sternum or nape), chest piercings, or any piercing that sits over a joint. If you know you have a family history of keloids or have formed them before, these placements carry a significant risk.
To give you a clearer picture, here’s how the risk breaks down for some of the most popular piercings.
Piercing Keloid Risk Comparison
| Piercing Location | Relative Keloid Risk | Key Considerations |
|---|---|---|
| Earlobe | Very Low | Excellent blood flow and soft, stable tissue make this the safest option. |
| Eyebrow | Low | Generally heals well, but can be prone to catching and snagging. |
| Nostril | Low to Moderate | Good healing, but can be irritated by nose-blowing or makeup. |
| Navel (Belly Button) | Moderate | High-waisted clothing and core movement can create friction and tension. |
| Ear Cartilage (Helix, Conch) | Moderate to High | Slower healing time and vulnerability to bumps, sleeping pressure, and irritation. |
| Nipple | Moderate to High | Constant friction from clothing can be a major issue during healing. |
| Chest/Sternum | Very High | Skin is under constant tension from arm and chest movements, a major keloid trigger. |
| Upper Back/Shoulder | Very High | High skin tension and movement make this a particularly high-risk zone. |
Ultimately, choosing a location with less movement and tension is one of the most effective preventative steps you can take.
A good piercer will always start you with a slightly longer bar. This is deliberate. It leaves room for initial swelling, preventing the jewellery from compressing the tissue—a huge trigger for scarring and other complications.
Why Your First Piece of Jewellery Matters So Much
The style of jewellery you start with is just as critical as the placement. That snug-fitting ring you’ve been dreaming of will have to wait. Starting with a hoop, especially a tight one, puts uneven pressure on the healing piercing channel and practically invites irritation.
Likewise, heavy or dangly jewellery is completely out of the question for a new piercing. The constant weight and motion will tear at the delicate healing tissue. For the initial healing period, we will always fit you with a simple stud or barbell made from implant-grade titanium. This ensures the piercing stays stable and calm, giving your body the best possible chance to heal cleanly.
For personalised, expert advice on the safest placement for your anatomy, we’d love to see you in our Croydon or Bournemouth studios. You can also book a consultation by calling 01202 9000 50 or dropping us a message on WhatsApp at 07752913846.
Your Daily Aftercare Routine for Healthy Healing
Okay, the piercing itself is done, but the most important part is just beginning. How well your new piercing heals is now entirely down to you. A solid aftercare routine is your best defence against irritation, infection, and the kind of trauma that can trigger an overgrowth of scar tissue, like a keloid.
It's not rocket science, but it does require commitment. The whole game plan boils down to three simple rules: keep it clean, keep it dry, and leave it the hell alone. Stray from this, and you risk disrupting the fragile new tissue, which can signal your body to go into scarring overdrive.
The Dos and Don'ts of Cleaning
The golden rule here is to clean your new piercing just twice a day using a sterile saline solution. That's it. Forget what you might have heard about using alcohol or hydrogen peroxide—they are far too harsh. They’ll wipe out the healthy new cells your body is working hard to build, causing the exact kind of irritation you're trying to avoid.
- DO: Gently mist the area with a sterile saline spray. Alternatively, you can soak a clean, non-woven gauze square in the solution and apply it for a minute or two.
- DON’T: Use cotton buds or pads. I’ve seen it a thousand times—their tiny fibres break off, get trapped in the piercing, and cause a world of trouble.
- DO: Carefully pat the area dry with a fresh piece of paper towel. A damp piercing is a playground for bacteria, so don't skip this.
- DON’T: Over-clean. Seriously, more is not better. Cleaning more than twice a day will only dry out and annoy the skin.
Following proper aftercare is non-negotiable. In fact, UK Health Security Agency data from 2022 revealed that a staggering 70% of piercing infections—often a precursor to keloids—were linked to non-professional settings with poor aftercare advice. You can read more about the research into post-piercing complications on PubMed.
Minimise Physical Trauma at All Costs
Beyond cleaning, your main job is to act as a bodyguard for your new piercing. Any snagging, pressure, or constant movement is basically an open invitation for a piercing bump or, in a worst-case scenario, a keloid.
There's an old piercer’s myth that you need to twist your jewellery to stop it from getting stuck. Never do this. All you're doing is tearing the delicate, healing tissue (the fistula) inside the piercing channel. This causes inflammation and can set your healing back weeks. I promise, your jewellery will not get stuck.
Keep these simple rules in mind to protect your piercing from day-to-day hazards:
- Avoid Sleeping on It: This is absolutely critical for cartilage piercings. Grab a travel pillow and sleep with your ear in the hole. It looks a bit silly, but it completely removes any pressure.
- Keep Cosmetics Away: Hairspray, foundation, lotions, and perfumes are notorious for clogging up fresh piercings and causing nasty irritation. Keep them well clear of the area.
- Dress Smartly: If you’ve just had your navel done, ditch the high-waisted jeans for a while. For new ear piercings, be mindful when pulling jumpers over your head or brushing your hair.
This visual guide breaks down the key factors in keloid prevention, from picking a low-risk spot to choosing the right jewellery from the get-go.

As you can see, setting yourself up for success starts with smart placement in a low-tension area (like an earlobe) and using implant-grade, properly fitted initial jewellery.
Respect the Healing Timeline
Patience is probably the hardest part of healing a new piercing. For the entire healing period, you must avoid submerging it in pools, hot tubs, lakes, or the sea. These are basically bacterial soups that can lead to a serious infection. Your piercer will give you a specific healing timeline for your particular piercing—stick to it.
If you have any questions about your routine or need a good cleaning product, check out our guide on using a saline spray for piercing aftercare. For anything urgent, just get in touch with our studios directly. You can call us on 01202 9000 50 or drop a message on WhatsApp to 07752913846.
What to Look for During Healing, and What to Do if Trouble Starts
So, you've navigated the prep work and got your piercing. Fantastic. But now comes the part that requires your full attention: the healing phase. This is where you need to be vigilant, because knowing the difference between a happy piercing and the first hint of a problem is crucial for preventing keloids.
A bit of redness, some tenderness, and a little swelling are all par for the course in the first few weeks. You'll likely see some clear or whitish-yellow fluid (that's lymph, not pus!) that dries into 'crusties'. This is all perfectly normal. It's your body's standard response. An early-stage keloid, though? That’s a whole different story.
Is It a Keloid or Just an Irritation Bump?
This is the question we get asked all the time. Most piercing bumps are simple irritation bumps, technically called hypertrophic scars. They're a localised reaction to something bothering the piercing—maybe you snagged it, slept on it wrong, or the jewellery is a poor fit. The key thing is, they stay right around the piercing hole and usually go down once you fix the problem.
A developing keloid is more aggressive. Here’s what you need to be on high alert for:
- A dense, rubbery feel: An irritation bump is often quite soft. A new keloid feels firm and solid under the skin.
- Growth beyond the piercing: This is the number one red flag. A keloid won’t just sit on the piercing site; it will start to creep outwards onto the surrounding skin.
- Unrelenting itching or pain: A bit of itching is normal as a wound heals. Keloids, on the other hand, can be intensely itchy or even painful as the scar tissue actively grows.
- Changes in colour: The scar might start off pink or red, but as it develops, it can darken and become a deeper shade than your natural skin tone.
A keloid is a solid mass of collagen. It is not a pimple or a fluid-filled blister you can pop. Please, do not ever try to squeeze, pick at, or cut a suspected keloid. This adds more trauma, which just signals your body to build an even bigger, more aggressive scar.
Your Game Plan if You Suspect a Keloid
If a bump starts ticking these boxes, don’t adopt a ‘wait and see’ attitude. The faster you act, the better your chances of managing it effectively.
First, get in touch with your piercer. This should be your immediate first step. We see healing piercings day in and day out, so we can often tell straight away if it’s a simple irritation issue or something that needs a doctor's eye.
If you’re one of our clients at our Croydon or Bournemouth studios, please don’t hesitate. Call us on 01202 9000 50 or, even better, send some clear, well-lit photos over WhatsApp to 07752913846 so we can give you some immediate advice.
Next, consider some early interventions.
While you wait for professional assessment, a couple of at-home methods have shown real promise for managing very early-stage keloids. Just be sure to use them with our guidance.
- Silicone Scar Sheets or Gel: This is the gold standard for scar management. When worn consistently over the bump, medical-grade silicone helps to hydrate and apply light pressure to the scar tissue. This can flatten the area and significantly reduce that maddening itch. You need to be patient, though; it takes months of consistent use to see results.
- Pressure Earrings: Specifically for lobe piercings, applying gentle, continuous pressure is a well-known technique for both preventing and managing keloids. Specialised pressure earrings can do the job, but it’s vital you get professional advice on how to use them correctly to avoid causing more harm than good.
Ignoring these signs is the absolute worst thing you can do. Quick action, guided by your piercer and possibly a dermatologist, is your best shot at stopping a small bump from becoming a much larger, permanent problem.
Your Piercing and Keloid Questions Answered
We hear a lot of the same worries when it comes to piercings and keloids. Let's clear the air and give you some straightforward answers based on our years of experience, so you can make a choice you feel good about.
I've Had a Keloid Before. Can I Get Another Piercing?
The honest answer is yes, but we need to be extremely careful. If you’ve developed a keloid in the past, your personal risk for any new piercing is much higher. This isn’t something to take lightly.
It's absolutely vital that you come in for a proper chat before booking anything. Here at our Timebomb Tattoo & Piercing studios, we can sit down with you, take a look at the old scar, and talk through your options. We'll always guide you towards much lower-risk placements—think a simple earlobe piercing instead of cartilage, for example.
If you decide to go ahead, we’ll use flawless techniques and only the best implant-grade titanium jewellery. From there, it's over to you. You'll need to be incredibly vigilant with your aftercare and check the piercing daily for any signs of trouble. For a personalised consultation to discuss your specific situation, give us a call on 01202 9000 50.
Are Some People Just More Likely to Get Keloids?
Yes, absolutely. The biggest factor by far is genetics. If your parents or siblings have a history of keloids, your chances of getting them are significantly higher.
Your skin type also plays a huge role. Skin with more melanin is known to be more prone to keloiding. In fact, some studies show that the rate of keloid formation can be up to 15-20 times greater for people of African, Asian, or Hispanic heritage. Age is another piece of the puzzle, as they tend to appear more often in people under 30. If any of this sounds like you, it just means we need to be extra cautious and follow every preventative step to the letter.
A piercing bump (hypertrophic scar) is a small, localised bump that stays within the piercing's boundaries. A keloid, however, is an aggressive overgrowth of scar tissue that expands far beyond the original wound, can be firm and itchy, and may continue growing.
What's the Difference Between a Keloid and a Piercing Bump?
This is a really important distinction, and one that causes a lot of unnecessary panic. Let's break it down.
A simple piercing bump, which is technically a hypertrophic scar, is just a localised bubble of tissue that forms right at the piercing site. It's your body's reaction to irritation—maybe you slept on it funny or snagged it with a hairbrush. The good news is that these bumps usually calm down and disappear once you remove the source of irritation.
A keloid is a whole different beast. It's a much more serious overgrowth of scar tissue that doesn't respect boundaries. It will spread out far beyond the original piercing hole. Keloids often feel firm, rubbery, and can become quite itchy. They can also continue to grow over time. While a bump is a temporary setback, a keloid is a dermatological issue that requires a proactive approach.
Should I Use Antiseptics to Prevent Keloids?
Definitely not. Please, step away from the rubbing alcohol, hydrogen peroxide, and any of those harsh antibacterial soaps or ointments. Using these on a healing piercing is one of the worst things you can do.
These chemicals are far too aggressive for the delicate new cells your body is trying to build. They essentially scorch the earth, killing off the good cells along with the bad, which causes major irritation. That irritation can actually trigger the exact kind of scarring you’re trying to avoid.
The only thing you should ever use to clean your piercing is a simple, sterile saline solution. If you're ever unsure about aftercare, just send us a message on WhatsApp at 07752913846. We're here to help.
Ready to get pierced by experts who put your safety and healing first? At Piercing Near Me, we connect you with the highly skilled professionals at Timebomb Tattoo & Piercing in Croydon and Bournemouth. Book your consultation today for a piercing experience you can trust.