
You've saved the photo, chosen the side of your ear, and started imagining a neat little stud sitting in the centre of the cartilage. Then someone tells you an inner conch piercing can still be healing long after it looks perfectly calm. That's where many first-time clients become confused.
The important distinction is simple: surface settling isn't the same as deep cartilage healing. An inner conch can look tidy on the outside while the tissue inside remains vulnerable to pressure, jewellery movement and contamination. With the right placement, suitable jewellery and consistent care, it can become a beautifully balanced part of your ear. It just needs more patience than a standard lobe piercing.
Understanding the Inner Conch Piercing Commitment
A client might arrive at our Croydon studio with a screenshot of a small silver-coloured stud and a plan to change it to a hoop as soon as the swelling disappears. The initial consultation often changes that timetable. The piercing may look settled from the front, but cartilage takes longer to stabilise beneath the skin, particularly in a central bowl that can be pressed by pillows, headphones and earbuds.
An inner conch piercing sits in cartilage, not the soft lower lobe. UK-facing guidance commonly places its full healing window at about 6–9 months, although wider cartilage guidance ranges from 3–6 months to 4–12 months, depending on individual healing and aftercare. You'll find those differing ranges reflected in UK guidance on conch piercing healing. The variation doesn't mean the advice is unreliable. It shows that healing depends on anatomy, jewellery fit, daily habits and how consistently the area is protected.
Why the placement demands patience
Cartilage has a more limited blood supply than soft tissue. That helps explain why an inner conch piercing can remain tender, crusty or easily irritated after the outside appears quiet. A calm-looking surface isn't permission to twist the jewellery, sleep directly on it or replace the starter piece.
The practical test isn't whether the piercing looks fine in a mirror. It's whether the channel has remained comfortable and stable under ordinary movement and pressure.
This is a versatile placement. A discreet stud can look refined, while a later ring can create a stronger focal point. The result depends on more than the jewellery itself. A professional piercer needs to assess the bowl of your ear, mark a position that suits your anatomy and select jewellery that leaves room for early swelling.
At Timebomb Tattoo & Piercing, clients can arrange professional piercing support in Croydon and Bournemouth. The aim is to make the decision with clear information rather than social-media expectations. If you're prepared to protect the ear and follow a patient aftercare routine, the inner conch can be an excellent long-term choice.
Ear Anatomy and Precise Placement Options
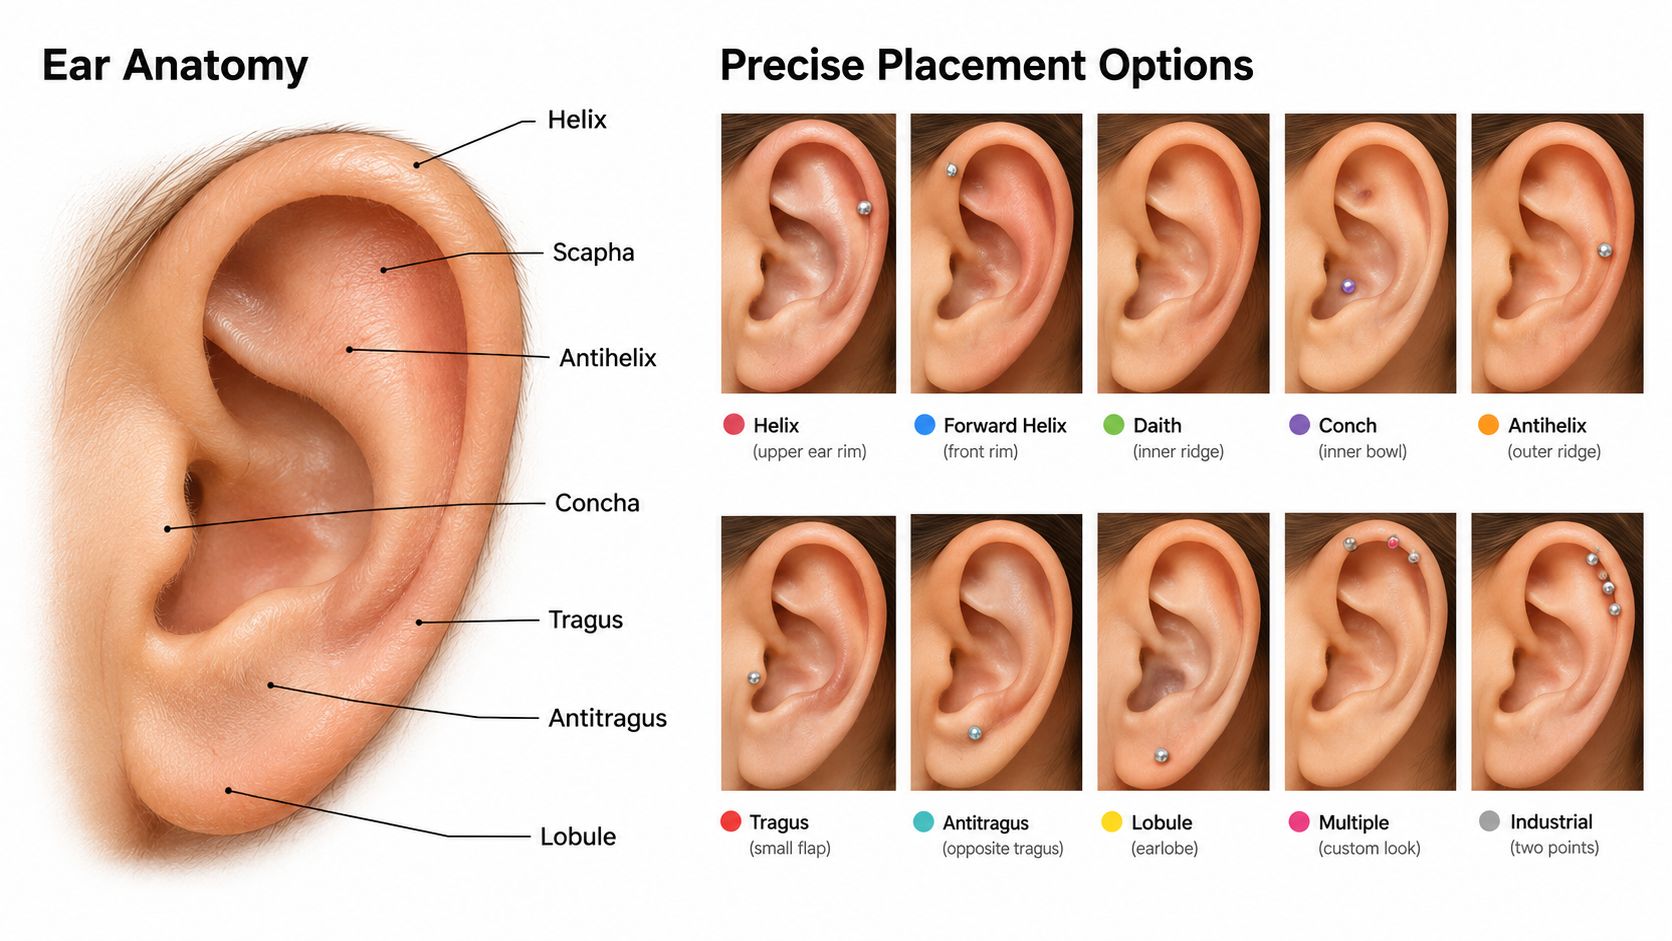
The word “conch” describes the broad cartilage area forming the bowl of the ear. An inner conch piercing is placed in the deeper, central bowl, nearer the ear canal. An outer conch sits further out on a flatter ridge, closer to the helix. They may sound similar, but the available space, visual effect and jewellery possibilities aren't identical.
How a piercer assesses your ear
A careful consultation usually follows a few practical checks:
- Identify the bowl. The piercer locates the central cartilage and checks how much usable surface sits above the ear canal.
- Assess thickness and depth. Cartilage varies between ears. The piercer considers how the tissue will accommodate the post and any expected swelling.
- Discuss the intended jewellery. A small stud may suit a more central position. A future hoop may require a position and angle that allow the ring to sit naturally without pressing into the ear.
- Mark and review. You should be able to see the mark from different angles and approve it before the needle is used.
Your two ears may not be mirror images. One side may have a deeper bowl, a different fold or a slightly different cartilage profile. A placement that looks centred on one ear might need a small adjustment on the other to remain balanced.
Inner conch compared with outer conch
The inner conch creates a focal point inside the ear's bowl. It generally gives a stud a contained, centred appearance. The outer conch sits on a flatter area nearer the outer rim and may have different limitations, particularly where cartilage is thick or the ridge is not sufficiently flexible.
Placement also affects function. A post that sits too close to the canal may interfere with some earphones, while a piece positioned too far out may not give the centred look you wanted. Jewellery should follow the anatomy rather than forcing the anatomy to match a trend.
For a closer look at how position influences style and fit, see this guide to conch piercing placement. At Timebomb Tattoo & Piercing, the consultation is customised to your ear shape, desired style and realistic jewellery plan.
The Reality of Cartilage Healing Timelines
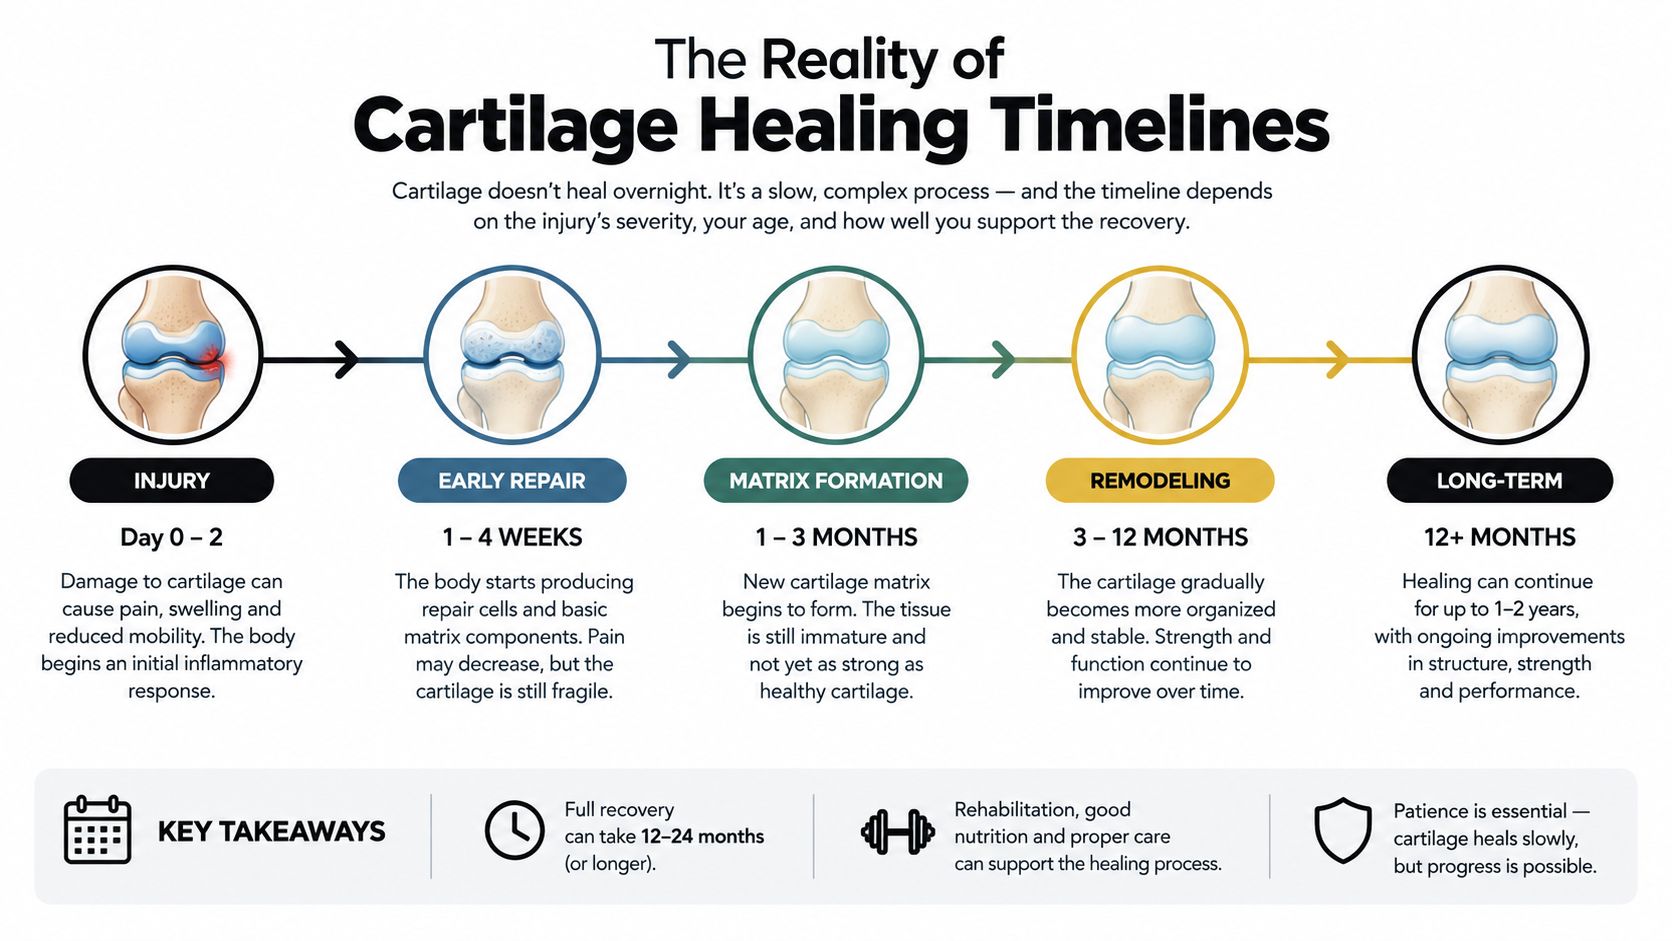
The six-week idea causes much of the confusion around an inner conch piercing. Six weeks can be a useful point for checking how the initial swelling has changed, but it doesn't reliably represent complete internal healing. Some local-authority ear-cartilage guidance refers to 6–8 weeks, retailer aftercare pages may refer to 12 weeks or 3–6 months, and UK editorial and specialist guidance places full conch healing at 6–12 months. These differing timeframes are set out in local UK ear-piercing aftercare guidance.
The reason is biological. The skin at the entrance can settle before the deeper cartilage channel has finished strengthening. Cartilage also has limited blood supply, so the body's repair process is slower than it is in the lobe. If you stop cleaning or change the jewellery because the outside looks normal, you can disturb tissue that hasn't finished stabilising.
A more useful way to read the timeline
Early healing often includes tenderness, warmth, mild swelling and light crusting. These signs can fluctuate, especially after the ear catches on hair or receives accidental pressure.
Surface settling is the stage where the piercing looks calmer and feels less noticeable. This is when people are most likely to underestimate the remaining healing work. The channel may still react to sleeping on the ear, earbuds or a hoop that moves with every turn of the head.
Deep stabilisation takes place over the longer cartilage window. Some UK piercing guidance describes inner conch healing as 6–9 months, with broader specialist guidance extending to 12 months, and irritation potentially prolonging recovery to 18 months. The UK cartilage piercing care guide connects prolonged recovery with repeated pressure, sleeping on the pierced side, earbuds and snagging.
Treat six weeks as a review point, not a finish line.
A piercing that is painless for several days can still become sore after a night of pressure. It's better to judge progress by a sustained pattern of comfort, no recurring crusting and no reaction to normal activity. A piercer should assess the channel before you make a significant jewellery change. More practical guidance is available in this overview of cartilage piercing healing.
Choosing Implant-Grade Jewellery for Fresh Piercings
The jewellery placed on the day affects how much movement and pressure the new channel experiences. For a fresh inner conch piercing, a flat-back labret stud is the usual professional starting point because it sits securely against the ear and can accommodate the early healing period more predictably than a moving ring.
A hoop is attractive, but its curve moves as you sleep, brush your hair or put on clothing. That movement can pull at both openings of the piercing. A ring can also be pressed sideways by a pillow or headphone, creating irritation even when it initially feels comfortable.
Studs and hoops serve different stages
Fresh jewellery needs to prioritise stability and access for swelling. A piercer selects the post length after examining your tissue rather than relying on a universal measurement. UK jewellery guidance commonly discusses a 16-gauge, 1.2 mm stud for many fresh conch piercings, while a UK ear-piercing FAQ advises leaving cartilage jewellery in place for 12 weeks before changing it. The cartilage jewellery advice from H. Samuel also reflects the importance of not treating an early jewellery change as routine styling.
Implant-grade titanium is a sensible initial material because professional studios use it for fresh piercings where biocompatibility and a low-irritation surface matter. The finish should be smooth, the backing should sit comfortably and the post should neither compress the ear nor leave excessive space for snagging. You can compare material considerations in this guide to titanium piercing jewellery.
| Jewellery Type | Fresh Piercing (0-6 Months) | Fully Healed Piercing |
|---|---|---|
| Flat-back labret stud | The preferred starting style, with a carefully selected post to allow for swelling and cleaning. | Suitable for everyday wear, including decorative ends and more fitted posts when assessed by a piercer. |
| Hoop or conch ring | Generally postponed because movement and pressure can irritate the developing channel. | An option once the channel is fully settled and the piercer confirms that the ring's diameter and shape suit the anatomy. |
| Decorative stud | Possible if the design has a smooth, suitable end and doesn't create extra snagging. | A wider range of shapes and finishes can be considered. |
When a hoop becomes realistic
There isn't one calendar date that makes every conch ready for a ring. The piercing needs to be calm, stable and free from recurring irritation, and the ring needs to fit without pulling the channel into an awkward angle. A professional piercer should make the first change, particularly if the post has been in place through a long healing period.
Waiting protects your options. Starting with a stud doesn't rule out a ring later. It gives the channel a more stable environment while you decide whether you want a subtle fitted hoop, a larger statement ring or to keep the original stud.
What to Expect During Your Studio Visit
A good appointment should feel organised rather than rushed. At the Croydon or Bournemouth studio, the process begins with a consultation, not with a needle. Your piercer will discuss the placement, inspect your ear and ask relevant questions about your health, healing history and any factors that could affect the appointment.
The appointment in practical steps
- Consultation and suitability check. You discuss which ear you want pierced, the look you're aiming for and the jewellery you'd like to wear eventually. The piercer checks the anatomy and raises any contraindications that need attention.
- Jewellery selection. The starter piece is chosen for the fresh piercing, swelling and practical fit. This is the time to ask how the jewellery may be changed later.
- Marking. A surgical pen marks the proposed entry and exit position. You check the mark while sitting naturally, and the piercer adjusts it if the angle or balance isn't right.
- Sterile preparation. The piercing is performed with a single-use, sterile needle, never a piercing gun. Equipment is handled according to professional hygiene procedures and reusable instruments are autoclaved.
- Piercing and insertion. The sensation is usually a brief, sharp pressure. The piercer then inserts the sterile jewellery and checks that it sits comfortably without unnecessary compression.
- Aftercare explanation. You leave knowing how to clean the area, what pressure to avoid and when to return for an assessment or jewellery adjustment.
The needle matters because cartilage needs a controlled, precise approach. A gun forces jewellery through tissue and isn't the appropriate method for this placement. A calm environment also helps you stay still, ask questions and approve the result before anything permanent happens.
You won't need to guess what normal early tenderness means or decide alone whether the post is too long. Ask the piercer to show you how the backing sits and explain what to do if swelling changes. Clear instructions are part of a professional piercing service, not an optional extra.
Personalised Aftercare and Avoiding Irritation Traps
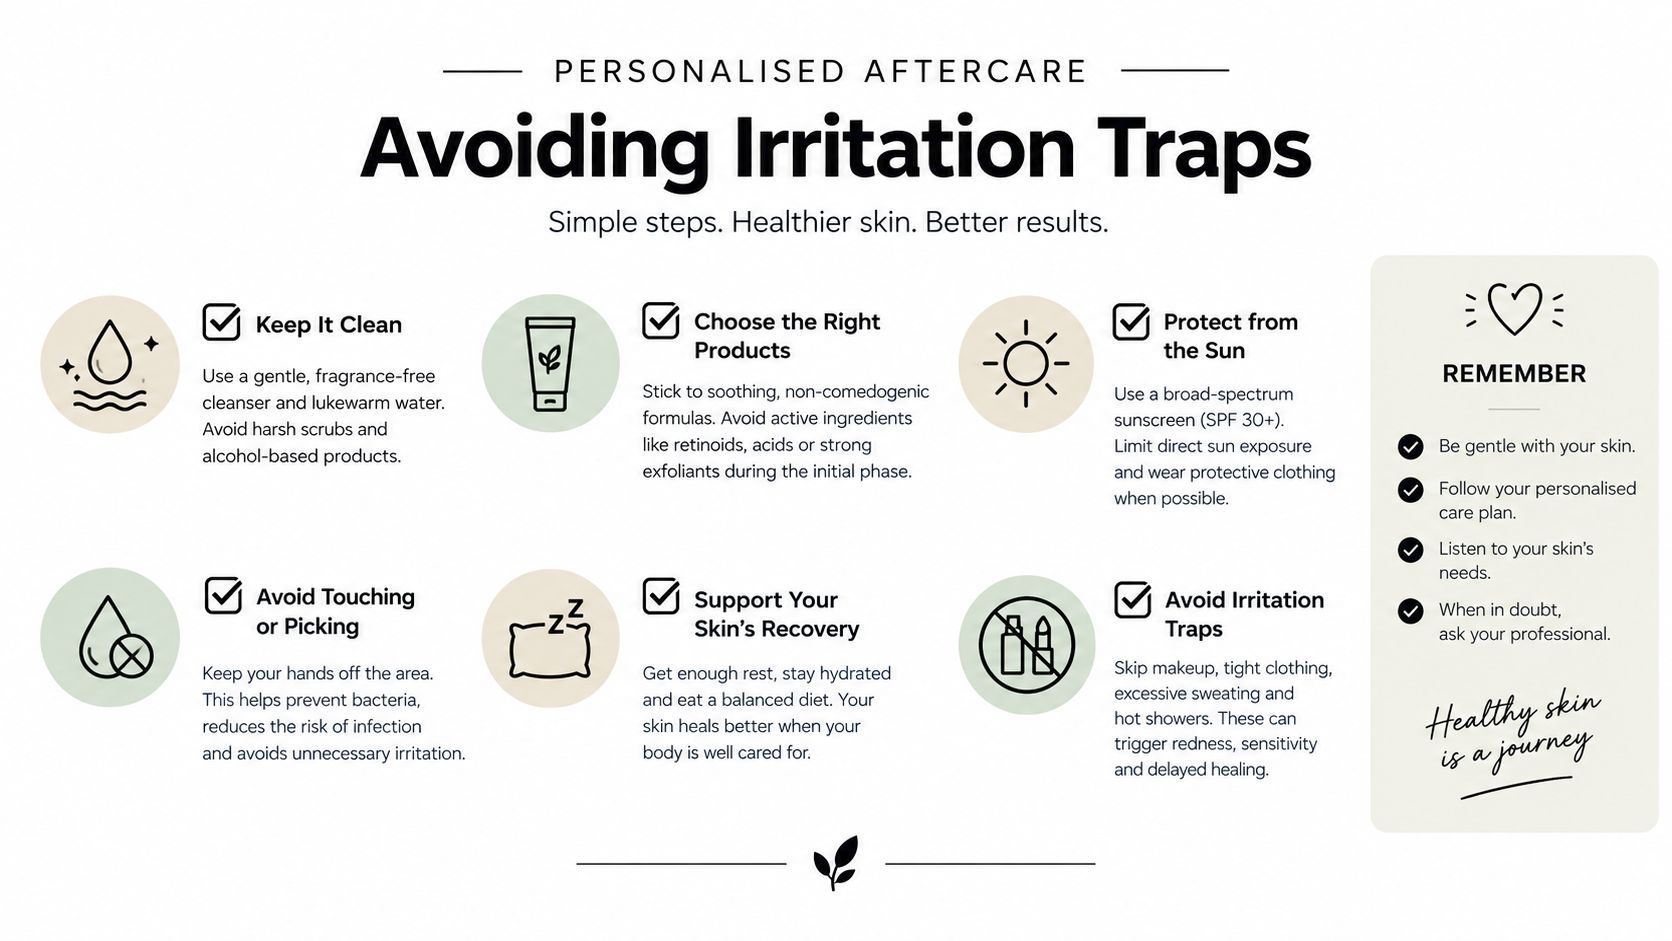
Inner conch aftercare works best when it's simple and consistent. UK guidance commonly recommends cleaning ear cartilage piercings twice a day with sterile saline, while advising you not to twist, pick or sleep on the jewellery. The UK saline aftercare guidance from Metalmorphosis also refers to a 0.9% sodium chloride wound-wash standard used in UK-oriented piercing advice.
A gentle cleaning routine
Wash your hands before touching the area. Use sterile saline to soften any crusting, then allow loosened residue to rinse away without picking at it. Pat the surrounding skin dry with a clean paper towel rather than rubbing the jewellery or leaving the ear damp.
The NHS describes using warm salty water to soften crusting, drying with a clean paper towel and avoiding picked crusts or dry jewellery twisting in its guidance on infected piercings. Follow the routine supplied by your piercer, particularly if the studio has provided a sterile wound-wash product. Don't add harsh antiseptics, strong household products or unnecessary creams unless a healthcare professional tells you to.
The pressure traps people underestimate
- Sleeping on the pierced side: Pressure can push the jewellery against the cartilage for hours. A travel pillow with the ear resting in the central opening can keep the ear suspended while you sleep.
- Earbuds and headphones: Anything that sits in or over the conch can rub the jewellery, transfer contamination or apply direct pressure. Choose alternatives while the piercing is healing, and ask your piercer before returning to regular use.
- Hair and clothing: Long hair, jumpers, scarves and changing tops can catch the post. Tie hair away when needed and pull clothing carefully over the ear.
- Swimming: Some UK aftercare advice recommends avoiding pools and open water until healing is complete. Water exposure creates a contamination risk, so swimming shouldn't be treated as harmless just because the surface looks settled.
- Unnecessary handling: Checking the jewellery repeatedly, turning it for reassurance or removing crusts with fingernails creates friction. Clean it, dry it gently and leave it alone.
Pressure is often the hidden reason an inner conch remains irritated. If tenderness returns after sleeping on that side or wearing a particular headset, remove the trigger rather than scrubbing the piercing more aggressively.
Seek medical advice if you're concerned about signs of infection, and don't remove jewellery without professional or medical guidance. Cartilage problems deserve prompt attention.
Booking Your Consultation and Common Questions
Before booking an inner conch piercing, use a short decision checklist:
- Anatomy: You're willing to let a professional assess the bowl and mark a position suited to your ear.
- Jewellery: You're comfortable beginning with a stable stud rather than insisting on a hoop immediately.
- Routine: You can clean with sterile saline twice daily and avoid pressure, snagging and unnecessary handling.
- Lifestyle: You're prepared to adapt sleeping, earphone and swimming habits during the healing period.
- Expectations: You understand that a calm surface may arrive before full internal cartilage healing.
Questions clients often ask
Is there an age requirement?
Age policies can depend on the studio, the piercing type and whether a parent or guardian is involved. Ask the Croydon or Bournemouth team before booking so you know which identification or consent arrangements apply.
Can I bring my own jewellery?
Speak to the studio before the appointment. Fresh-piercing jewellery must be suitable in material, finish, design and size, so a piercer may recommend using a piece from the studio's approved range instead.
Should I attend if I have a cold or feel unwell?
Contact the studio first. If you're ill, postponing may be more comfortable and gives the team a chance to advise you based on the appointment and your symptoms.
Can I walk in?
Both Croydon and Bournemouth offer consultations, walk-ins and appointments. Availability can change, so calling ahead is sensible, especially if you want a particular jewellery style or need an anatomy consultation.
For quick questions or booking support, call 01202 900050 (Bournemouth) / 020 8686 7730 (Croydon) or message WhatsApp on 07752 913846 (Bournemouth) / 07902 490584 (Croydon). A conversation before the appointment can clarify placement, jewellery, aftercare and whether the timing works with your routine.
Piercing Near Me offers access to consultations, walk-ins and appointments for professional piercing at Timebomb Tattoo & Piercing studios in Croydon and Bournemouth. Visit Piercing Near Me to explore your options, then contact the team to plan an inner conch piercing with suitable jewellery and clear aftercare.