
You're lying in bed, trying not to catch the jewellery on your pyjama top, and wondering whether the lingering soreness is normal. The piercing may look calm in the mirror, yet you can still feel it when you roll over, shower, or pull on a bra. That uncertainty is common because a nipple piercing often looks settled before the tissue inside has finished rebuilding.
The most useful way to understand a nipple piercing healing timeline is to track stages rather than count down to one guaranteed date. UK guidance places healing across a broad range of roughly 3 to 12 months, with some sources describing around 3 to 6 months and others allowing 6 months to 1 year, depending on health and aftercare. You can compare this range in guidance from Holier Than Thou on piercing healing times and Braintree and CIEH body-piercing aftercare information.
This guide focuses on observable changes: swelling that settles, crusting that becomes less frequent, skin that stops reacting to ordinary movement, and jewellery that remains comfortable without recurring irritation. It also separates routine irritation from symptoms that deserve prompt professional attention.
What the Nipple Piercing Healing Timeline Really Looks Like
A nipple piercing usually heals from the inside out. The two openings can look closed and tidy while the channel between them remains delicate, rather like a narrow tunnel whose entrance has finished before its walls have fully strengthened.
That's why “fully healed” shouldn't mean “it looks fine”. In practical terms, a healed piercing can tolerate daily movement, clothing contact, routine cleaning, and normal jewellery movement without repeated tenderness, discharge, swelling, or flare-ups. UK studio guidance from Stoke Body Piercing describes nipple healing as generally taking 6 months to 1 year, while other UK guidance uses a shorter estimate. The variation itself is important. A fixed date can create false confidence.
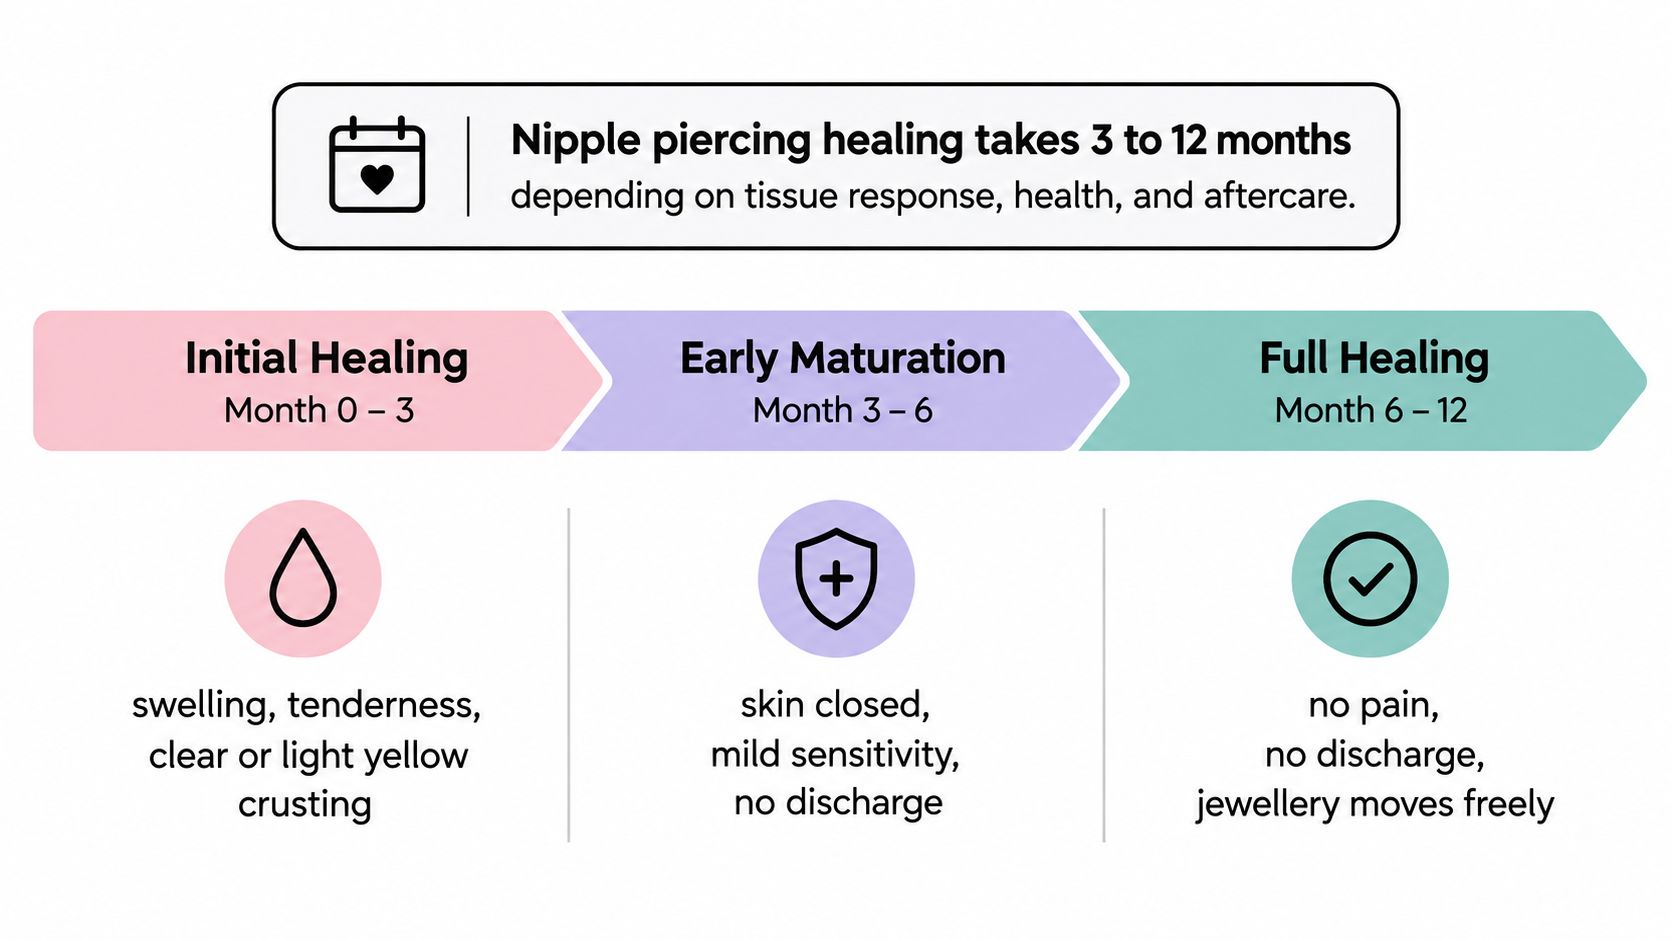
Stage one is the visible settling period
During the first stage, the expected signs are tenderness, light swelling, and clear or pale crusting around the entry and exit points. The area may feel sensitive when clothing moves across it, but the overall direction should be towards less swelling and less discomfort.
The next stage is quieter. The skin can appear closed, crusting becomes occasional or disappears, and movement becomes easier. That doesn't automatically mean the channel is ready for jewellery changes or rough handling. A piercing can be comfortable during ordinary activities and still become sore after pressure, a snag, or repeated touching.
The final stage is maturation. Pain and discharge should no longer recur, and the jewellery should sit comfortably without causing repeated reactions. The time required depends on your health, anatomy, friction, sleeping position, jewellery, and how consistently you follow aftercare. UK guidance also stresses that care quality and overall health influence whether healing sits nearer the shorter or longer end of the documented range.
For a practical overview of hygiene and behaviour during this process, use this UK body-piercing aftercare guide. Slower healing isn't automatically a problem if the signs are steadily improving and irritation settles when its trigger is removed.
The First Days and Weeks After Your Piercing
The first fortnight is easier to manage when you know what to look for instead of expecting the area to feel normal immediately.
Days one to three
On day one, soreness, tenderness, and light swelling are expected. The nipple may feel warm, but warmth should be mild rather than radiating, increasingly hot, or accompanied by worsening throbbing.
Around day two or three, you may notice a small amount of clear or pale fluid. This can dry around the jewellery and form a light crust. Don't pull it away while it's dry. Warm water during a shower or a sterile saline rinse can soften it so it comes away without tearing the fragile tissue.
Days four to seven
Swelling often reaches its most noticeable point around day four, then begins to reduce. The useful question is not whether the piercing looks perfect, but whether the direction is improving. Less swelling, calmer colour, and fewer sharp sensations suggest the early response is settling.
Crusting around the openings is common during the first week. Picking can reopen the surface and create a new irritation cycle, so let softened residue rinse away rather than treating it like dirt that must be scrubbed off.
Practical rule: Warm water can soften crusting. Fingers, nails, and force can turn a normal healing sign into fresh trauma.
Week two onwards
Itching often appears around week two as the skin and nerve endings recover. Mild itching by itself isn't an infection cue, especially when the area isn't becoming hotter, redder, more swollen, or more painful.
By weeks three to four, visible progress should be clearer. Swelling should have reduced, the skin colour should be more stable, and ordinary clothing should cause fewer reactions. If the piercing repeatedly flares after pressure or remains increasingly painful, arrange a review rather than assuming every symptom belongs to normal healing.
UK aftercare advice also recommends limiting water exposure and mechanical stress early on. Cheltenham's body-piercing guidance advises showers rather than baths during the early period and avoiding swimming initially, while sexual activity should wait until the piercing is healed or dry.
Months Two to Six When the Piercing Looks Fine but Isn't
Months two to six are deceptive. The skin may look settled, crusting may have stopped, and movement may no longer hurt, but the internal channel can still be vulnerable.
Think of a sprained ankle that stops hurting before it's ready for unrestricted activity. You can walk across a room comfortably, but a sudden twist still causes a setback. A nipple piercing behaves similarly. It may tolerate ordinary movement while reacting badly to a snag, pressure during sleep, or jewellery that is twisted and compressed.
Signs the quieter phase is progressing
Look for a steady pattern rather than a single good day:
- Stable swelling: The piercing doesn't become puffy again after a shower, a night's sleep, or ordinary clothing.
- Straight jewellery: The bar sits evenly instead of leaning because one side is swollen or under pressure.
- Shorter reactions: A caught shirt may cause brief sensitivity, but it doesn't lead to a week of soreness.
- Calmer tissue: Tenderness becomes occasional and linked to a clear event rather than appearing without explanation.
A piercing that still oozes liquid when twisted or compressed is telling you that the channel isn't ready for that treatment. Persistent tenderness after every contact, or jewellery that shifts when it should remain stable, also suggests ongoing irritation or immature tissue.
Why setbacks happen here
People often relax their protective habits once the surface looks normal. They sleep directly on the piercing, return to restrictive clothing, allow repeated snagging, or change jewellery without a professional assessment. Each episode can disturb tissue that had begun to settle, pushing recovery towards the longer end of the UK range.
The UK aftercare guidance from Tattoo Heroes links slower healing with friction, pressure, heavy sweating, sports impacts, and premature jewellery changes. It also recommends avoiding swimming, hot tubs, jacuzzis, saunas, and heavy sweating until the area is fully healed. The practical test is simple: if a habit repeatedly causes swelling, soreness, or discharge, remove that trigger instead of asking the piercing to tolerate it.
Daily and Weekly Care That Keeps Healing on Track
A reliable routine should be gentle, repeatable, and boring. Your aim isn't to sterilise the skin with harsh products. It's to reduce residue and contamination while leaving the forming channel undisturbed.
Your daily routine
Clean the piercing twice daily with sterile 0.9% sodium chloride saline, using a pre-made product rather than homemade salt water. A sterile saline spray for piercing aftercare can make this easier because the concentration is prepared for wound care.
Wash your hands first. Apply the saline to the front and back, or use it as a gentle rinse, then allow stubborn crusting to soften. Leave the jewellery in place while cleaning. Twisting or removing it can tear the forming channel and introduce more irritation.
Afterwards, pat the area dry with a clean disposable paper towel. Don't rub, drag cotton buds across the entry points, or scrape away residue that hasn't softened. Avoid alcohol, hydrogen peroxide, strong antiseptics, and aggressive cleaning because these can irritate healing tissue rather than improving it.
Weekly checks and exposure controls
Check the jewellery position and the surrounding skin in good light. Notice whether the bar remains straight, whether swelling returns after sleep, and whether clothing has caused a new sore spot.
Choose a soft bralette or supportive sports bra if movement during sleep is a problem. Avoid bare skin rubbing against rough bedding, and change pillowcases and bras regularly. In the shower, use warm water and avoid directing a high-pressure jet straight at the piercing.
Skip chest-heavy workouts for the first 2 to 3 weeks, then reintroduce them gradually with a snug cotton layer that limits movement. Chlorine, hot tubs, lakes, and pool water should remain off-limits until at least month four, while UK guidance more broadly advises avoiding immersion until healing is complete. For the first three months, sexual and oral contact should involve barriers and gentle handling, with no pressure, pulling, or saliva directly irritating the site.
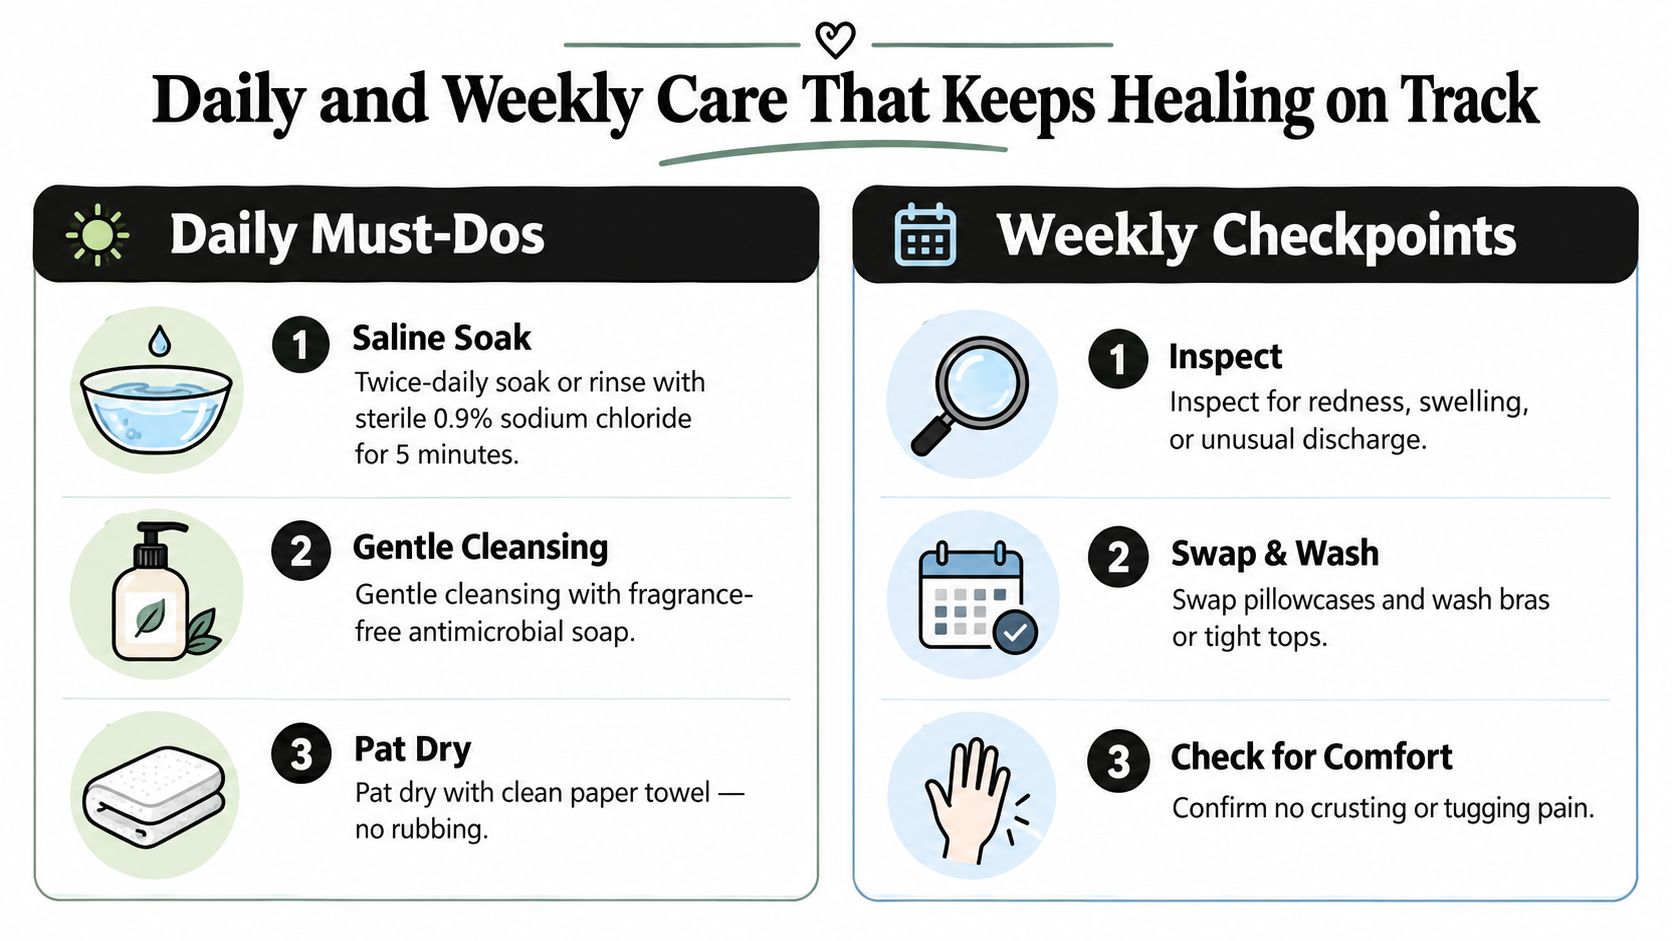
Mirror checklist: Wash hands, saline rinse, soften rather than pick, pat dry, check for pressure, and leave the jewellery alone.
Common Issues and How to Tell Them Apart
A photo taken in the same lighting each week can be more useful than memory. It lets you compare colour, swelling, discharge, and jewellery position without letting one anxious glance decide that something is seriously wrong.
| Sign or Symptom | Normal Healing | Irritation | Possible Infection |
|---|---|---|---|
| Colour and warmth | Mild pinkness or slight warmth that settles | Redness linked to pressure, snagging, or over-cleaning | Redness spreading beyond the piercing, with increasing heat |
| Fluid and crusting | Clear or pale lymph crust | Crusting returns after friction or compression | Yellow or green discharge, especially with odour |
| Pain | Mild tenderness that gradually reduces | Soreness after sleeping on it, catching clothing, or touching it | Escalating throbbing pain |
| Skin changes | Itching during the healing process can occur | A raised red bump near one exit point | Marked swelling or jewellery sinking into tissue |
| Whole-body signs | No fever or flu-like symptoms | Usually no general illness | Fever, chills, or a hot, swollen lymph node in the armpit |
| First response | Continue gentle saline care | Remove the trigger and reduce friction | Seek professional medical assessment promptly |
Irritation usually has a recognisable trigger
A tight bra, sleeping position, rough fabric, contaminated water, wrong jewellery, or over-cleaning can all keep a piercing reactive. If the trigger is removed, irritation should settle within 7 to 14 days. That timeframe is a practical guide for watching improvement, not permission to ignore symptoms that are getting worse.
Don't squeeze a bump or increase cleaning aggressively. Return to gentle saline care, reduce pressure, and ask a piercer to assess jewellery fit or material if the problem keeps returning.
Infection needs a different response
Infection indicators include worsening throbbing pain, spreading redness, foul-smelling yellow or green discharge, fever, chills, or a hot swollen lymph node. These symptoms need professional assessment within 24 hours, and medical symptoms should go to a GP or urgent medical service rather than being managed only with piercing aftercare.
For a further visual check, use this guide on how to tell if a piercing is infected. Don't remove jewellery without professional advice if infection is suspected, because closing the outside can interfere with drainage.
Jewellery and Clothing Choices That Shape Healing
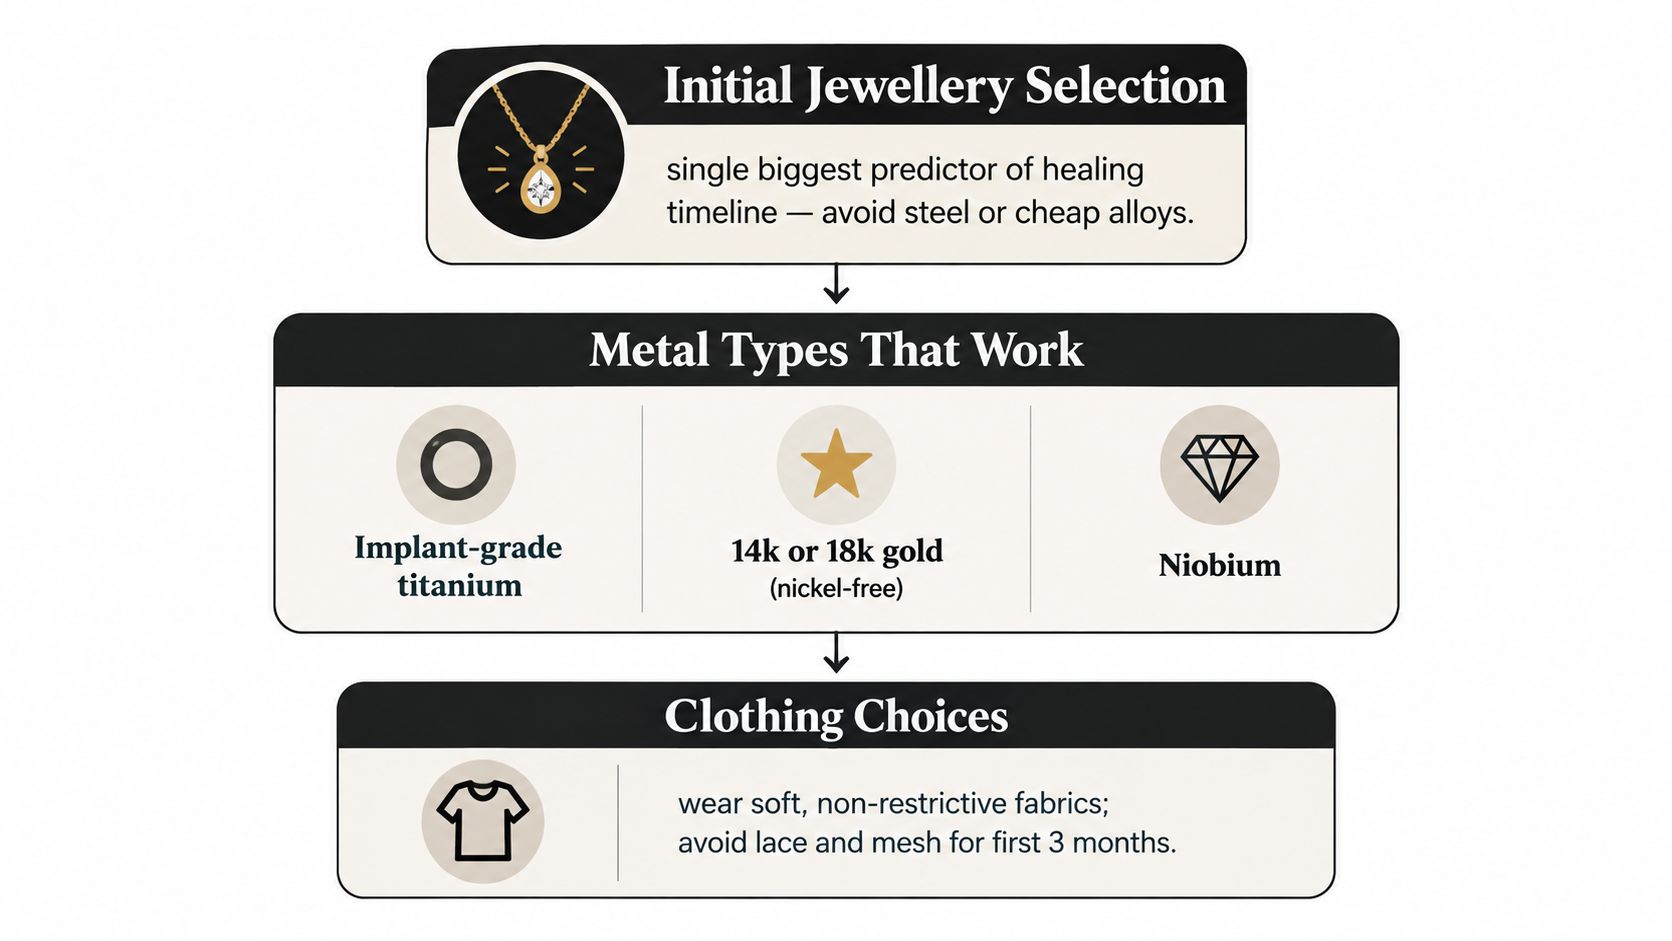
Jewellery affects pressure, movement, and skin contact throughout the nipple piercing healing timeline. A poor fit or reactive material can look like delayed healing because the tissue keeps responding to the jewellery itself.
Choose the material before the decoration
Suitable options for healing include implant-grade titanium meeting ASTM F136, solid 14k or 18k nickel-free gold, and niobium. Ask what the jewellery is made from rather than accepting a vague label such as “surgical steel”. Plated metals, acrylic, and mystery alloys are poor choices for a long healing process, particularly when nickel exposure causes contact irritation that resembles a stubborn piercing problem.
Straight barbells are usually the most practical starting style because they distribute pressure evenly and don't rotate as much as rings. Captive rings can catch on fabric and move through the channel, while curved barbells may create uneven pressure depending on your anatomy and fit.
Fit matters as much as metal
Initial jewellery needs enough length for early swelling. Many piercers use a barbell around 14g, sometimes 12g, with a length selected for the individual anatomy. A post around 16mm may be used where that length is appropriate, but sizing should be assessed in person rather than copied from another client.
Too-short jewellery can press into swelling and leave the ends tight against the tissue. Too-long jewellery can snag, swing, and repeatedly pull the openings. Both situations can prolong irritation.
Clothing should change with the piercing's behaviour:
- Month one: Choose loose, soft cotton and avoid lace, mesh, rough seams, and tight underwire.
- Months two to six: A snug cotton bralette can reduce movement if it doesn't compress or rub the jewellery.
- From month six onward: Underwire may be comfortable once movement is friction-free and the piercing no longer reacts after wear.
Don't forcibly enlarge or adjust the piercing before it's completely healed. UK guidance from Bridgend's body-piercing guidelines warns against forced enlargement and tight clothing because repeated pressure can prolong healing. Don't downsize to a shorter bar before month three at the earliest, and have a piercer perform the first jewellery change.
When to Seek Professional Help
Some discomfort can linger during a long healing process, but worsening symptoms deserve action. Stop experimenting with home care and contact a professional if the area develops radiating heat, redness that expands beyond the piercing, throbbing pain that interrupts sleep, yellow or green discharge with a foul odour, fever, chills, or jewellery that appears to be sinking into the tissue.
Mild soreness after a clear snag, occasional itching, and jewellery that feels snug but remains mobile are different. Those signs can reflect irritation or immature healing, especially when they improve after pressure and friction are reduced. The important distinction is direction. A normal or irritated piercing should settle when the trigger is removed, while a possible infection tends to become more painful, hotter, redder, or more swollen.
Know who to contact
Your piercer can check placement, bar length, angle, material, pressure points, and signs of migration. Send clear close-up photographs in good light, ideally including a wider image that shows the jewellery position and surrounding skin. Avoid filters, flash glare, and images taken immediately after cleaning, since those can make colour and discharge harder to judge.
Contact a GP or urgent medical service when you have fever, chills, flu-like feelings, spreading redness, escalating pain, or significant heat and swelling. A piercer can advise on jewellery and irritation, but infection symptoms require medical assessment rather than repeated saline rinses.
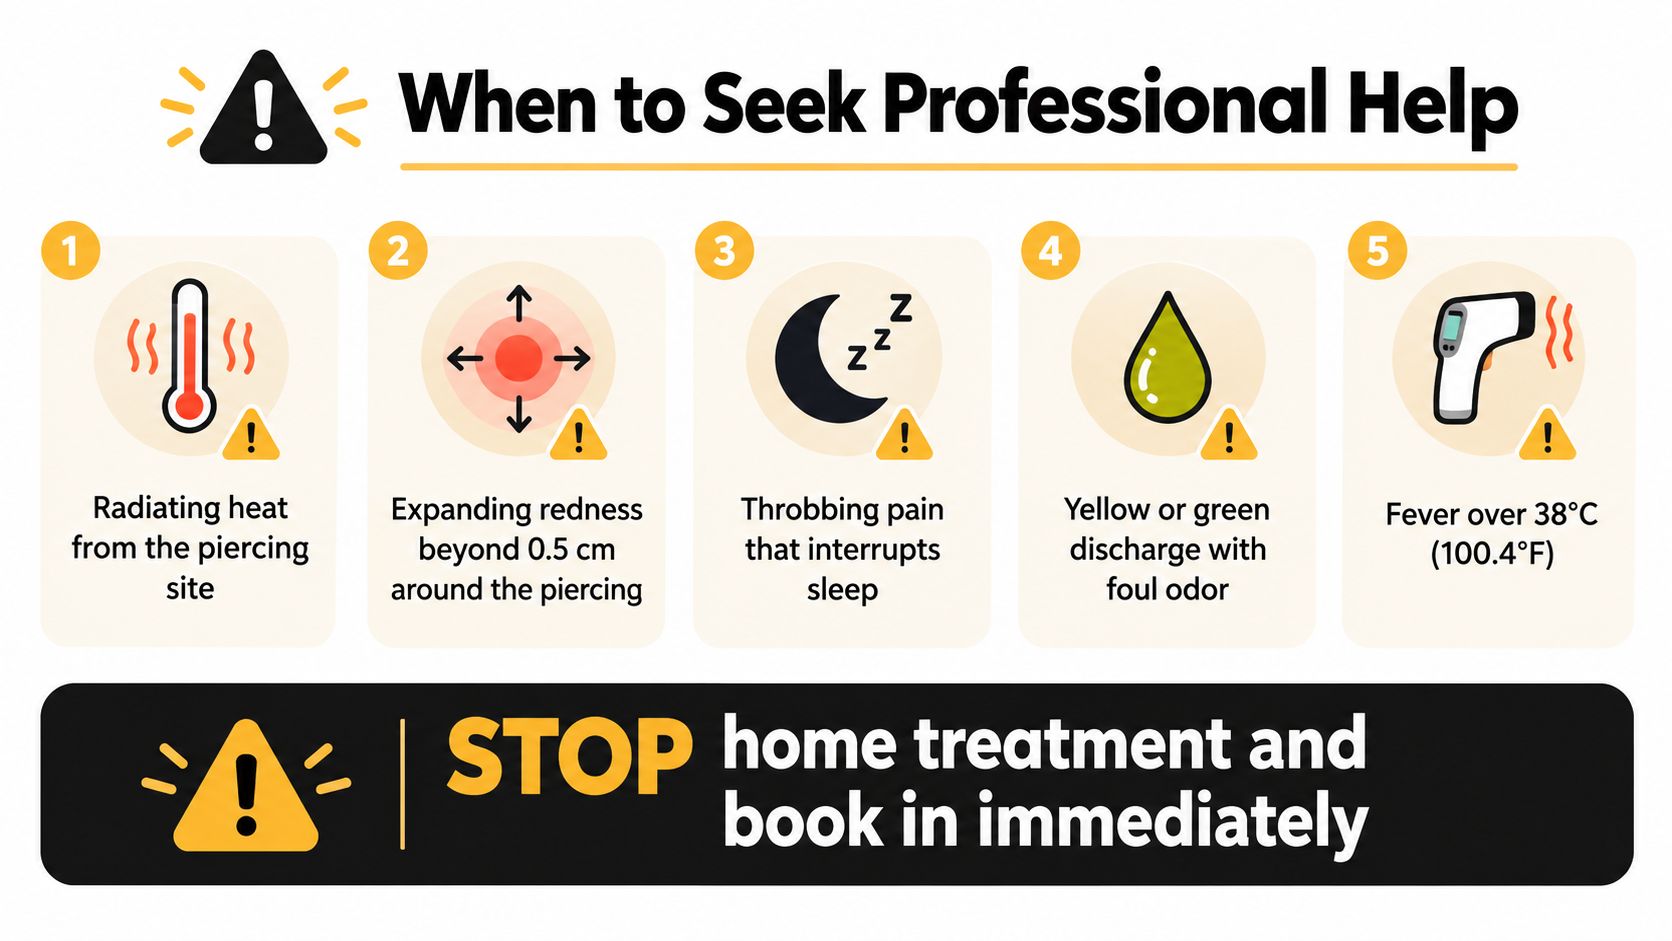
Quick escalation can prevent a manageable irritation problem from progressing into migration, rejection, or tissue damage. If you're unsure, describe exactly what changed, when it started, and whether the symptoms are spreading or improving.
If you're planning a nipple piercing or need a progress review, Piercing Near Me helps you find professional piercing services in Croydon and Bournemouth, with guidance on implant-grade jewellery, placement, and personalised aftercare. Visit the site to explore studios, arrange a consultation or appointment, and get support throughout the healing process.