
You've probably got the screenshot saved already. A neat little gem in the middle of the ear, maybe a flat disc, maybe something sparkly, and now the big question starts: what should your first conch piercing stud be?
That's where people often go wrong. They focus on the front of the jewellery and miss the part that matters most in the first stage. With a conch, your initial stud isn't just decoration. It needs to fit the anatomy properly, allow for swelling, sit comfortably against the inner ear, and be made from a material your body is likely to tolerate well.
A well-chosen conch stud makes healing calmer. A poor one can turn a straightforward piercing into months of avoidable irritation. Good studios treat that first piece like a proper healing tool, not just an accessory.
Why Your First Conch Stud Matters Most
You sit down for the appointment with a saved photo in mind. Then the real decision starts. For a fresh conch, the first stud needs to heal well under pressure from swelling, sleep, headphones, hair, and everyday knocks.
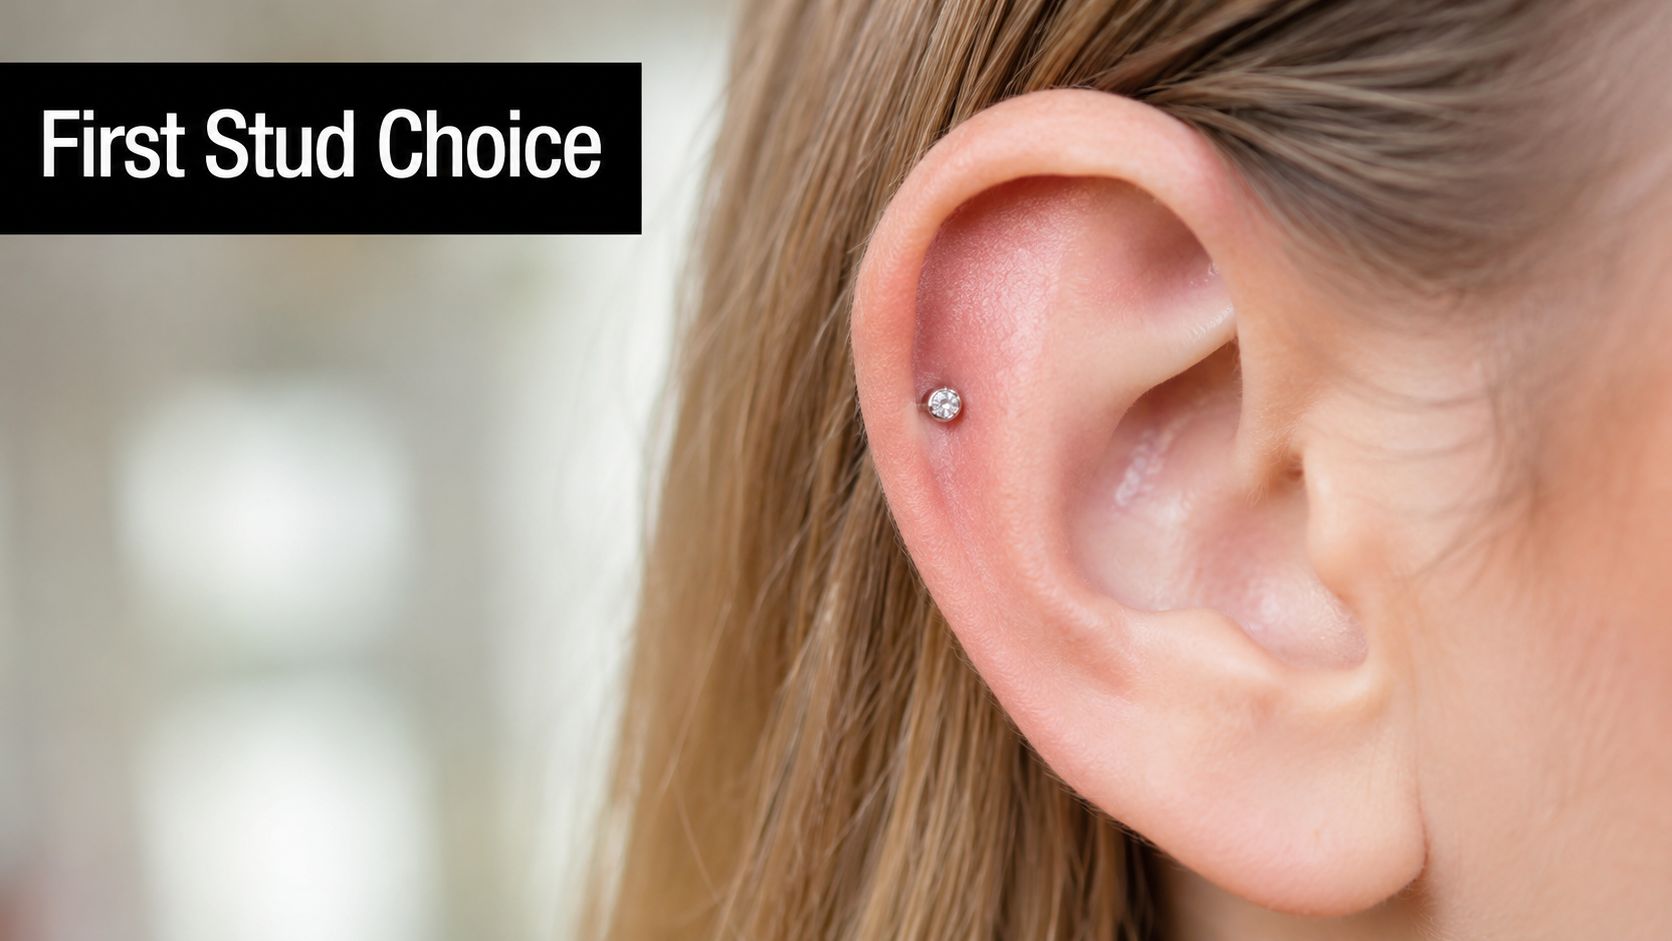
Your first stud is healing jewellery
A conch piercing passes through cartilage. Cartilage usually settles more slowly than a lobe and reacts quickly to pressure, friction, and poor fit. In the studio, I treat starter jewellery as part of the procedure, not an afterthought.
A well-chosen stud gives the area room to swell, stays put, and puts less stress on the channel while it forms. A poor choice can leave you chasing the same problems for months. Ongoing tenderness, bumps, pressure marks, and snagging often start with jewellery that was too short, too heavy, or too ornate for a fresh piercing.
Professional UK studios usually begin with a stud instead of a ring because a stud is easier to stabilise in this placement. Less movement usually means a calmer heal.
What a good first conch piercing stud should do
Starter jewellery has a clear job. It should:
- Leave space for swelling without sinking into the tissue
- Sit securely so the piercing is not constantly shifting
- Keep snagging low around hair, towels, hats, and pillows
- Make downsizing possible later once the initial swelling has settled
That last point gets missed a lot. The first post is often slightly longer on purpose. It is not meant to be your forever fit. Good studios plan for a check-up and downsizing once the piercing is ready, because wearing the original longer post for too long can cause extra movement and irritation.
Studio standards matter more than trends
Professional standards make a real difference. Reputable studios choose jewellery for fit, finish, and healing behaviour first, then style. That usually means a simple top, a properly sized flat-back labret, and a material with a strong track record for fresh piercings, such as implant-grade titanium jewellery used for new piercings.
Clients often want the smallest dainty piece possible straight away. Sometimes that works. Sometimes the anatomy, swelling risk, or top design makes it a poor starter option. The safer choice is the one that suits your ear and can be downsized cleanly later, even if it looks a little plainer on day one.
Paying for good technique and correct jewellery at the start usually saves money, time, and hassle later. With a conch, the first stud sets the tone for the whole heal.
Choosing the Safest Materials for Your Piercing
Ask experienced piercers what matters most in starter jewellery, and material is always near the top of the list. A conch piercing stud sits in a fresh wound for months, so the metal needs to be reliable, body-safe, and well finished. This isn't the place for mystery alloys or vague labels.
The materials worth asking for
For an initial conch, implant-grade titanium is the standard many UK studios favour. It's lightweight, widely trusted for fresh piercings, and a practical choice for clients who want something simple and dependable. If you want to read more about why so many studios start there, this guide to titanium piercing jewellery is a solid reference.
Niobium is another body-safe option, though you're less likely to see it as the default starter choice in every studio.
Solid gold can also be a good option when it's a high-quality, nickel-free alloy and designed for piercing use rather than standard fashion jewellery. The catch is cost and construction. Gold looks great, but it needs to be the right gold, properly polished, and built for a fresh piercing.
Why “surgical steel” isn't always reassuring
Clients often receive mixed messages. “Surgical steel” sounds clinical, but it can mean very different things depending on who's selling it. In lower-quality jewellery, that label can hide inconsistent manufacturing and metals that some people don't tolerate well.
For a healed piercing, some clients wear steel happily. For a fresh conch, I'd always put predictable quality first. You want material with clear standards, not a marketing phrase.
If the studio can clearly explain what the metal is and why they use it, that's a good sign. If the answer stays vague, keep asking.
Conch Piercing Stud Material Comparison
| Material | Best For | Key Benefit | Consideration |
|---|---|---|---|
| Implant-grade titanium | Fresh conch piercings | Trusted, lightweight, and widely used for initial healing | Usually more clinical in look unless upgraded with decorative ends |
| Solid 14k or 18k gold | Clients wanting a premium finish from day one | Attractive and suitable when the alloy and finish are piercing-quality | Costs more and must be genuine body-safe jewellery |
| Niobium | Clients who want a safe alternative to titanium | Good body compatibility and solid everyday wear | Less commonly stocked as a default starter option |
| Surgical steel | Some healed piercings | Easy to find and often familiar to clients | Quality can vary, so it's not my first choice for a fresh conch |
What works best in real life
The safest route is usually the least complicated one. A plain titanium flat-back stud with a small front sits neatly, heals predictably, and can be upgraded later with different ends once the piercing is settled.
If you love gold, ask whether the piece is solid gold and suitable for an initial piercing. If the jewellery is plated, heavily textured, or set with a front that catches easily, it's better saved for later.
Getting the Right Size Gauge and Length
A lot of conch problems start with jewellery that looked fine in the tray but never fit the ear properly. In the studio, size is one of the first things I check, because a well-placed conch can still become irritated if the post is too thin, too short, or left too long after swelling settles.
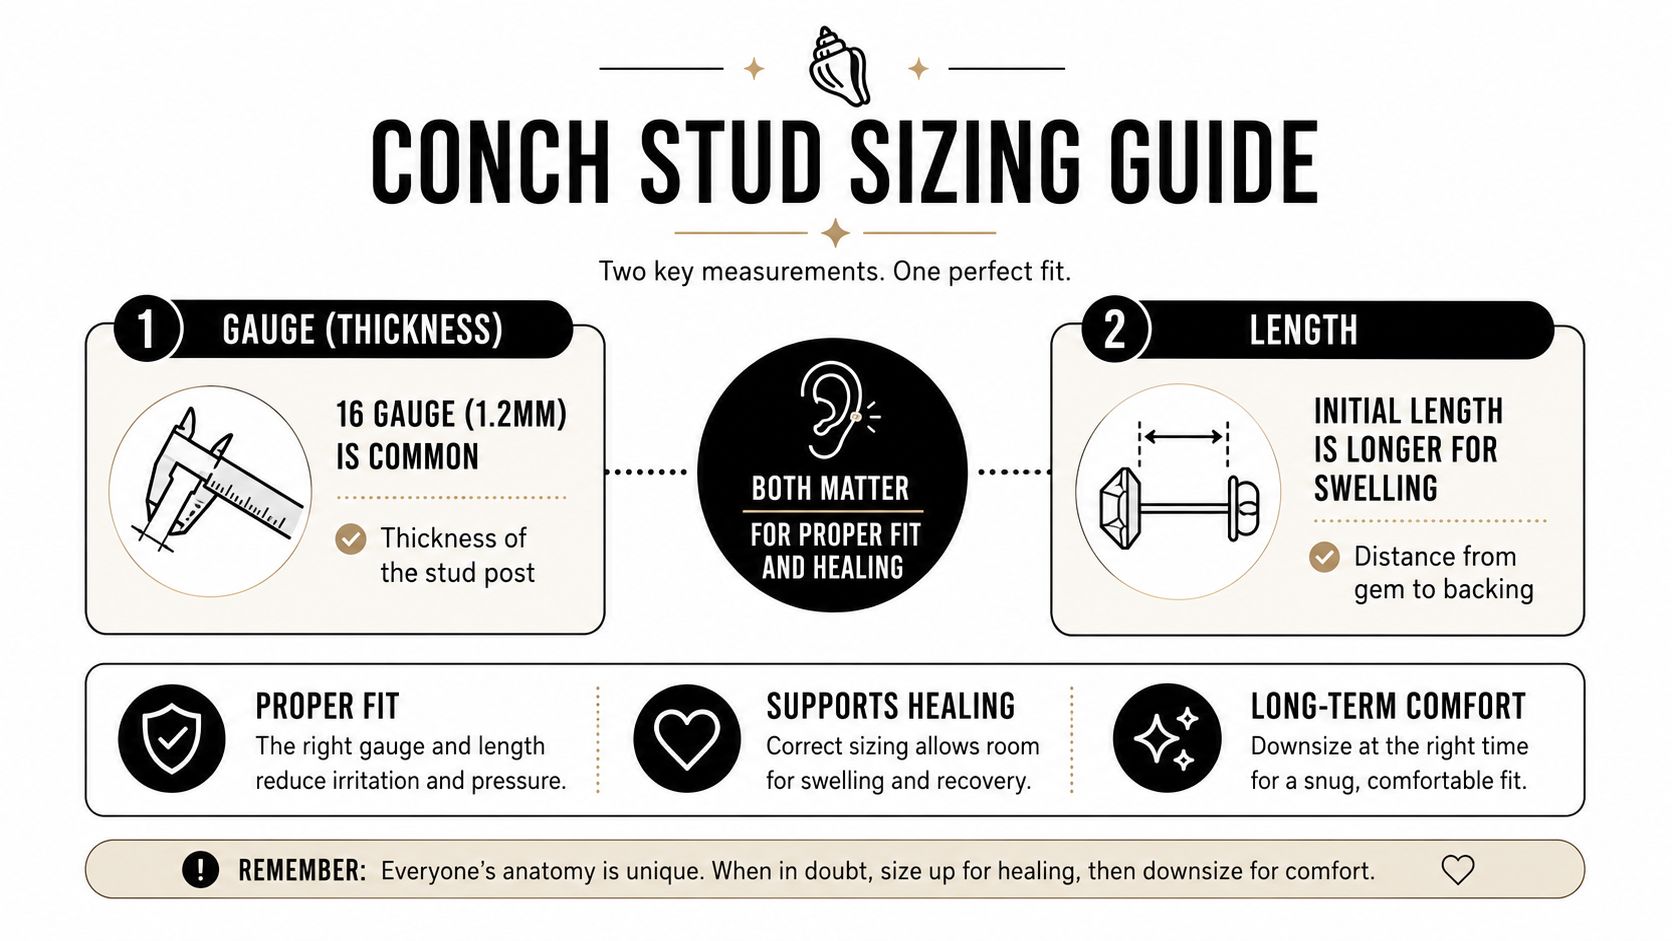
For most fresh conch piercings in the UK, the standard is a 16-gauge (1.2 mm) stud. As outlined in a guide from Camden Body Jewellery, the usual starting length is 6 to 8 mm, though some ears need more room at first, and downsizing to a 4 to 6 mm post after healing reduces mechanical stress.
Gauge means thickness
Gauge refers to the thickness of the post, not the size of the decorative top. For a conch, 16 gauge gives a reliable balance. It is sturdy enough for cartilage, widely available in professional jewellery lines, and practical if you want more styling options later.
Some piercers will adjust that based on the ear itself. Crystal Heaven Jewellery's conch size guide notes that conch piercings are usually done at 16 gauge, with some studios choosing 14GA or 18GA depending on anatomy and jewellery plans. If you want the measurements explained more clearly, this mm to gauge conversion guide is useful.
Length affects swelling, pressure, and snagging
Length is where professional fitting matters most. A fresh conch needs extra space to allow for swelling, especially in the first part of healing when cartilage can become puffy and tender. If the post is too short, the ear can press against the disc and top, which quickly turns into soreness and embedding risk.
A post that is too long causes a different set of problems. It shifts more, catches on towels and hair, and gets knocked forward during sleep or while changing clothes. That repeated movement is a common reason a conch stays irritated longer than it should.
Downsizing needs to be part of the plan
Good studios do not treat the starter post as the finished fit. The longer post is there for the healing phase. Once swelling drops, the jewellery should sit closer to the ear with just enough room to avoid pressure.
This step gets missed often. In real appointments, a lot of stubborn irritation comes down to a post that was never shortened. If your piercer does not mention a review appointment for downsizing, ask when they expect to check the fit.
What to ask your piercer
A proper sizing discussion should cover:
- Your ear anatomy, including whether the conch is deep, flat, or unusually thick
- The starting post length and why that size was chosen
- When to come back for a downsize
- Whether the chosen top adds extra weight or movement
That conversation is part of safe piercing practice in good UK studios. It is how you end up with jewellery that heals well first and looks right second, instead of the other way around.
Understanding Stud Types and Backings
Material and size matter, but design matters too. A conch piercing stud can be beautifully made and still be annoying if the backing is wrong. The shape that sits inside the ear has a direct effect on comfort, snagging, and day-to-day healing.
Why flat-back labrets are the professional standard
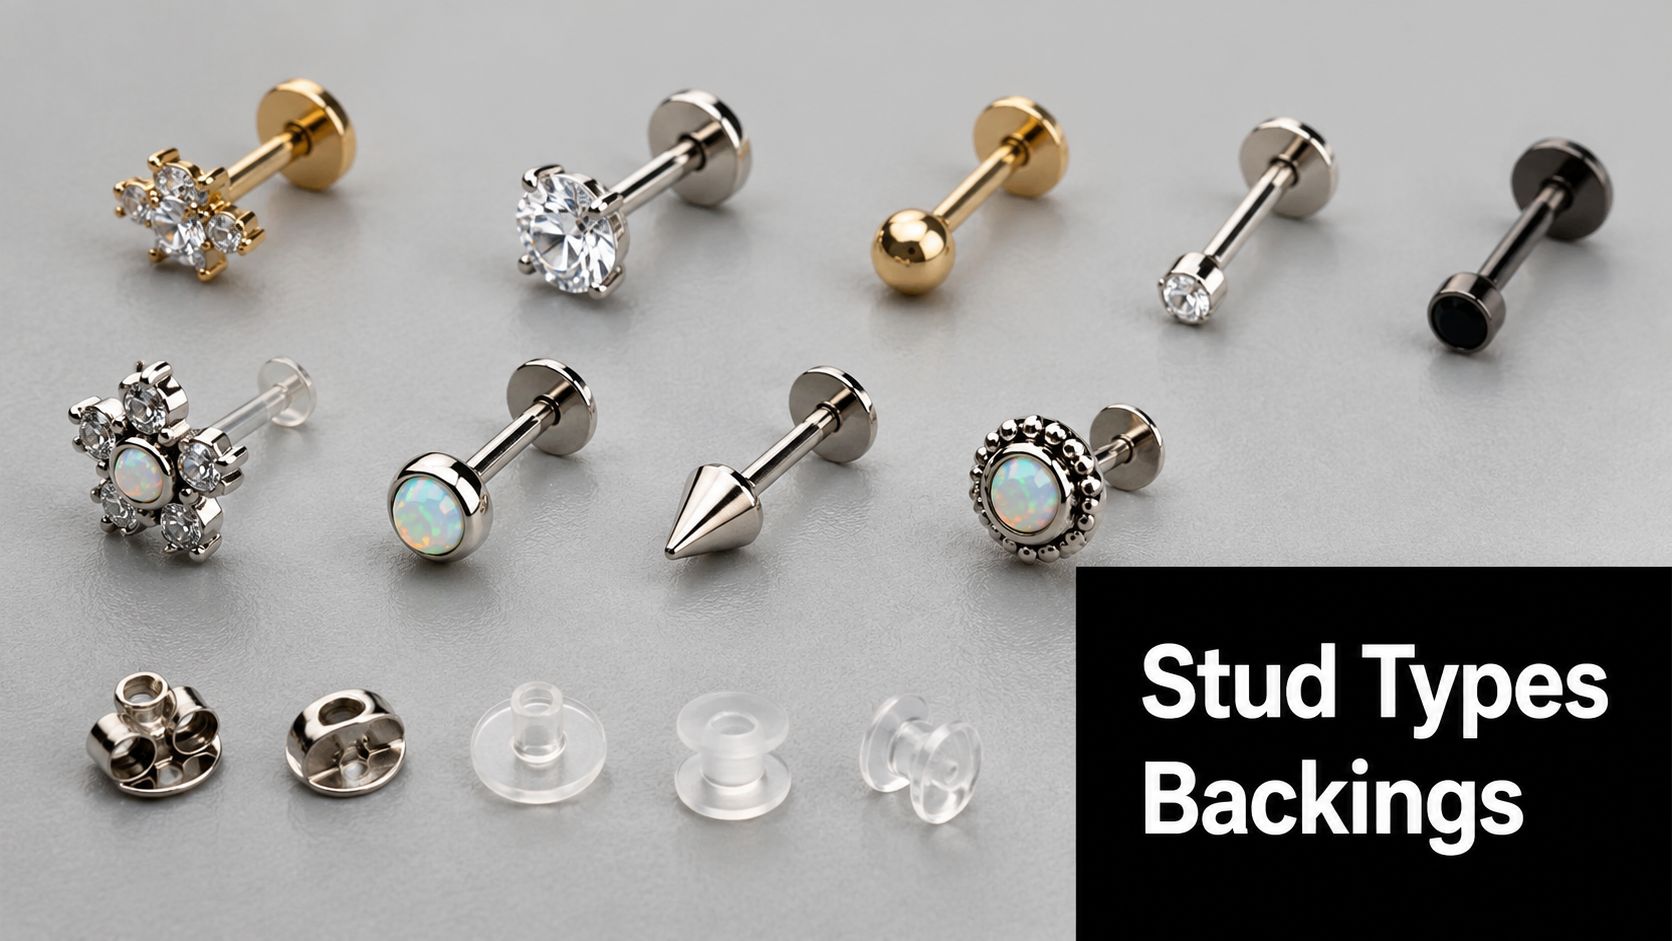
For a fresh conch, the flat-back labret stud is the design that makes the most sense. The flat disc sits against the inner ear instead of poking into it, which means less pressure and less friction in a spot that already deals with headphones, hair, collars, and pillows.
That's especially important in the conch because the jewellery sits in a curved, central part of the ear. Bulky backs and awkward fastenings tend to get noticed fast.
For a closer look at the style, these flat-back earring studs show the kind of profile that works well in cartilage placements.
What doesn't work well
Butterfly backs belong in standard fashion earrings, not fresh cartilage piercings. They trap debris more easily, put uneven pressure on the ear, and aren't designed for a new piercing channel that needs stable, properly fitted jewellery.
Ball backs can also be less comfortable in this placement. They create a pressure point where a flat disc would sit more cleanly.
Here's the practical breakdown:
- Flat-back labret works best for healing, comfort, and reduced snagging.
- Butterfly back is a poor choice for a fresh conch.
- Chunky decorative backs often look better in theory than they feel in the ear.
Threadless and internally threaded jewellery
High-quality conch studs are usually threadless or internally threaded. That means the wearable part of the jewellery passes through the piercing smoothly, without rough external threading scraping the channel.
That detail matters more than many clients realise. Jewellery construction affects insertion, changes, and how kind the piece is to tissue if it needs adjusting.
If the front looks lovely but the mechanism is crude, it's still not good jewellery for a conch.
A simple, well-made flat-back with a secure top usually beats a fancier piece with awkward hardware. During healing, low drama wins.
Styling Your Healed Conch Piercing
Your conch settles into your ear visually once it is healed. Clients often reach that stage and realise the piece that worked for healing is not always the one that gives the best balance, sparkle, or comfort day to day.
A healed conch usually looks best with jewellery that respects the shape of the ear rather than fighting it. Small polished discs, bezel-set gems, opals, and low-profile domes tend to sit neatly and catch light without dominating the whole ear. If you already wear several pieces in the lobe or helix, a simpler conch top often makes the whole curation look more polished.
Bolder options can work well too. Clusters, marquise fans, and sculpted shapes suit this placement if they are proportioned properly. The front should sit close to the ear and follow the natural line of the conch bowl. If it projects too far or feels top-heavy, it usually looks awkward and can become irritating to wear under headphones or while sleeping.
A few combinations I recommend often in studio are:
- Minimal styling with a plain titanium or solid gold disc and understated lobe pieces.
- Soft sparkle with a single clear or champagne gem paired with a neat helix stud.
- Statement curation with the conch as the main feature and quieter jewellery around it.
Many clients ask about switching to a ring once the piercing is healed. That can look great, but fit matters more than trend. A ring that is too tight can press into the outer ear and feel sore by the end of the day. One that is too large tends to move, catch, and sit at an angle that does not flatter the placement.
Proper measuring makes the difference. In studio, we check the anatomy of the ear, the placement of the piercing, and how close you want the ring to sit before choosing a diameter. Guesswork usually leads to jewellery that looked good online but never feels right in real life.
A stud still ends up being the everyday favourite for plenty of healed conch piercings. That is common. Rings have a different look, but a well-fitted stud is usually easier for work, sleep, helmets, phones, and long-term comfort. Choosing the option you will enjoy wearing is better than forcing a style that only works in photos.
Aftercare and Troubleshooting Common Issues
You get home, the piercing looks fine, and then day three or four hits. The ear feels warmer, the jewellery seems more noticeable, and you start wondering if something is going wrong. With a conch, that stage is common. What matters is how the piercing behaves over time and whether the jewellery still fits the way it should.
A conch usually heals well with simple, consistent care. In studio, the problems I see most often are caused by pressure, snagging, sleeping on the ear, or leaving the initial longer post in for too long after swelling has settled. That last point gets missed a lot. A conch can look calm from the front while still being irritated by excess movement.
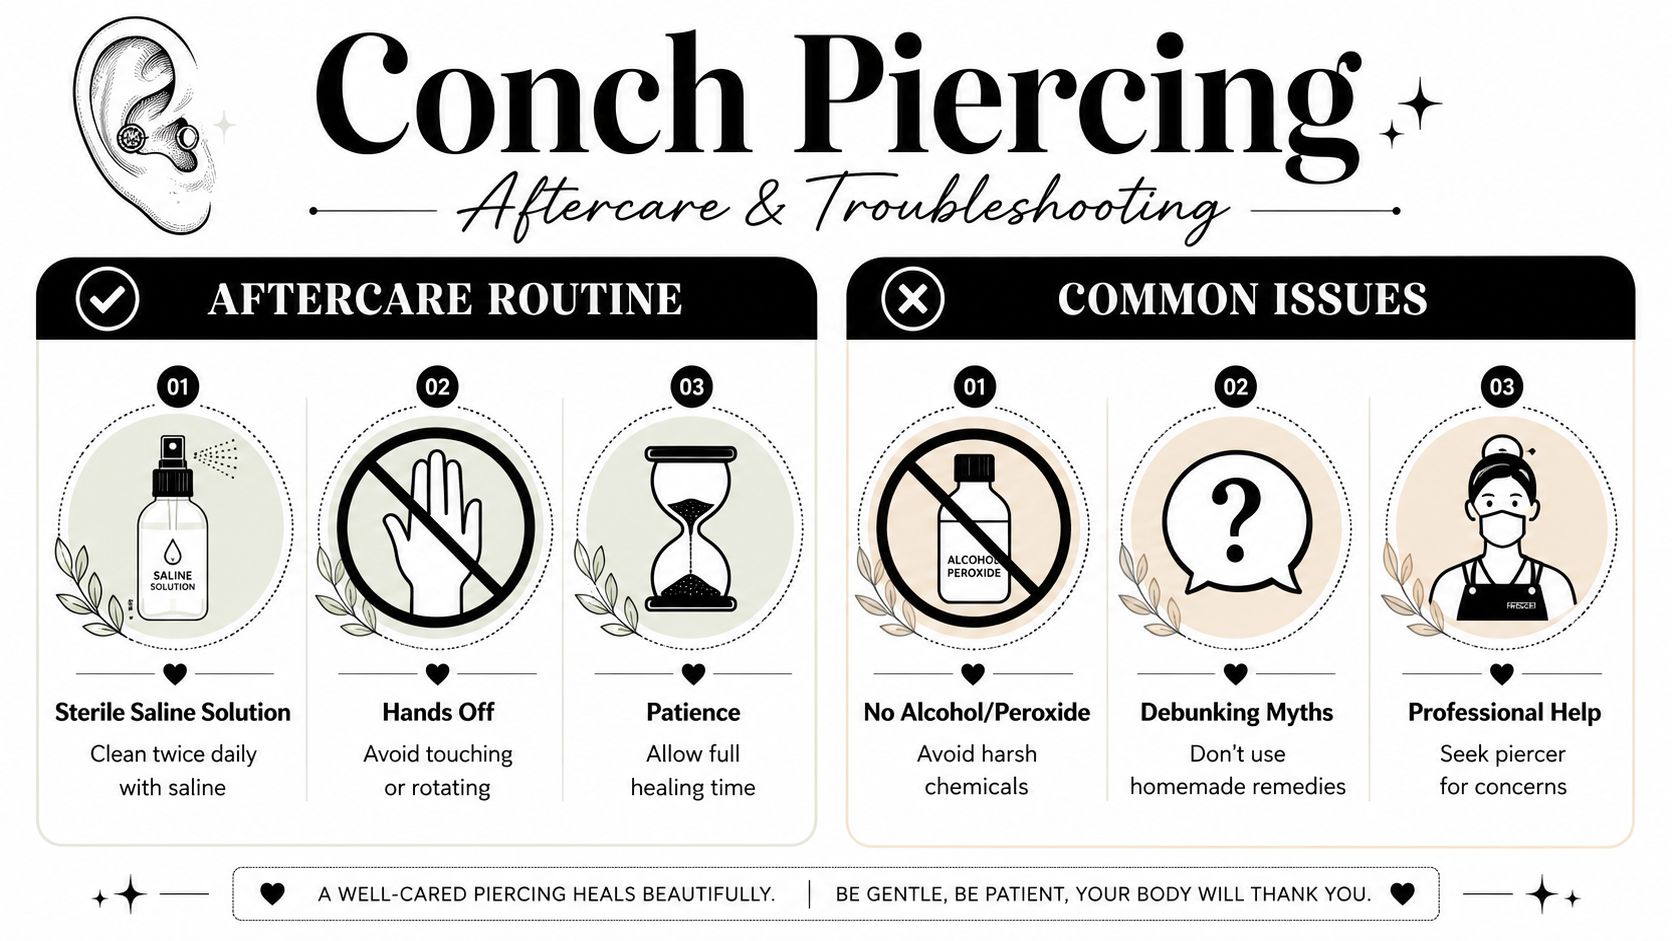
A conch piercing also needs more respect than a lobe piercing because cartilage has a lower blood supply and tends to stay irritated longer once it is aggravated. Laura Bond's guide reinforces the basics: clean with sterile saline twice a day and avoid swimming in the early healing period in this conch aftercare advice.
What your routine should look like
Keep the routine boring. Boring is good.
- Clean with sterile saline twice daily during the early stage, then reduce once the piercing is settled.
- Dry the area gently after cleaning or showering. Moisture trapped around the back of the disc can keep the site irritated.
- Leave the jewellery alone apart from cleaning. No twisting, no rotating, no testing whether it still moves.
- Keep pressure off the ear as much as possible. Travel pillows help if you are a side sleeper.
- Come back for a review when the swelling period has passed so a piercer can check whether the post now needs downsizing.
In professional UK studios, that review matters more than many clients realise. The starter post is chosen with room for swelling. Once that swelling drops, the same post can start shifting back and forth, catching in hair, or sitting at an angle. A well-timed downsize often settles a piercing that looked "fussy" but was moving too much.
What to avoid
Harsh products usually make cartilage angrier.
- Alcohol, peroxide, and strong antiseptics can dry the tissue and delay recovery.
- Tea tree oil, aspirin paste, and homemade salt mixes cause more problems than they solve.
- Swimming too early exposes the piercing to water you cannot keep sterile.
- Sleeping directly on the conch adds pressure for hours at a time.
- Changing jewellery before it is ready can restart swelling and irritation very quickly.
Sterile saline, clean hands, and patience do more for a conch than a drawer full of internet fixes.
Normal irritation versus a problem
Some tenderness, light swelling, and a bit of crusting can be normal in the early stages. A healthy piercing usually looks a little better week by week, even if there are occasional flare-ups after being knocked or slept on.
Irritation bumps are common with conch piercings, and they usually have a cause you can identify. The usual suspects are pressure, an overlong post, poor jewellery quality, snagging, or sleeping on that side. In practice, the answer is often mechanical, not chemical. Remove the source of friction, fit the jewellery properly, and the piercing has a fair chance to settle.
Watch the fit closely. If the front starts embedding, the back disc presses into the skin, or the jewellery suddenly feels tight, get it checked quickly. If the bar is still very long after the initial swelling has gone down, book that downsize rather than waiting it out.
When to get help
Conch piercings heal slowly, and cartilage can stay sensitive for months. Slow healing is normal. Steady worsening is not.
Go back to your piercer if the jewellery keeps catching, sits crooked, feels too tight, or seems to move excessively. Seek medical advice if you have symptoms that suggest infection, such as spreading heat, significant swelling, discharge that looks like pus, or pain that is getting stronger rather than easing. A piercer can assess jewellery fit, pressure, and irritation. A doctor diagnoses and treats medical infection.
The safest approach is simple. Do the basic aftercare well, protect the piercing from pressure, and do not skip the review appointment. For a conch stud, good healing is rarely about doing more. It is about doing the right things at the right time.
Book Your Safe Piercing in Croydon or Bournemouth
You sit down for a conch piercing, the placement looks right, and then the main question starts. Is the studio fitting jewellery that gives the piercing the best chance to heal cleanly, or just putting in whatever is on hand?
That difference matters. In a good studio, the appointment does not stop at the needle. You should be told what jewellery is being fitted, why that post length suits your anatomy, and when to come back for a review and downsize. Those are the standards professional UK studios work to, and they are often the difference between a piercing that settles well and one that stays irritated for months.
Price matters too, but context matters more. A properly performed conch piercing usually reflects the cost of sterile single-use equipment, implant-grade initial jewellery, careful placement, and follow-up support. If a price looks unusually low, ask what is included and what material you are being pierced with.
For appointments or a quick jewellery question, contact the studio on 01202 900050 (Bournemouth) / 020 8686 7730 (Croydon) or message on WhatsApp 07752 913846 (Bournemouth) / 07902 490584 (Croydon).
If you want a conch piercing in Croydon or Bournemouth, book with a studio that treats jewellery fit and aftercare as part of the service, not an afterthought. For trusted guidance on safe, professional piercing services in both areas, book through Piercing Near Me.
Trackbacks/Pingbacks