
You've left the studio with a fresh conch stud, spotted it in the train window, and are now wondering whether your headphones will fit over it at work. That's the practical reality behind the question what is a conch piercing. It isn't only a small piece of jewellery in the centre of your ear. It's a cartilage piercing you'll need to live with through commuting, sleep, phone calls, hair washing, coats and ordinary accidental knocks.
A conch piercing can look calm on the outside while the channel inside is still settling. UK guidance places early aftercare for ear cartilage in a shorter initial window, while specialist piercing guidance commonly gives a much longer full-healing period of 6 to 9 months, or up to 6 to 14 months depending on your ear, jewellery and daily habits (UK conch piercing guidance). This guide breaks down the placement, jewellery, healing stages, practical routine and warning signs, so you can decide with a realistic picture rather than an idealised one.
A First Look at Conch Piercings
A conch piercing passes through the bowl-shaped cartilage in the middle of the outer ear. The name comes from the ear's resemblance to a conch shell, but the useful detail for a first-timer is its depth and firmness. Unlike a lobe, the conch has dense cartilage and less soft tissue around it, so pressure from a pillow, headset or phone can remain irritating for much longer.
What the first week feels like
You may leave the studio with warmth, tenderness and swelling around a longer starter bar. That bar gives the ear room to accommodate early swelling. It can look more prominent than the jewellery you eventually want, but changing it too soon can create unnecessary pressure and trauma.
The piercing itself is brief. The bigger adjustment comes afterwards, when you automatically lift a phone to that ear, put in an earbud, pull a jumper over your head or turn onto the pierced side at night. A conch often becomes a test of small habits rather than a test of whether you can tolerate the initial appointment.
Practical rule: If an object touches the ear every day, treat it as part of your piercing plan before you book.
The questions a piercer should ask
A careful consultation should establish whether you're considering an inner conch or an outer conch, which side you sleep on, whether you use in-ear or over-ear headphones, and how your glasses, hair, helmet or work equipment sit around the ear. Placement should follow your anatomy and routine, not just a reference photo.
You'll also need to discuss whether you want a discreet flat-back stud now and a hoop later. A ring can look striking, but it moves more and is usually less forgiving during early healing. Implant-grade titanium, including ASTM F-136 titanium, is identified in UK jewellery guidance as a material used for initial piercings (implant-grade titanium jewellery guidance).
For a UK client, responsible preparation includes understanding sterile saline care, avoiding early water exposure and knowing when symptoms need medical attention. The NHS advises urgent GP or NHS 111 help if a piercing may be infected, and says to leave the jewellery in unless a doctor tells you to remove it (NHS advice on infected piercings).
Where the Conch Sits on the Ear
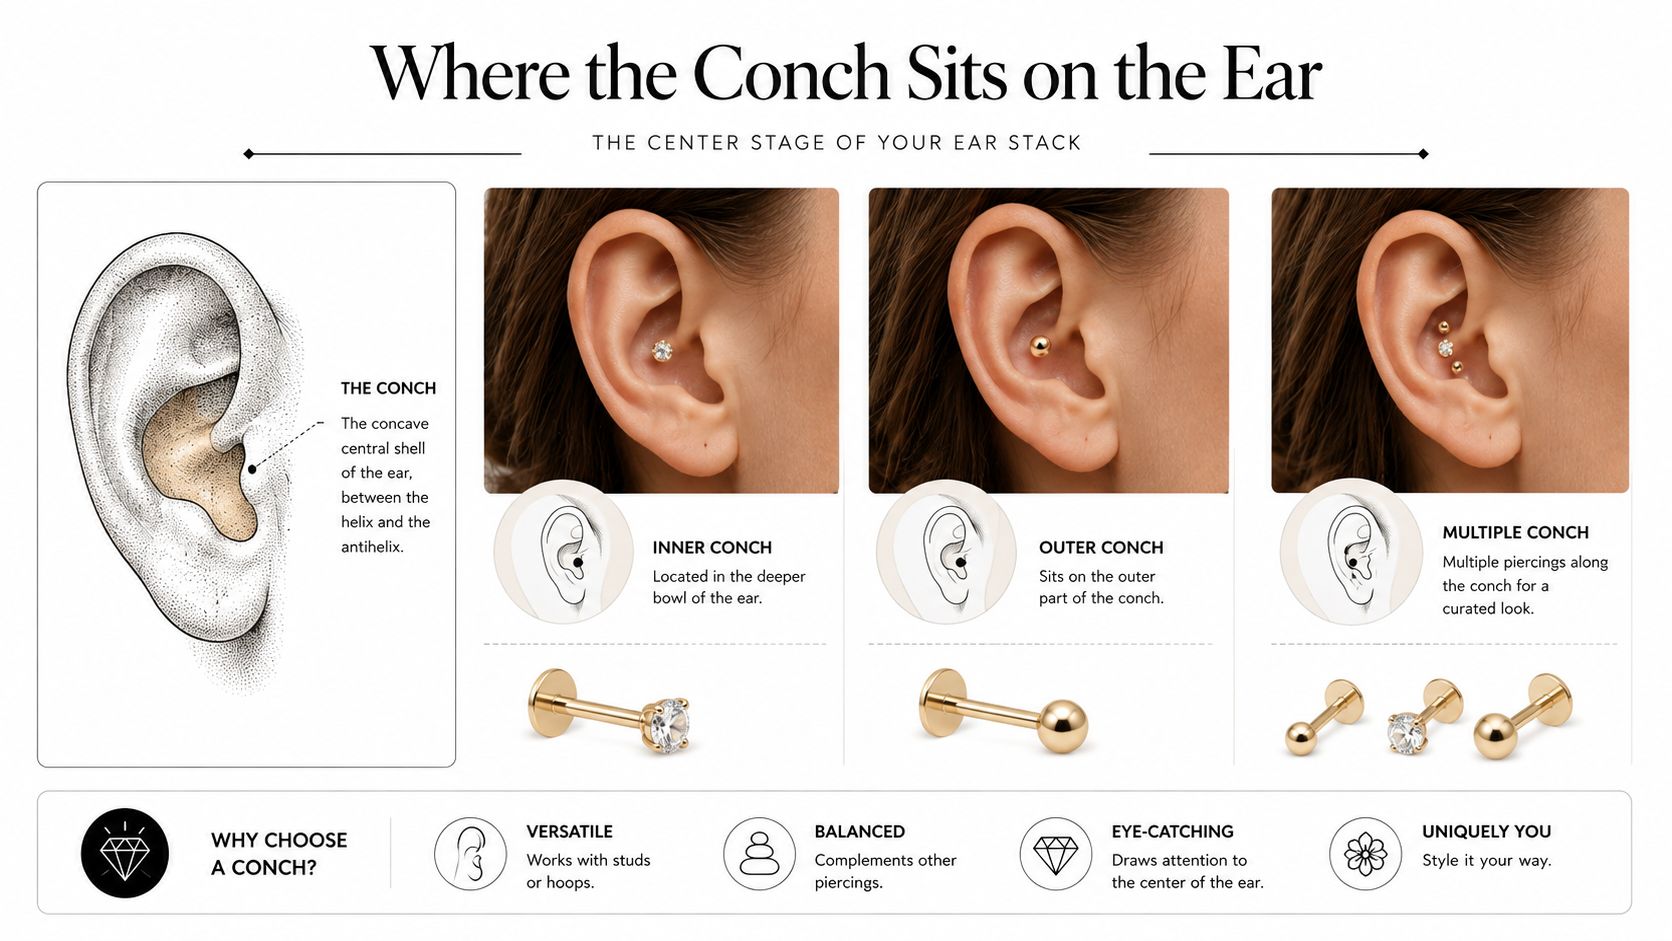
The concha is the cupped, shell-like bowl of the external ear. It sits between the raised outer folds and the opening of the ear canal, creating the central area that gives a conch piercing its focused, balanced appearance. A piercer assesses the depth, curve and available cartilage before marking the entry and exit points.
UK piercing guidance commonly distinguishes inner conch and outer conch placements. They're related, but they don't behave identically once jewellery, sleep and daily contact enter the picture.
Inner and outer conch explained
An inner conch sits deeper in the bowl, closer to the ear canal opening. It often works well with a flat-back stud, and some clients eventually choose a hoop once the piercing has settled. Its recessed position can feel protected from collars and hair, but earbuds and in-ear monitors may press directly against it.
An outer conch sits higher on the firm cartilage, nearer the upper edge of the bowl and above the lobe. It can suit a stud or small bar that lies relatively flat, and its position may make a hoop easier to style. The trade-off is exposure to pillows, hair, hats and clothing.
| Consideration | Inner conch | Outer conch |
|---|---|---|
| Position | Deeper central bowl, near the canal opening | Higher, firmer cartilage above the lobe |
| Common jewellery | Flat-back stud, later hoop | Flat-back stud, bar or later hoop |
| Main daily pressure | Earbuds, earphones and headset contact | Pillow, hair, collars, hats and scarves |
| Visual effect | Central and tucked into the ear | More visible and often flatter to the head |
| Best decision factor | Your audio equipment and ear anatomy | Your sleep position and clothing habits |
Both placements pass through cartilage, so neither should be treated like a second lobe. Cartilage generally has a slower recovery pattern than soft tissue, and UK aftercare guidance treats ear cartilage as a separate category from lobe piercing (UK cartilage cleaning guidance).
Before choosing, test your normal routine. Hold your phone against each ear, put on your usual headphones, check where your glasses arms rest and notice whether your pillow presses the area. A good mark should look attractive, but it should also leave your everyday objects with as little contact as possible.
Jewellery Options for Conch Piercings
Starter jewellery and healed jewellery serve different purposes. A piece that looks elegant in a photograph may move, snag or press against the channel while the cartilage is still swollen.
Flat-back labrets
An implant-grade titanium flat-back labret is a practical starting point for many conch placements. The flat disc rests inside the ear instead of leaving a butterfly-style backing to catch on hair or bedding, while the front can be kept simple or changed later by a professional.
The initial post is generally longer than the final healed fit because the ear needs space for swelling. UK aftercare guidance recommends a review around 6 weeks to assess whether downsizing is appropriate, while another UK cartilage guide places early swelling management and routine care in the 6 to 8 week period (UK piercing aftercare guidance).
Barbells and hoops
A straight barbell can suit a deeper or more dramatic placement, particularly where the anatomy needs additional room. It still needs to be correctly fitted. Too short creates pressure, while too long catches easily and gives the jewellery more opportunity to move.
Hoops, including seam rings and clickers, are usually better considered after the piercing has fully settled. They introduce movement and can be pulled by bedding, hair or headphones. A conch ring may be a long-term goal, but it shouldn't dictate a fresh piercing that needs stability.
| Jewellery Type | Typical Gauge & Length | Inner Conch Fit | Outer Conch Fit | Healing Suitability |
|---|---|---|---|---|
| Flat-back labret | Commonly 16G to 14G, with lengths often 6mm to 10mm | Usually practical for a recessed bowl | Usually lies neatly against the ear | Strong starter option when professionally sized |
| Straight barbell | Commonly 16G to 14G, length chosen for swelling and anatomy | Can work where extra depth is needed | Can suit a more exposed placement | Suitable when fitted by a piercer |
| Seam or clicker hoop | Gauge and diameter depend on anatomy | Can create a strong central look | Often gives a visible circular outline | Usually reserved for a settled piercing |
| Heavy statement piece | Varies widely | May pull on deep cartilage | May catch on hair and clothing | Poor choice for early healing |
Gauge describes the thickness of the post. Length describes how much room the bar provides. The useful rule is simple: snug without pinching, not loose enough to spin and not tight enough to leave pressure marks. A detailed guide to choosing a conch stud is available through conch piercing stud advice.
Avoid butterfly backs, low-quality plated metals, heavy decorative pieces and rings as initial jewellery unless an experienced piercer has a specific anatomical reason. Jewellery quality and fit affect how often the fresh channel is knocked, compressed or contaminated.
How Conch Piercings Heal Over Time
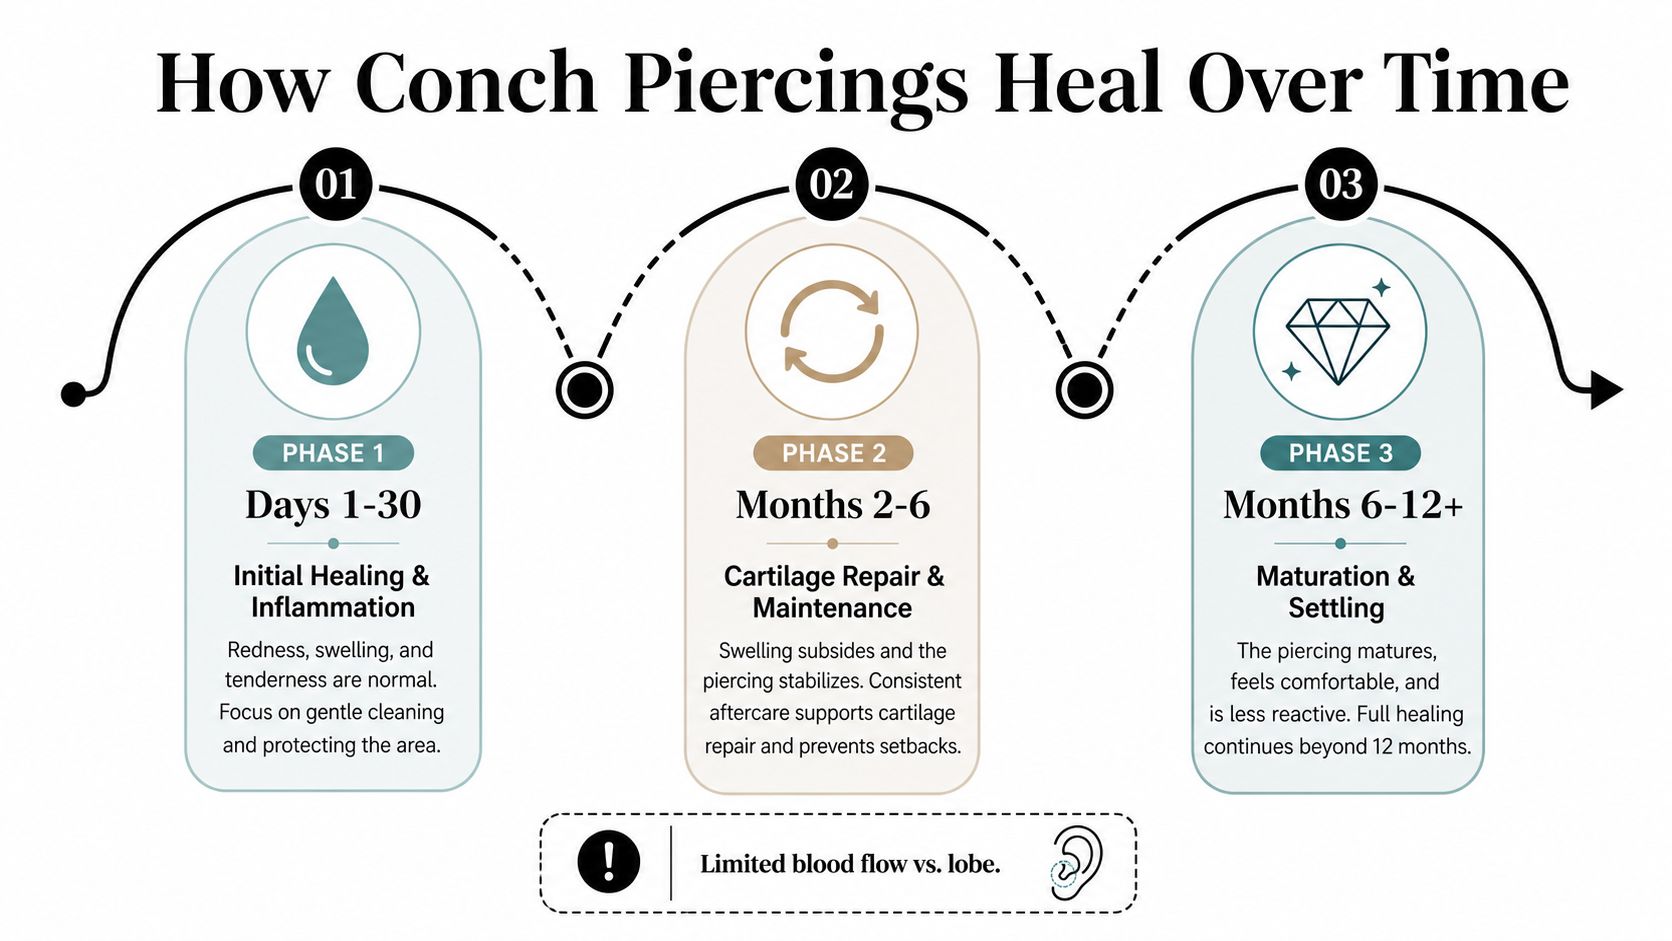
A conch doesn't follow one neat timetable. UK local-authority aftercare commonly gives ear cartilage an early healing window of 6 to 8 weeks, but specialist UK conch guidance often recommends 6 to 9 months or even 6 to 14 months for full healing (UK conch healing guidance). Those figures describe different points in the process. The ear may look calmer after the first weeks while the deeper channel remains vulnerable.
Cartilage heals more slowly than a lobe because the tissue has less direct blood supply and the conch is exposed to repeated mechanical pressure. Sleeping, commuting with headphones, brushing hair, using a phone and catching a scarf can all disturb the area.
Phase one, weeks 1 to 3
Expect swelling, warmth, tenderness and a pink appearance around the entry and exit points. The longer starter jewellery may feel snug as the ear reacts. Clear or pale lymph fluid can dry around the jewellery, and gentle saline care helps remove surface build-up without twisting the bar.
Your goal here isn't to make the piercing look perfect. It's to prevent avoidable knocks, pressure and contamination while the initial inflammation settles.
Phase two, months 1 to 3
The surface may appear much calmer, but the fistula, the channel through the cartilage, is still fragile. A headset that felt tolerable for a short journey can become irritating after a full working day. Phone pressure can also create repeated trauma in exactly the same place.
A professional review around 6 weeks can identify whether swelling has reduced enough for downsizing (UK cartilage aftercare guidance). Don't shorten the post yourself. A piercer needs to check the tissue and choose a fit that leaves room without creating excess movement.
Phase three, months 3 to 9
This is often the stage people underestimate. The piercing may look healed, but deeper remodelling continues, and lifestyle setbacks can still produce swelling or an irritation bump. A single night of pressure may not cause a major problem, but repeated pressure can keep the area unsettled.
Phase four, months 9 to 14 and beyond
Late maturation is when jewellery changes become more predictable, provided the ear has stayed calm and the channel is stable. A hoop may now be realistic, but the correct diameter, gauge and angle still matter. Full healing varies with anatomy, jewellery and behaviour, so a piercer should assess the ear rather than relying only on the calendar.
Whether you're commuting across Croydon or Bournemouth, the same principle applies. Plan around the longer healing arc, not the day the initial soreness disappears.
Aftercare Habits That Support Healing
Good conch aftercare is deliberately boring. The aim is to clean gently, reduce pressure and leave the tissue alone, rather than applying increasingly strong products whenever the ear looks different.
Clean it without overworking the channel
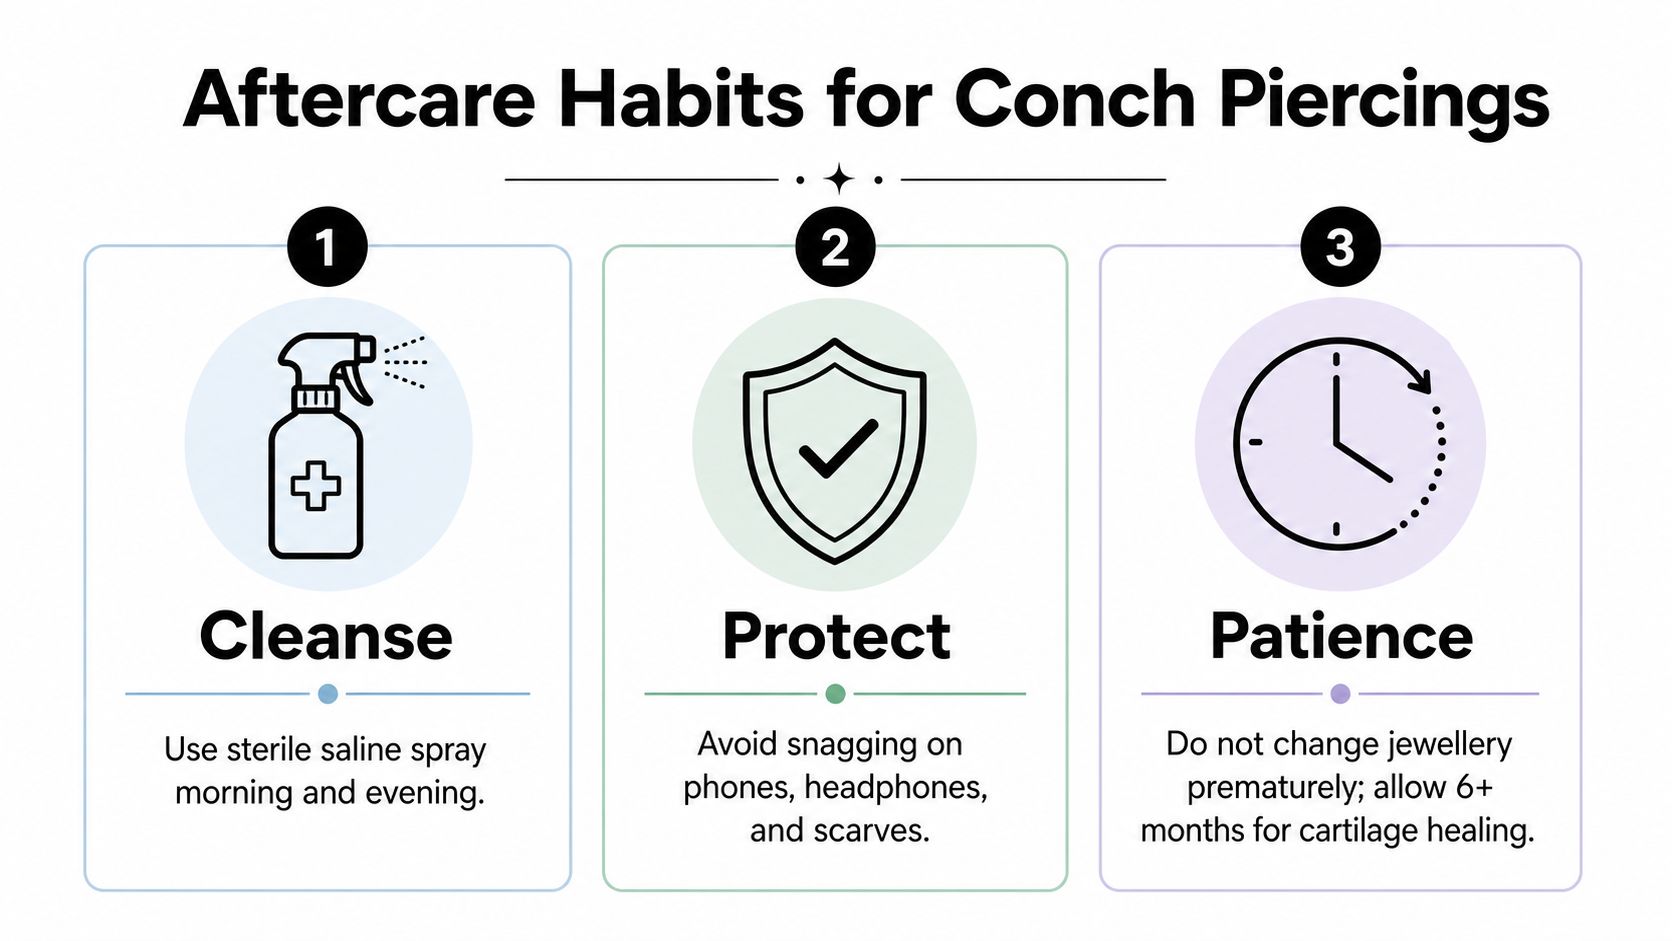
Use a sterile 0.9% saline spray from a UK pharmacy once or twice daily, following the product instructions. A UK cartilage care guide describes twice-daily sterile saline as a common routine in studios following Association of Professional Piercers-style standards (UK piercing aftercare guidance).
Spray the area, allow residue to soften and let the jewellery remain still. Don't twist, rotate or pick at crusting. Pat dry with disposable paper or sterile gauze rather than cotton-wool fibres. Avoid alcohol, witch hazel, strong antiseptics, perfumed products, creams, oils and hair products around the piercing unless a clinician advises otherwise (UK conch healing advice).
For a practical saline option, see sterile saline spray for piercings.
Protect the ear while you sleep
A travel pillow with a central gap can keep the ear suspended instead of compressed. A satin pillowcase may reduce snagging, but it won't make direct pressure harmless. Avoid sleeping on the pierced side during the early period, and check whether a sleep mask strap, bonnet or hair wrap rests against the jewellery.
Your evening routine should also include a quick check for trapped hair. Long hair can wind around a post without causing immediate pain, then pull the piercing when you turn your head.
Reduce contact during ordinary days
Keep earbuds away from a healing conch. Over-ear headphones may be more comfortable if the cup doesn't press on the jewellery, but test the fit for short periods first. Tie long hair back for commuting, and watch the edges of helmets, hats, scarves, hoodies and high-collared coats.
A microfibre towel can be gentler for drying hair, provided you don't rub the piercing. If you use a phone on that side, clean the device regularly and use speaker mode when contact feels uncomfortable.
Morning checklist
- Inspect: Check for pressure marks, snagged hair or unusual discharge.
- Cleanse: Apply sterile saline and let the area dry naturally or pat gently.
- Protect: Choose headphones, hair and clothing that won't touch the jewellery.
Evening checklist
- Rinse carefully: Repeat the saline routine without moving the post.
- Prepare sleep: Position the travel pillow so the ear sits in the gap.
- Remove pressure: Keep phones, earbuds and hair away from the piercing.
Consistency matters more than intensity throughout the 6 to 14 month healing window (UK conch piercing guidance).
Recognising Normal Irritation Versus Infection
Redness alone doesn't prove that a conch is infected. A fresh or recently pressured piercing can become pink, itchy or tender, especially after sleeping on it, catching it with hair or wearing a headset too long.
Normal irritation may include short-lived pinkness, mild itching, a small amount of clear or pale lymph fluid and a raised bump linked to pressure or jewellery fit. These symptoms should be assessed in context. If the ear settles after pressure is removed and gentle care continues, irritation is more likely than an advancing infection.
Signs that need medical attention
The NHS describes an infected piercing as potentially swollen, painful, hot and very red or dark, with white, green or yellow pus. It advises seeking urgent GP or NHS 111 help if you think a piercing is infected and leaving the jewellery in unless a doctor tells you to remove it (NHS infected piercing symptoms).
Cartilage infection can involve perichondritis, an infection of the tissue covering the cartilage. UK public-health guidance warns piercing businesses about Pseudomonas aeruginosa perichondritis, and UK clinical material highlights that cartilage infections can be associated with contaminated studio water or contaminated aftercare solution (UK government guidance on piercing-related perichondritis).
| Sign | Likely Irritation | Likely Infection |
|---|---|---|
| Colour | Localised pinkness after pressure or a knock | Redness or darkening that spreads |
| Temperature | Mild warmth that settles | Ear feels distinctly hot |
| Pain | Tenderness linked to contact | Increasing, throbbing or severe pain |
| Fluid | Clear or pale lymph fluid | White, green or yellow pus |
| Swelling | Small local bump or temporary puffiness | Hot swelling that continues to worsen |
| General symptoms | No fever or feeling unwell | Fever or broader illness symptoms |
Irritation bumps are usually associated with pressure, friction, movement or an unsuitable fit. Infection-driven inflammation is more concerning when heat, spreading redness, worsening pain, pus or systemic symptoms appear. Colour by itself can't make the diagnosis.
For someone in Croydon or Bournemouth, the sensible action is to remove pressure, continue gentle saline and take a daily photograph if the change is mild and localised. Contact the piercer for jewellery-fit questions, but contact a GP or NHS 111 for spreading heat, pus, fever or worsening pain. An experienced piercer should refer you to medical care when infection is suspected rather than trying to treat it in the studio.
Booking a Conch Piercing in Croydon or Bournemouth
A good booking starts with a placement conversation, not a jewellery decision made from a product photograph. Decide whether you're leaning towards an inner or outer conch, but keep an open mind until the piercer has assessed the shape and depth of your ear.
For Timebomb's Croydon studio, ring the landline during opening hours on 020 8686 7730. For the Bournemouth team, send a clear photograph by WhatsApp on 07752 913846 (Bournemouth) / 07902 490584 (Croydon) if you'd like an initial placement opinion before travelling. Walk-in slots are available before 4pm on weekdays, subject to availability, while appointments are useful if you need a longer consultation or a particular jewellery choice.
What to prepare
Bring photo ID and a clear idea of your preferred side. Tell the piercer about previous piercings, slow healing, metal sensitivities, keloid history or current medication. If another ear piercing is still healing, the team can assess whether adding a conch would create too much pressure or make aftercare harder.
A consultation should cover:
- Anatomy: Whether an inner or outer conch is suitable for your ear.
- Routine: Sleep position, headphones, phone use, hair and workplace equipment.
- Jewellery: Implant-grade options, starter length, front design and future downsizing.
- Aftercare: Saline cleaning, pressure reduction and warning signs.
- Practicalities: Deposit, payment, available appointments and rescheduling.
Age requirements should be confirmed with the studio before booking. Clients under 16 need a parent or guardian, and the studio can explain the identification and consent process. You can also use conch piercing booking guidance to review the practical route before contacting the team.
On the day, expect an arrival check, consultation, anatomy marking, jewellery selection, the sterile piercing procedure and an aftercare briefing. Ask how long the initial post should remain, when to arrange a review and what to do if the jewellery feels tight. If you need to reschedule, contact the studio as early as possible so the deposit and appointment options can be discussed clearly. Waiting times vary with availability, so confirm the current slot rather than assuming a walk-in will be immediate.
Piercing Near Me helps you compare conch piercing information and arrange consultations with professional studios in Croydon and Bournemouth, including advice on placement, implant-grade jewellery and aftercare. Visit Piercing Near Me before booking, then contact the studio to discuss your ear anatomy, daily routine and the conch style you want to live with through healing.