
You've saved a photo of a beautifully stacked ear, found a cuff that would complete it, and now you're wondering whether you can put it straight onto a new helix piercing. The answer depends on which type of cuff you mean, how the jewellery sits against the ear, and whether the cartilage has stabilized beneath the surface.
A helix cuff can create a striking, structured look, but it isn't automatically suitable for fresh cartilage. In a professional UK studio, the jewellery's metal standard, pressure, finish, and fit are treated as part of the healing process, not as afterthoughts.
Understanding the Helix Piercing Jewelry Cuff
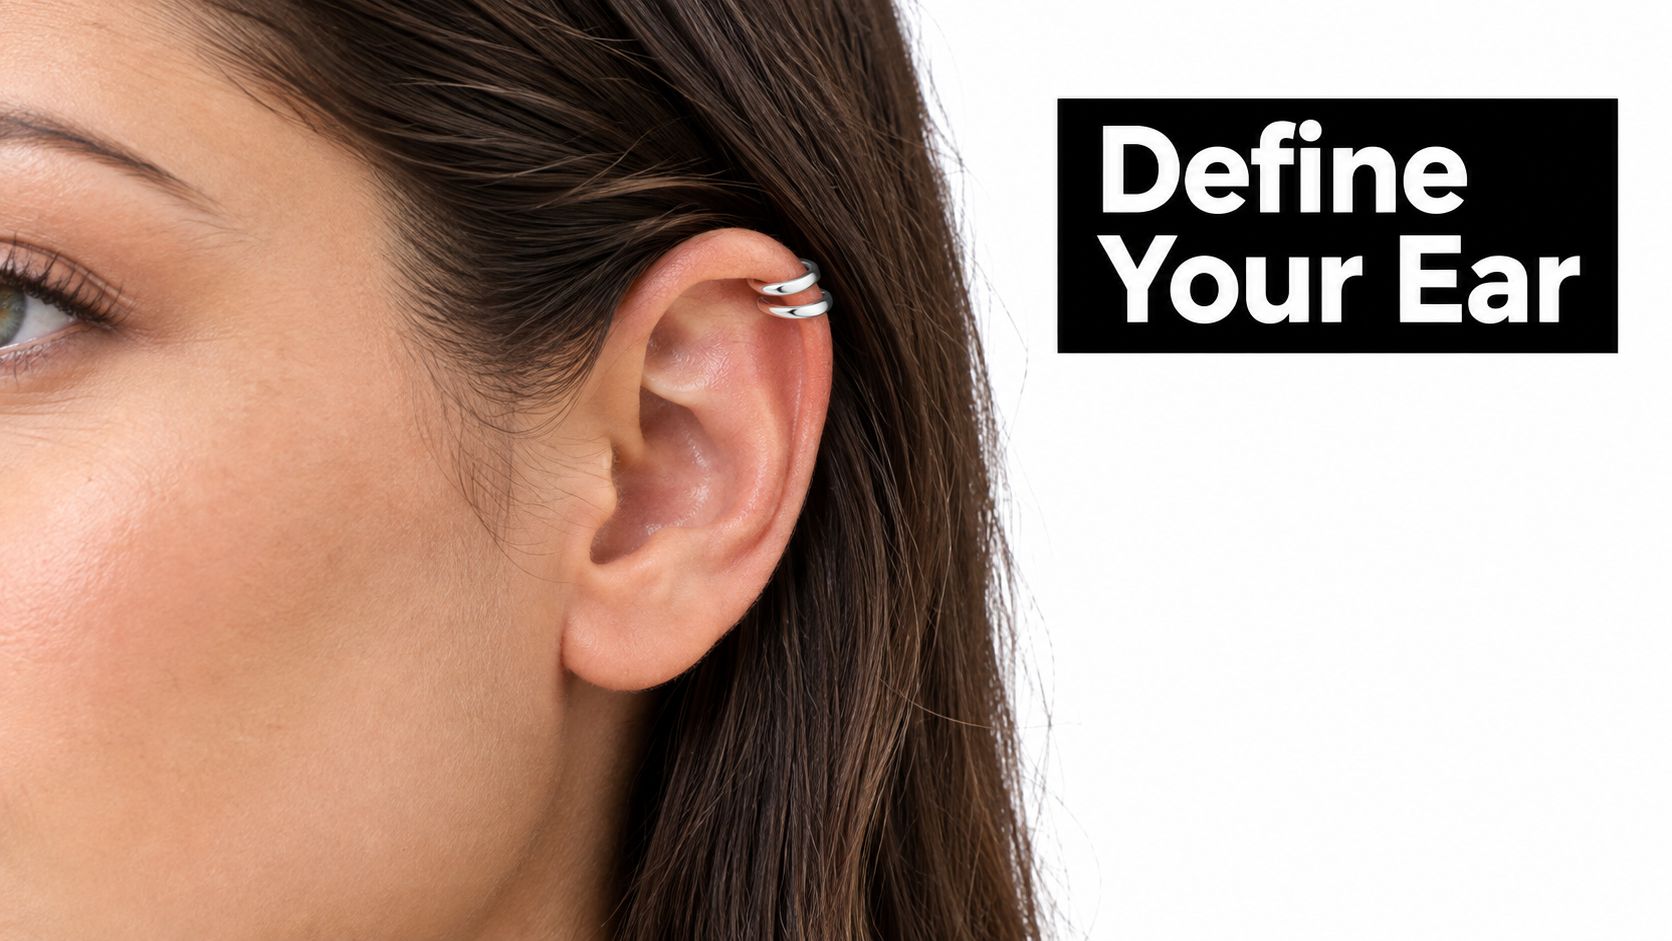
A curated ear often starts with something simple, such as a small lobe stud, then gains character from the upper rim. A slim silver cuff can trace the outer cartilage, while a second piece creates a layered, almost armour-like line around the ear. The visual effect is bold because the jewellery follows the helix ridge rather than sitting flat on the soft lobe.
The important distinction is mechanical. A pierced helix cuff is designed to work with a real piercing. It may slide over a post, connect to a bar, or click into a ring-style fitting that passes through the piercing channel. It remains part of the jewellery assembly that sits in or around the hole.
A non-pierced tension cuff is different. It wraps around the outside edge of the ear and stays in place through gentle pressure, shape, or an adjustable opening. It can mimic the appearance of helix jewellery without needle penetration, but it still presses against cartilage and can slip, pinch, or catch if the fit is wrong. You can compare the two formats in this guide to ear cuff piercings.
Why the helix needs specialised jewellery
The helix is the curved outer ridge of the upper ear. Its thickness, folds, and angle vary considerably between people, so a cuff that sits comfortably on one ear may press sharply on another. Unlike a lobe, the area contains cartilage, which is firmer and less forgiving when a rigid piece applies pressure at one point.
That anatomy explains why professional fitting matters. A cuff should follow the ear's contour without forcing the cartilage inward, dragging the piercing, or creating a point that hair and clothing can catch. If the piece is purely decorative and doesn't pass through a piercing, you can remove it at night. If it forms part of a healing piercing, changing it casually is a different matter entirely.
The visual style may be instant, but the safe route to wearing it is anatomical first, decorative second.
Material Standards and Implant-Grade Titanium
A polished finish doesn't tell you whether a cuff is appropriate for cartilage. The relevant questions are what the piece is made from, whether the material is verified, and how it behaves against healing tissue.
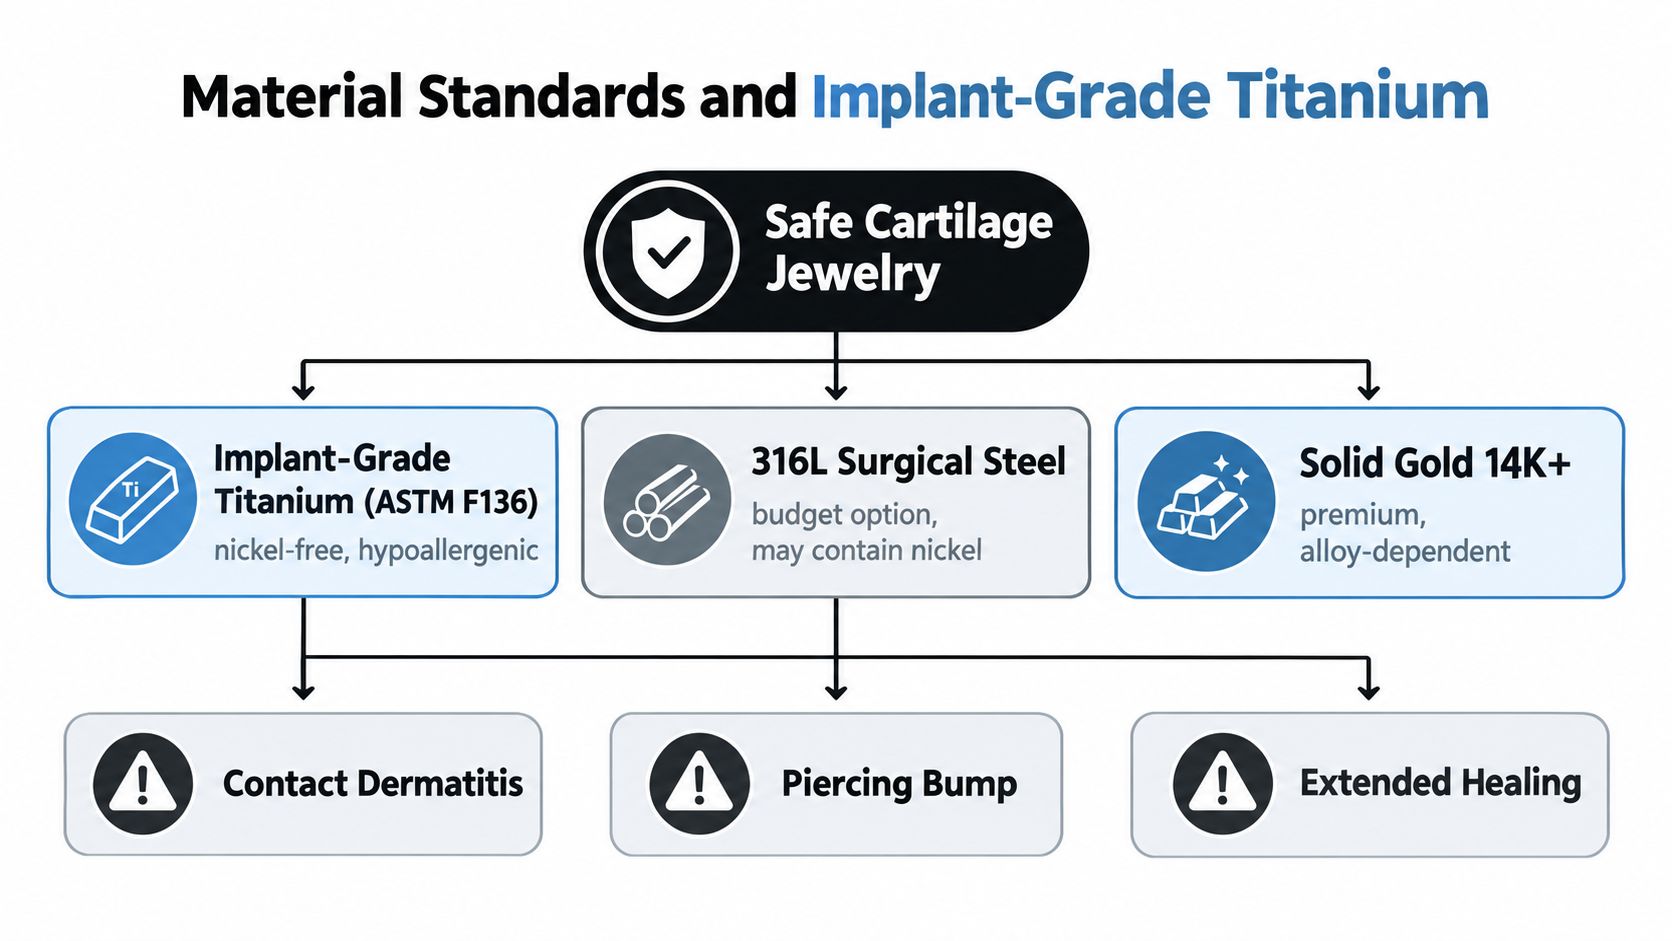
The UK Association of Professional Piercers states that initial jewellery must be made from implant-grade titanium, ASTM F136 or ASTM F1295, or implant-grade steel, ASTM F138, with valid mill certificates available to support the material claim. That makes verified implant-grade jewellery a strong professional benchmark for a helix cuff used with a piercing. See the practical material guide to titanium piercing jewellery.
Titanium is widely selected because implant-grade specifications provide a high level of material control and avoid the uncertainty attached to vague labels. “Surgical steel” by itself isn't a complete specification. A seller may use the phrase for several steel products, while a sensitive client needs to know the actual grade and documentation.
Nickel release and skin contact
UK local authority safety guidance sets a technical benchmark for nickel release. Post assemblies used for piercings must release less than 0.2 micrograms per square centimetre per week, while jewellery intended for prolonged skin contact must remain at or below 0.5 micrograms per square centimetre per week. These limits are set out in UK nickel-release safety guidance.
That distinction matters because a cuff can remain pressed against the helix for long periods, even when it isn't passing through the skin. Friction, sweat, hair products, and pressure can make an unsuitable alloy much more troublesome than it appears in a product photograph.
| Label or material | What to verify | Practical view |
|---|---|---|
| Implant-grade titanium | ASTM F136 or ASTM F1295 and supporting documentation | The clearest professional choice for sensitive or healing cartilage |
| Implant-grade steel | ASTM F138 and valid mill certificates | May be suitable when the grade is verified |
| “Surgical steel” | Exact grade, nickel-release performance, and documentation | Too vague as a standalone marketing term |
| Gold | Solid construction, alloy composition, and suitability for the wearer | Quality depends on the alloy and manufacture |
| Plated or unverified metal | Base metal and coating durability | A poor choice for healing tissue or prolonged contact |
Why finish matters as much as alloy
Even an appropriate metal can cause problems when the surface is rough, scratched, or poorly polished. A sharp edge can abrade the helix, while a decorative ridge can collect residue or catch on hair. Professional jewellery makers and piercers therefore consider surface smoothness, threading, edges, and closure design alongside the alloy.
If you're buying for a fresh piercing, ask the studio to show you the material details rather than relying on the product name. A confident professional should be able to explain the alloy and provide verification where appropriate.
Healing Timelines and the Danger of Early Cuffs
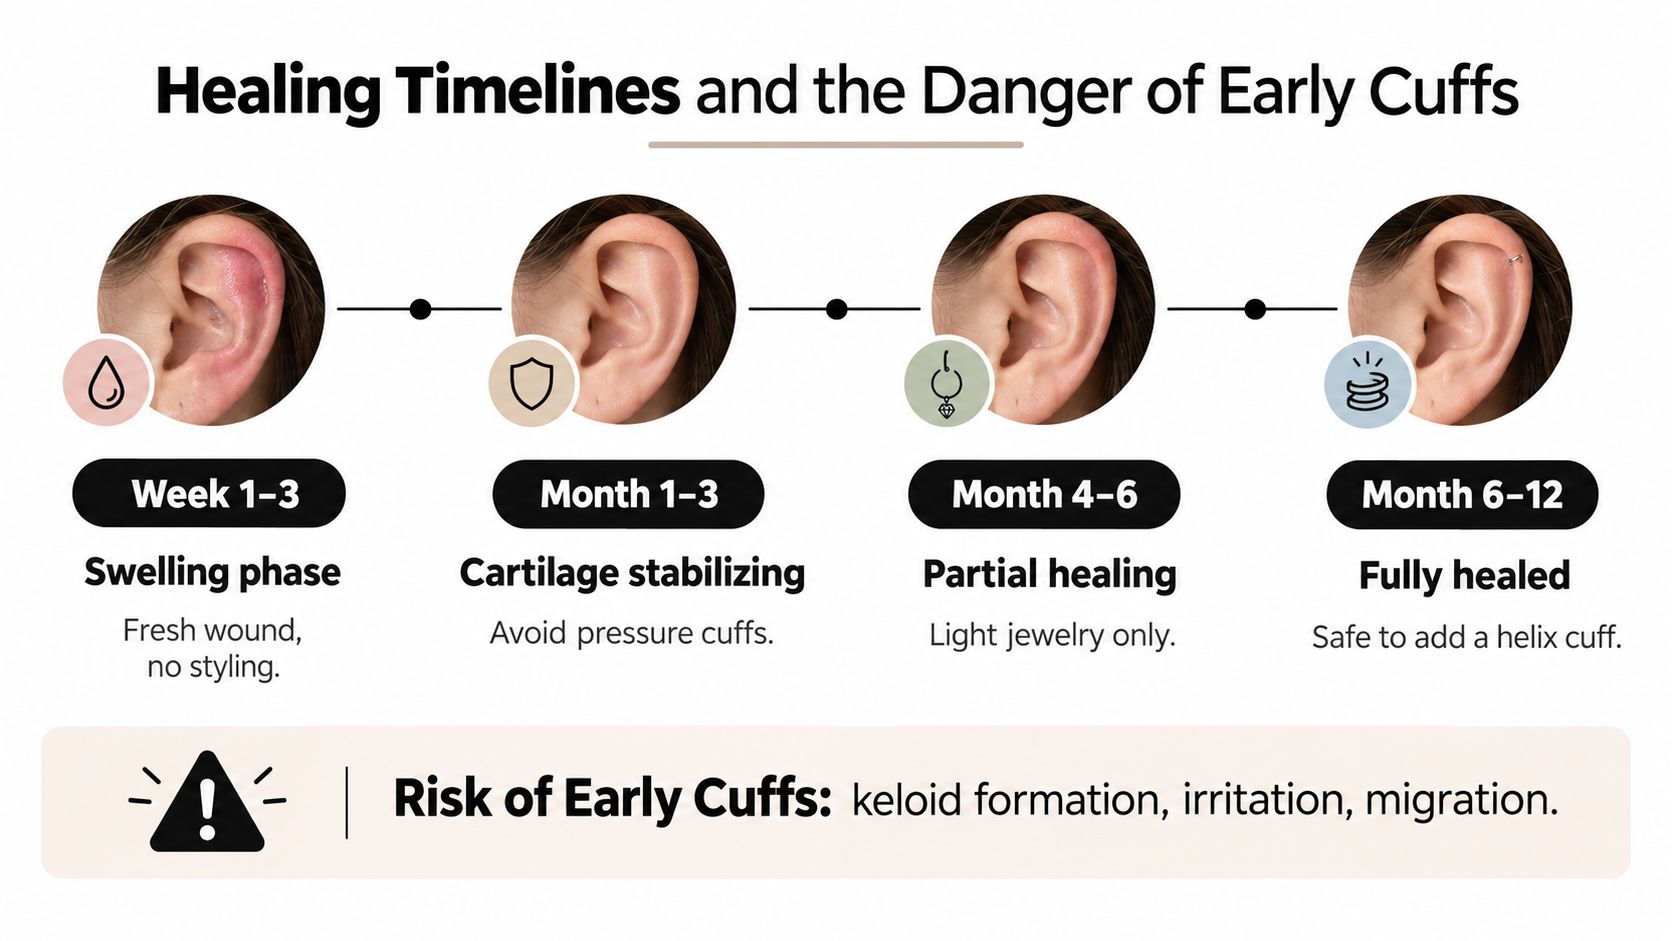
A helix can look calm in the mirror while the deeper piercing channel is still fragile. Cartilage heals more slowly than a lobe because it is tougher tissue with a poorer blood supply. The outer skin may settle first, but the channel underneath still needs protection from pressure, friction, and movement.
Torbay Council's ear-piercing guidance gives an approximate surface-healing window of 6 to 8 weeks for ear cartilage. Professional UK advice commonly places fuller cartilage healing at 3 to 6 months or longer, while some UK guidance describes complete healing as taking 6 to 12 months, depending on irritation and aftercare. These ranges describe different stages. Early surface improvement is not the same as deep stabilisation.
Why a fresh cuff creates trouble
A professional piercer normally starts a helix with jewellery that limits movement and allows room for swelling. A flat-back labret is commonly used because its rear sits smoothly against the head and its front can remain compact.
A cuff changes the load on the ear. It can press sideways, rotate as you move, or catch when hair and clothing pass over the cartilage. Repeated movement can irritate the healing channel, causing inflammation, bumps, or delayed healing. Braintree ear and face piercing guidance also explains why cartilage needs careful handling during recovery.
A cuff is usually a healed-piercing accessory, not an upgrade for a fresh wound.
Pain is an unreliable readiness test. A piercing may feel comfortable while the tissue beneath remains easy to disturb. Your piercer should assess the channel, swelling, skin condition, and jewellery fit before suggesting a change.
Keep the original professional jewellery in place unless your piercer needs to adjust it for a specific problem. Follow the aftercare guide for a helix piercing for cleaning instructions, use sterile saline as advised, and avoid sleeping directly on the ear. Headphones, hair, and hands should not apply repeated pressure.
Increasing soreness, inflammation, or yellowish discharge warrants medical help. Cartilage piercings carry a documented risk of perichondritis, an infection affecting the outer ear cartilage. NHS guidance for piercing businesses advises clients to seek medical help when infection signs occur.
Sizing, Fitting, and Daily Maintenance
Once a professional has confirmed that the piercing is fully healed, treat fitting as a small mechanical exercise rather than an impulse purchase. The cuff needs to match the ear's thickness and curve, with enough grip to stay in position but no concentrated pressure on the cartilage.
Fit a pierced cuff carefully
Start by checking the jewellery against the existing post or ring. The inner opening should follow the helix without pulling the piercing sideways. If the piece clicks into a post, the connection should close completely and sit smoothly. Never force a closure that resists, because forcing it can bend the jewellery or load the channel.
For a cuff that sits around a healed piercing, check four points:
- Contact: The piece should touch evenly rather than pressing at one sharp point.
- Movement: Turn your head, brush your hair back, and put on glasses to check for snagging.
- Pressure: Remove it if the ear throbs, feels numb, or develops a pressure mark.
- Stability: It should remain in place during normal movement without needing repeated adjustment.
Fit a non-pierced tension cuff
Slide the cuff onto the thinner part of the outer ear, then move it gently to the intended position. If the design is adjustable, make only a small change at a time. The cuff should feel secure, not tight. A piece that slips is too loose or sitting in the wrong area, while one that pinches needs repositioning or loosening.
Don't sleep in a tension cuff. Removing it at night reduces the chance of pressure, loss, and accidental catching against bedding.
Keep the piece clean
Wash your hands before handling the jewellery. Rinse the cuff with clean water when residue builds up, use a gentle fragrance-free cleanser when the material permits, and dry it thoroughly with a clean, non-fibrous cloth. Hair products, skin oils, and dead skin can collect beneath raised details, so inspect hinges and crevices rather than cleaning only the visible surface.
Avoid twisting a cuff against the ear to remove buildup. Take it off, clean the jewellery separately, and let the skin dry before replacing it. If the piercing becomes tender after wearing a new piece, stop using the cuff and ask a professional to assess the fit.
Curating Your Ear Around the Cuff
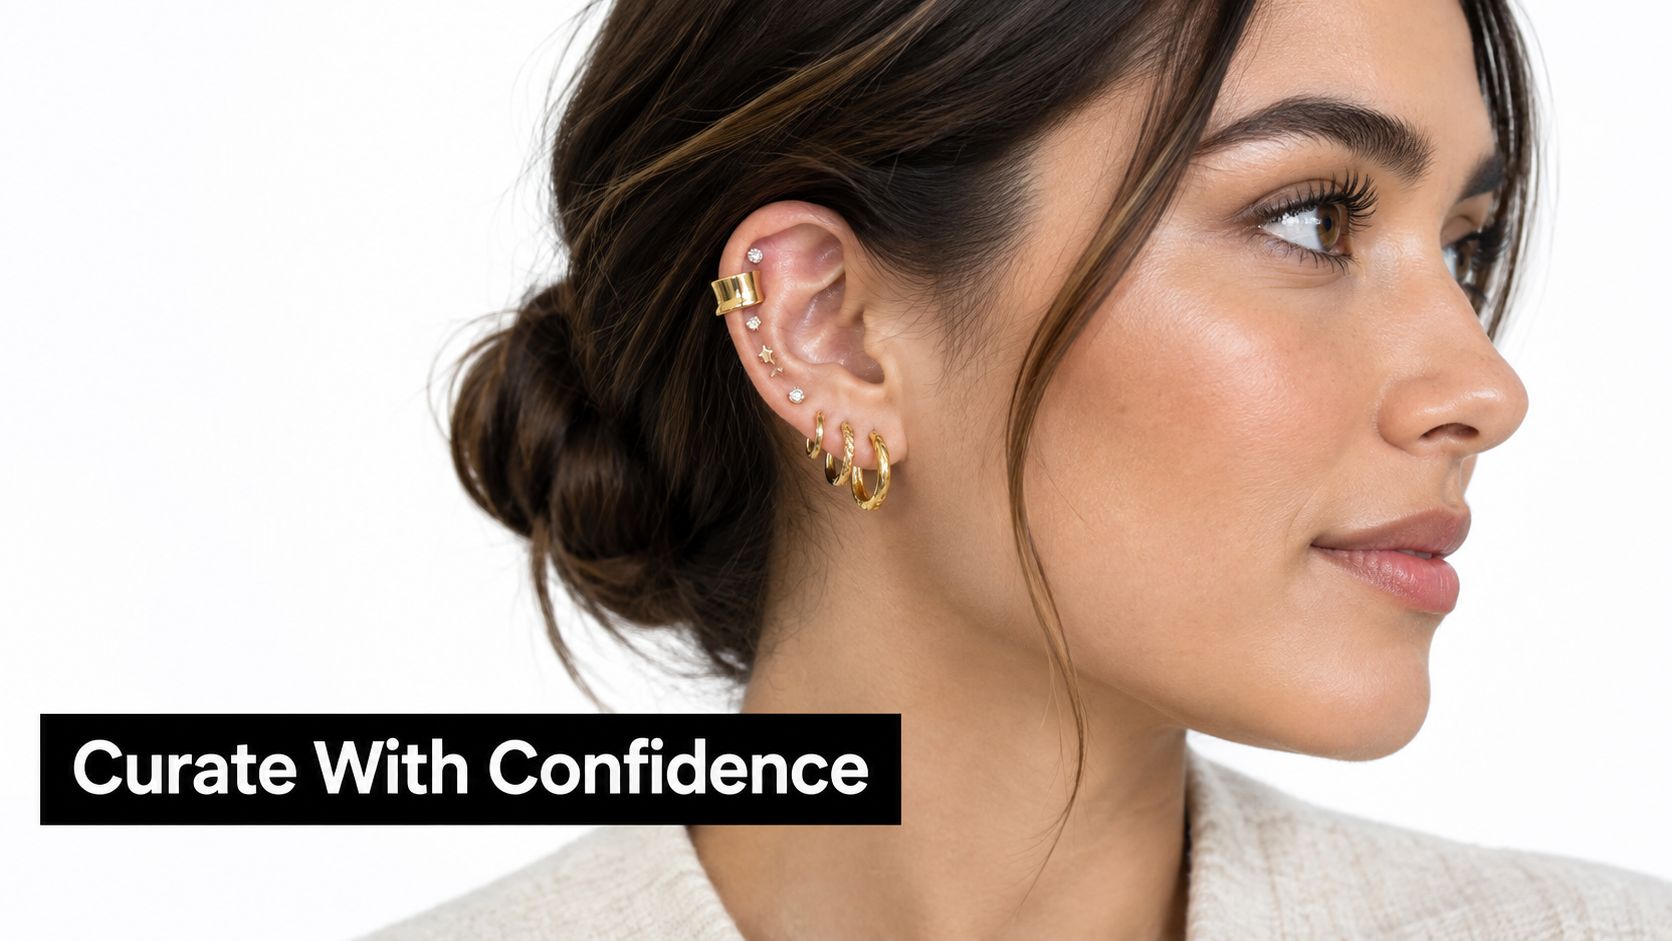
A helix cuff works best when it has a clear role in the overall ear. A broad, textured piece already carries visual weight, so pairing it with several equally elaborate items can make the ear look crowded. A slim cuff, by contrast, can act as a connecting line between a small helix stud and a refined lobe stack.
Let one piece lead
Choose the cuff first, then decide whether the rest of the ear should support or contrast with it. A sculptural silver cuff can sit above a simple conch stud and understated lobe jewellery. A warm gold cuff may work with a small hoop below, provided the finishes feel deliberately related.
Negative space matters. Leaving a visible gap between the cuff and the nearest hoop lets each piece remain legible. If every item touches or overlaps, the eye loses the shape of the ear and the cuff stops feeling like an intentional anchor.
Gemstones need the same restraint. If the cuff includes sparkle, keep surrounding stones quiet or repeat a related colour in one small piece. If the cuff is plain metal, a single coloured stone in the lobe or conch can provide contrast without competing for attention.
Design around your daily life
A beautiful stack still has to work with your routine. A high-profile cuff may catch in long hair, press beneath over-ear headphones, or become uncomfortable when you rest your head sideways. Wear the statement piece on the side that receives less regular pressure, especially if you're still adapting to the jewellery.
For a first arrangement, consider this sequence:
- Anchor: Choose the cuff as the strongest shape or texture.
- Balance: Add a smaller conch, tragus, or lobe piece rather than another dominant design.
- Spacing: Preserve visible skin between neighbouring items.
- Consistency: Repeat the metal tone or finish so the ear looks organised.
- Practicality: Test hair, glasses, headphones, and sleeping positions before committing to daily wear.
The best curation follows the anatomy instead of trying to conceal it. A cuff should trace the ear's natural line, not force the ear into a layout that creates pressure.
Booking a Professional Fitting at Timebomb Tattoo & Piercing
A cuff that looks comfortable in a photograph may pinch, slide, or catch once it meets your ear's actual anatomy. A professional piercer can assess the thickness and angle of your helix, distinguish a non-pierced cuff from jewellery intended for a healed piercing, and choose a fit that follows the ridge rather than forcing a universal size into place.
Timebomb Tattoo & Piercing offers professional piercing services in Croydon and Bournemouth, with consultations, sterile single-use needles, verified implant-grade jewellery, and personalised aftercare. The fitting discussion begins before the needle. Your piercer can check whether the planned position has adequate tissue, select jewellery that allows for swelling, and explain when a cuff can be introduced without disrupting cartilage healing.
A responsible appointment should cover:
- Anatomy: Whether your helix shape and intended position suit the design.
- Jewellery: Material, finish, dimensions, and swelling room.
- Procedure: Sterile preparation and a single-use needle.
- Aftercare: Saline cleaning, pressure avoidance, and warning signs.
- Follow-up: Assessment and professional downsizing when appropriate.
- Styling: A realistic point at which a cuff can replace or complement the original piece.
Avoid mall kiosks and unverified retailers for anatomical decisions. An inexpensive cuff may contain an unknown alloy, have a rough surface, or rely on pressure that irritates tissue. Fresh cartilage piercings need controlled jewellery, stable placement, and observation while the channel heals.
For fitting or appointment questions, contact Timebomb Tattoo & Piercing on 01202 900050 (Bournemouth) / 020 8686 7730 (Croydon) or WhatsApp 07752 913846 (Bournemouth) / 07902 490584 (Croydon). Increasing soreness, inflammation, or yellowish discharge requires medical advice. Do not change jewellery yourself if cartilage infection is suspected. NHS guidance on piercing businesses and infection warning signs is available from the NHS.
For practical guidance on cuff styles, professional piercing options, and safe aftercare, visit Piercing Near Me. The platform can help you explore services through Timebomb Tattoo & Piercing in Croydon and Bournemouth, then arrange a consultation for a helix setup that respects your anatomy and healing timeline.